Treatment photos are so important for any doctor to show progress of treatment and also keeping records for complete treatment. Taking treatment photo is always interesting but keeping it forever at a safe place is always a question and many doctors are facing issue. Generally, doctors take the photos using their mobile phone camera and keep the photos in their mobile phone. This is the easy, fastest and effective way. But when mobile phone storage gets full, it requires to delete old images and this is how you as a doctor lose your past work data, and everything becomes unorganized and messy. Care & Treatment desktop app provide the solution for this problem by not changing your practice pattern to take treatment photos using your mobile phone.
The solution to take treatment photo using mobile phone and save on your computer
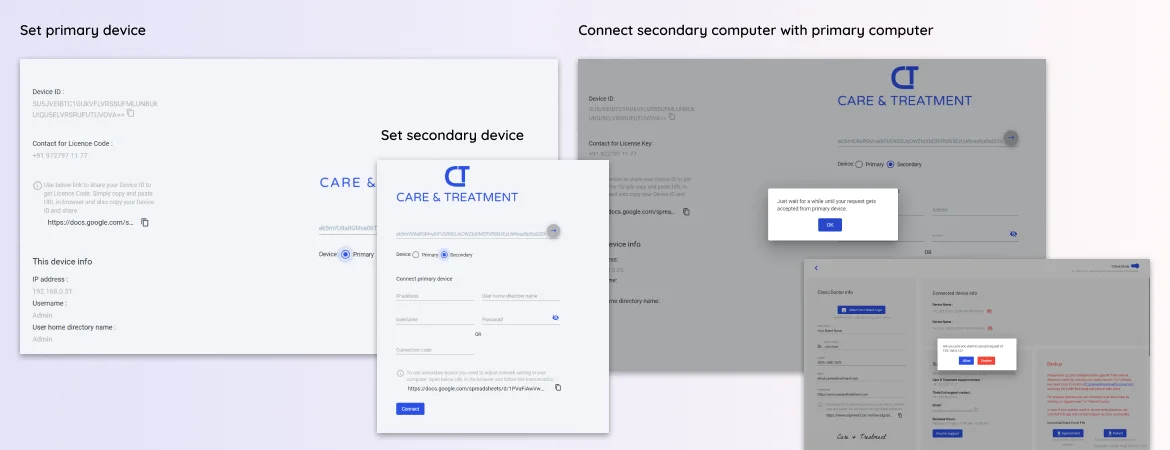
Care & Treatment desktop app provides a feature to get connected with your mobile phone camera and gallery, allowing you to click photos on your mobile phone and save them directly to your computer. And you can also upload photos from the phone gallery. This helps you secure and organize all your treatment photos in one place for your practice.
This is possible using a third party mobile app, developed by Care & Treatment technical team. The app is Cloud Cam which is available for both platform IOS and Android.
You need to download Cloud Cam app in your mobile. This app has some settings to add, so the app can connect with your C&T desktop app.
Setup Cloud Cam mobile app to use your mobile camera or gallery for adding treatment photos
It’s so easy to set up Cloud Cam app and get started with treatment photos and also save at safe place with a well-organized pattern. Below are the steps to finish the setup.
Prerequisites for setting up Cloud Cam mobile app connection to Care & Treatment desktop app
Before connecting the Cloud Cam mobile app with the Care & Treatment desktop app, make sure your primary device network settings are configured correctly. Follow below steps to check your network settings.
1. Open the settings menu on your primary device.
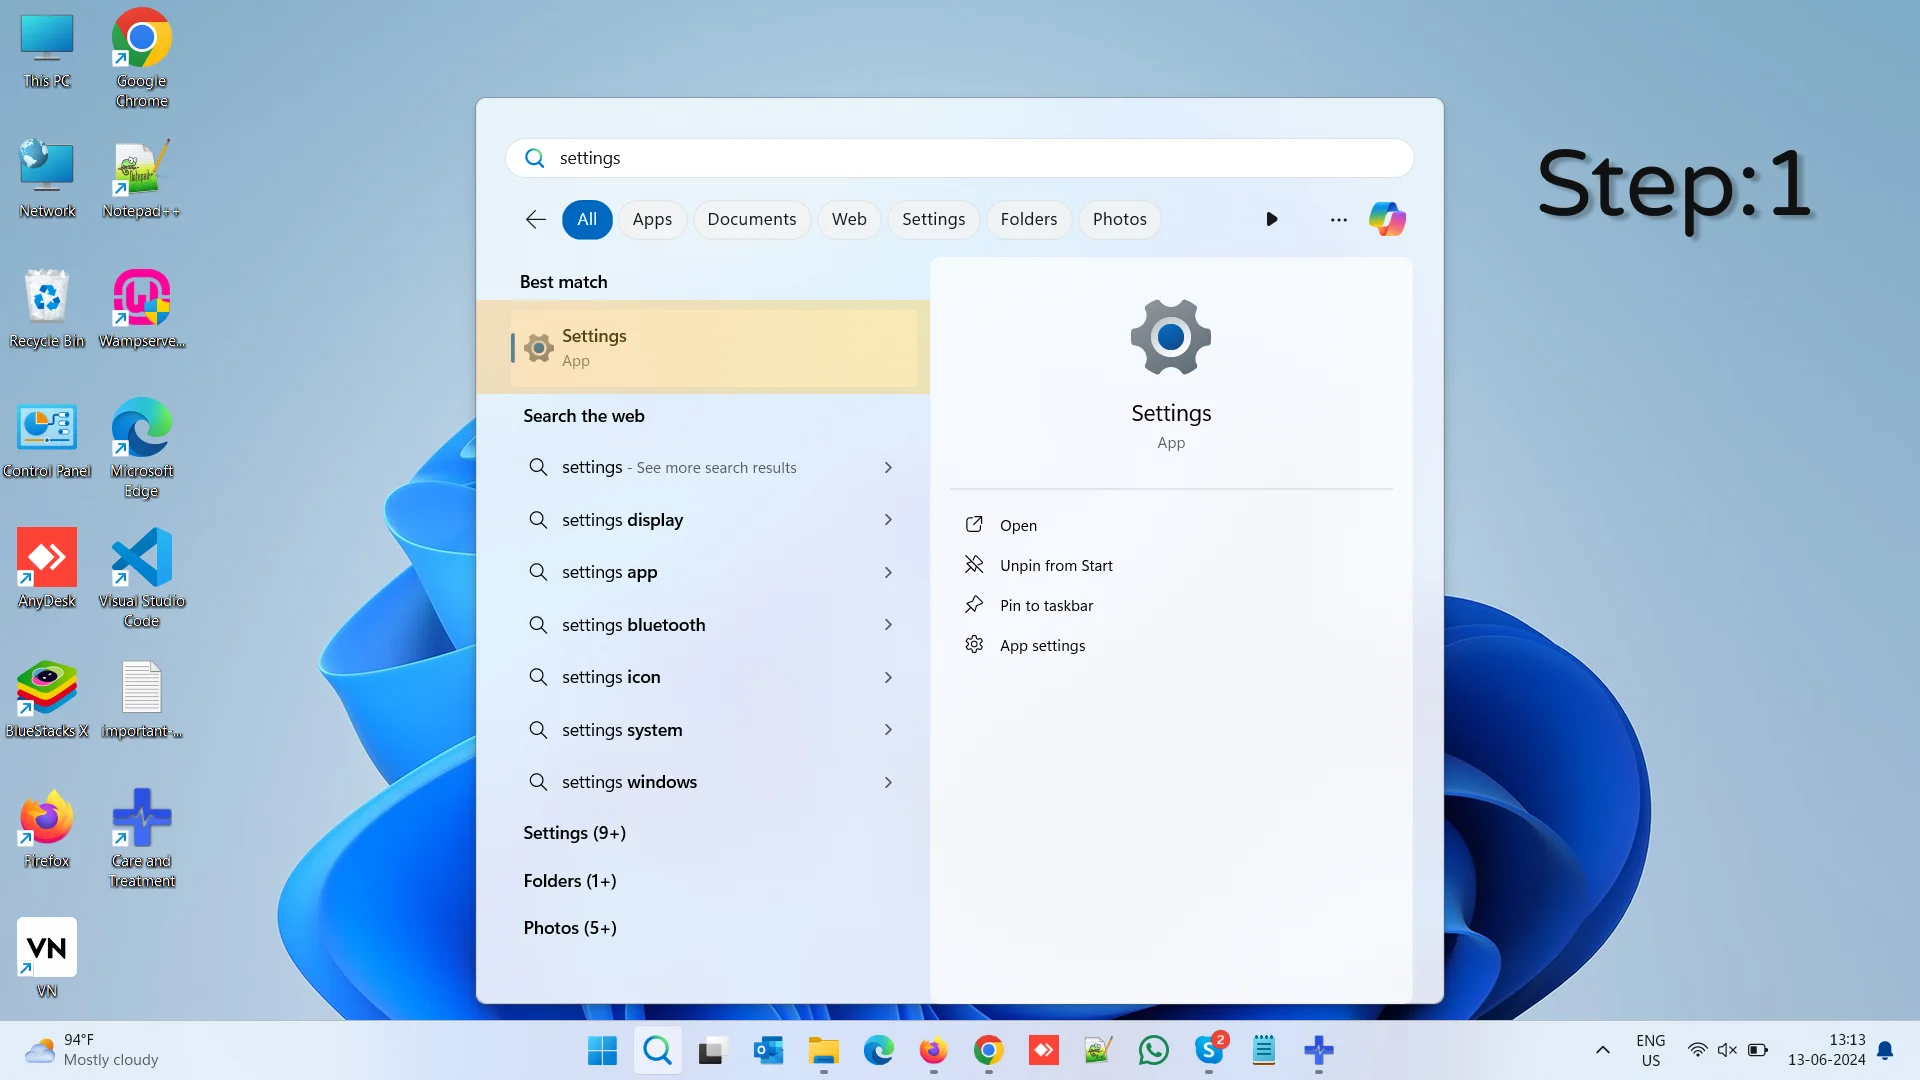
2. Go to Network & Internet
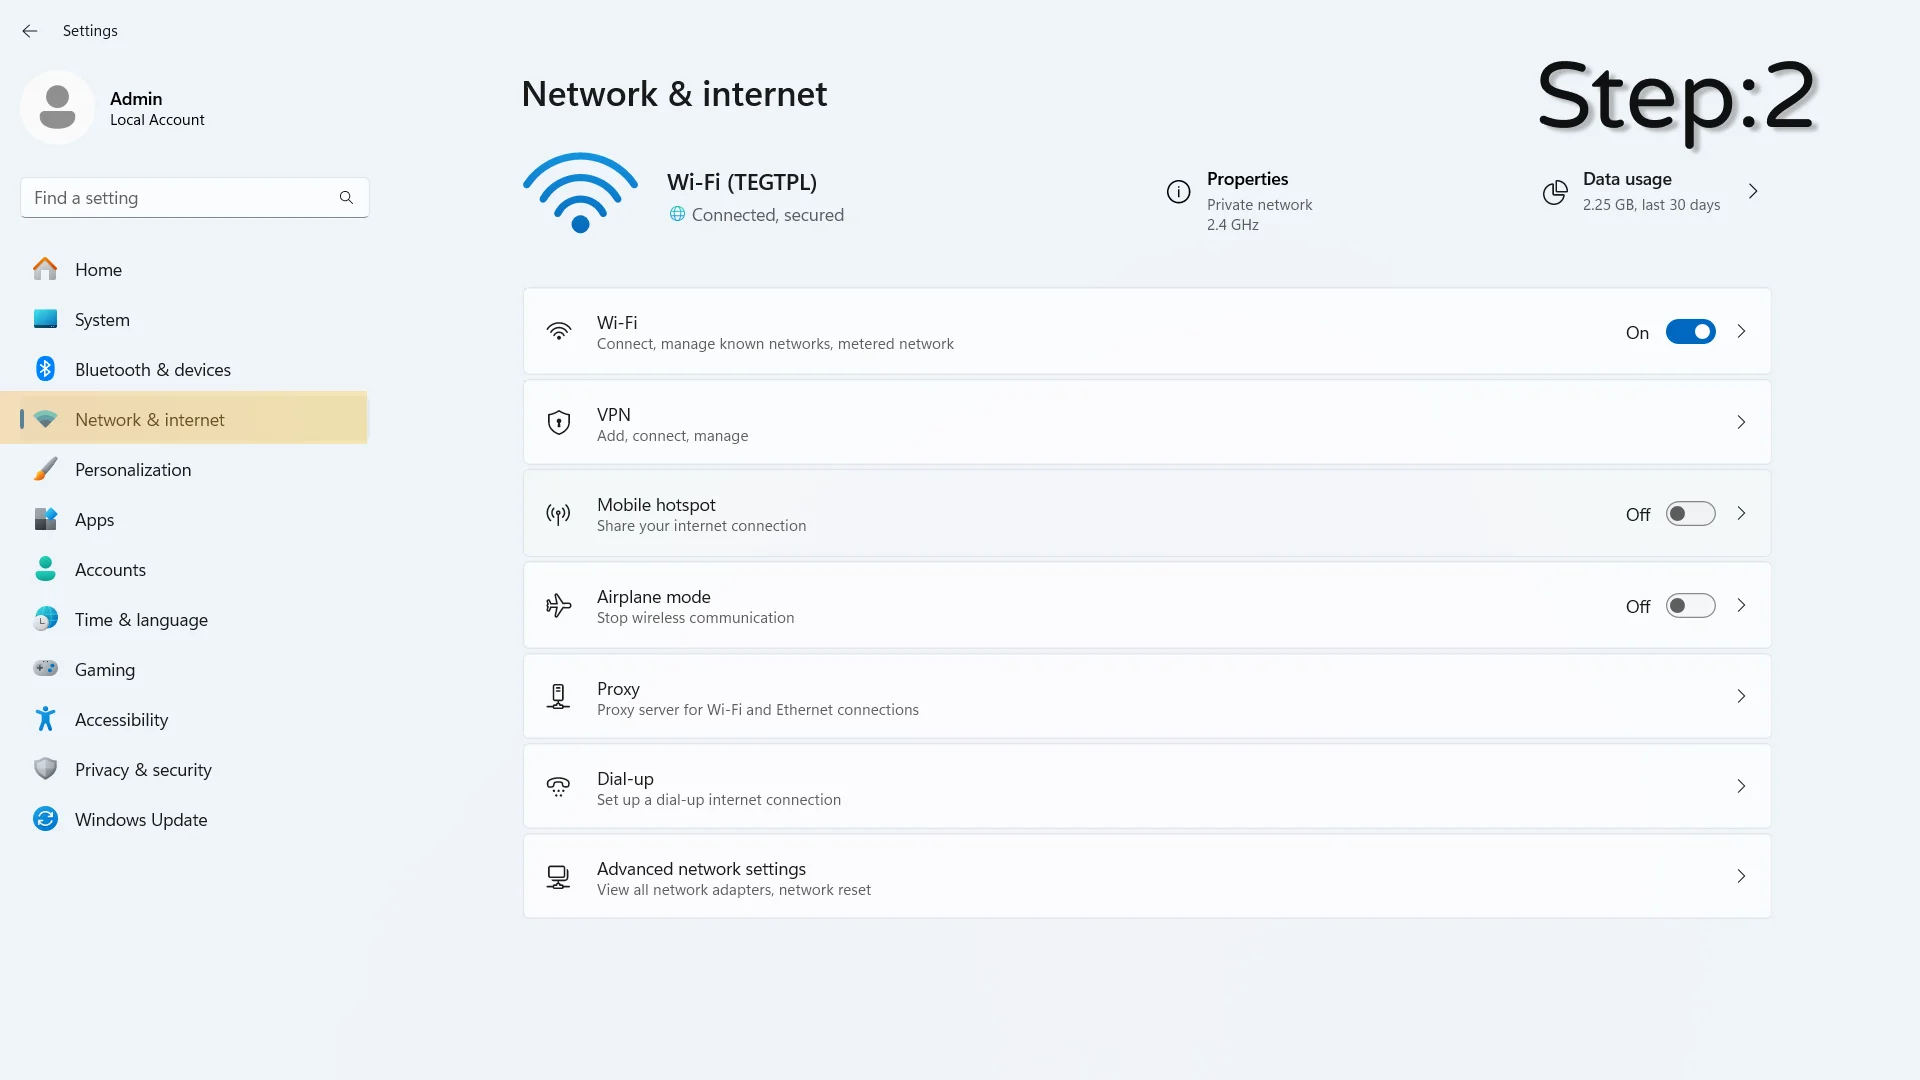
3. Here you have 2 options, if you are connected over Wi-Fi or LAN
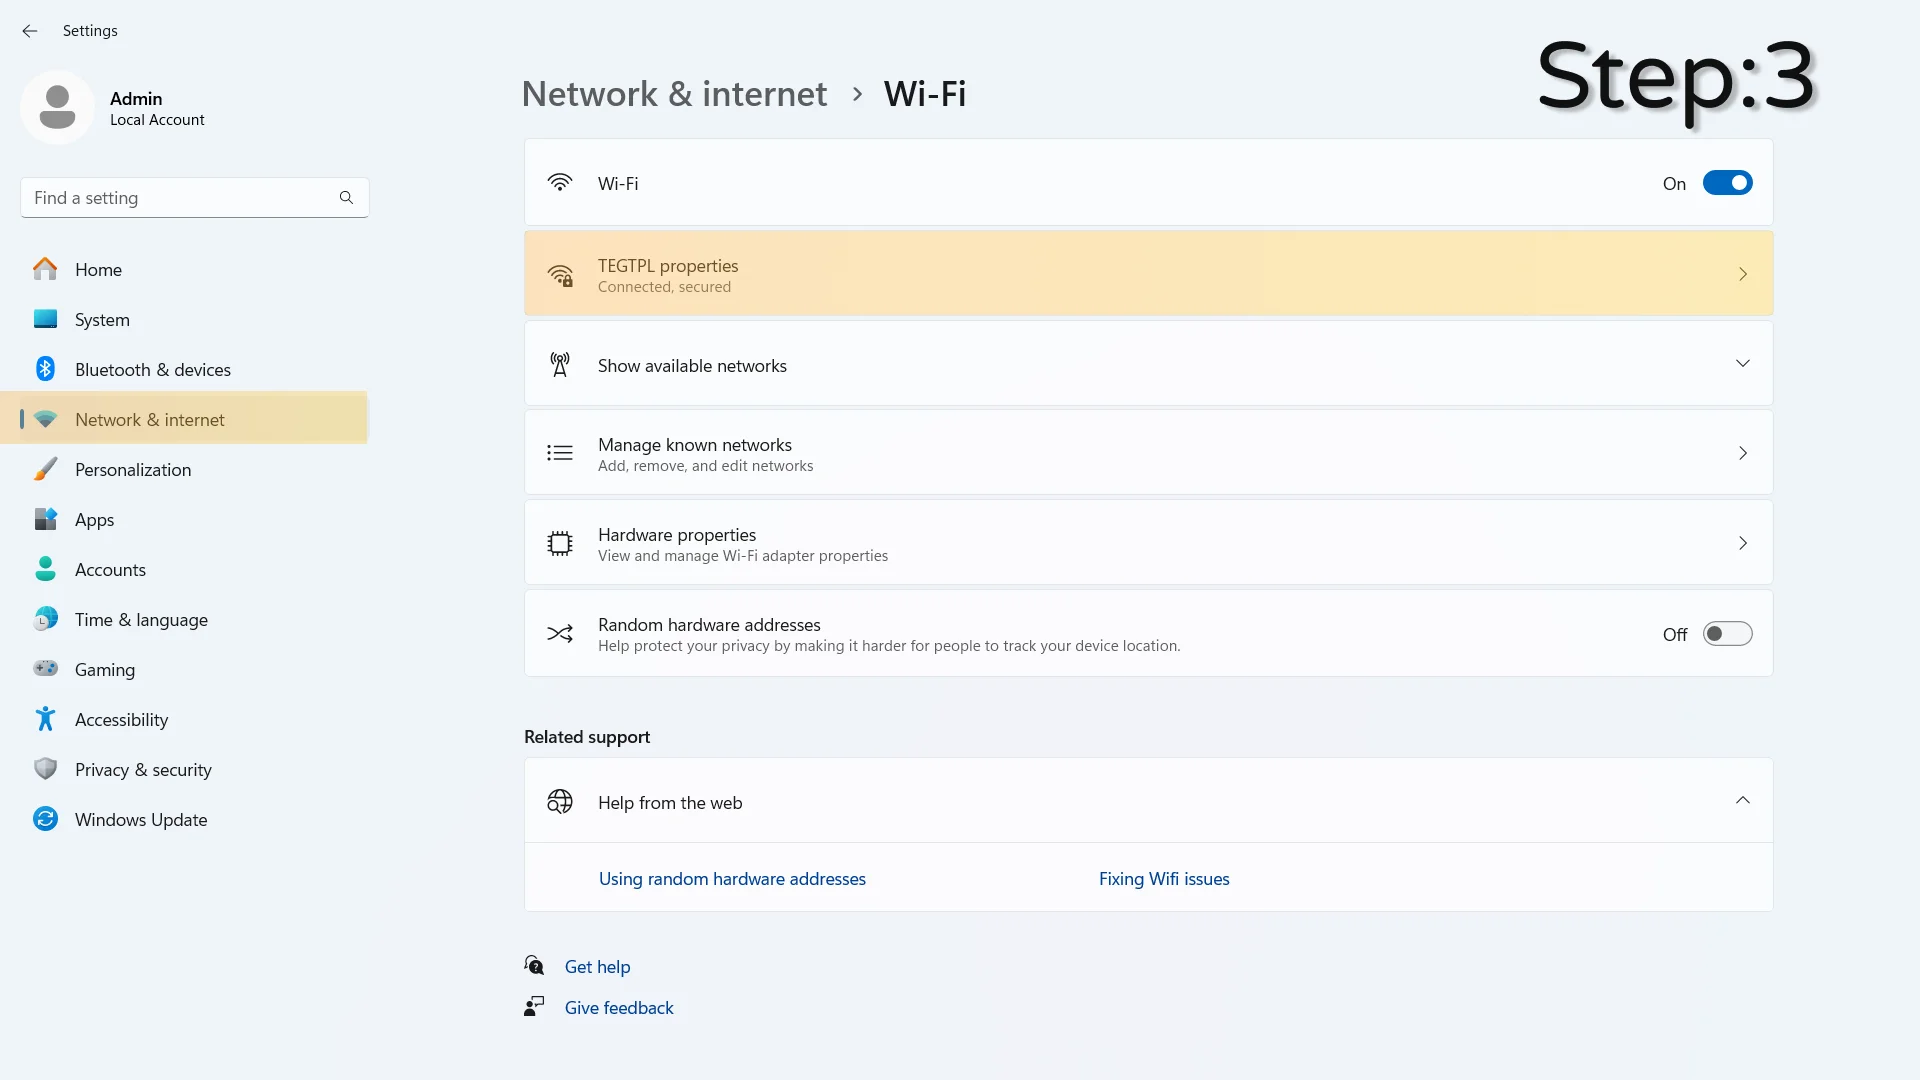
4. If you are connected on Wi-Fi, click on Wi-Fi or if you are connected on LAN click on Ethernet
5. In case of Wi-Fi network, find your connected Wi-Fi network by name and click to go inside.
6. In case of LAN network, find your connected Ethernet port and click to go inside.
7. Find the Network profile type, make sure it is set to Private network.
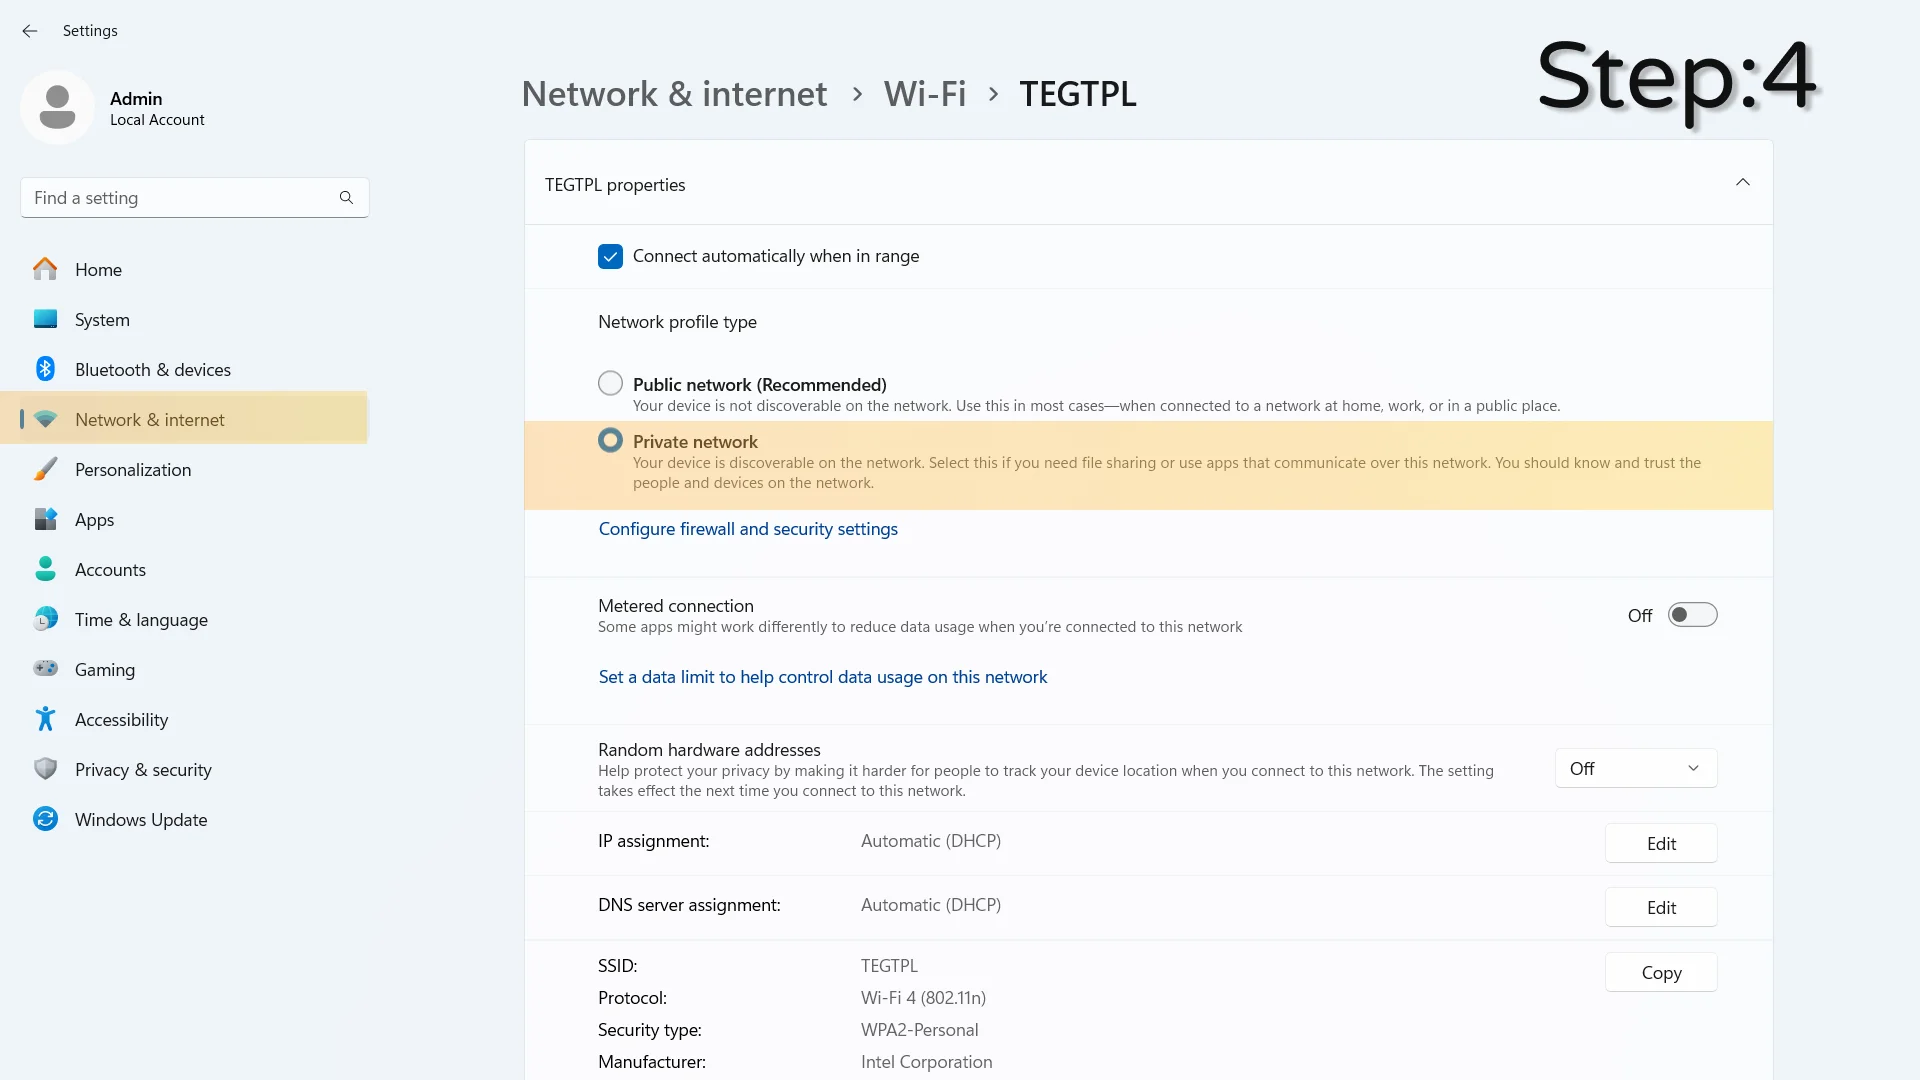
8. This settings is required in some computers not for all. But we recommend to set for your computer.
Allow network connection in windows defender firewall
This setting is not mandatory but sometime some windows setup have strict policy for network access due to anti viruse protection. For such cases if treatment photo mobile app Cloud Cam is not able to connect with your Care & Treatment desktop app, then you need to perform below steps.
1. Open Windows Defender Firewall
Click on the Start menu.
Type “Windows Defender Firewall” and select it from the search results.
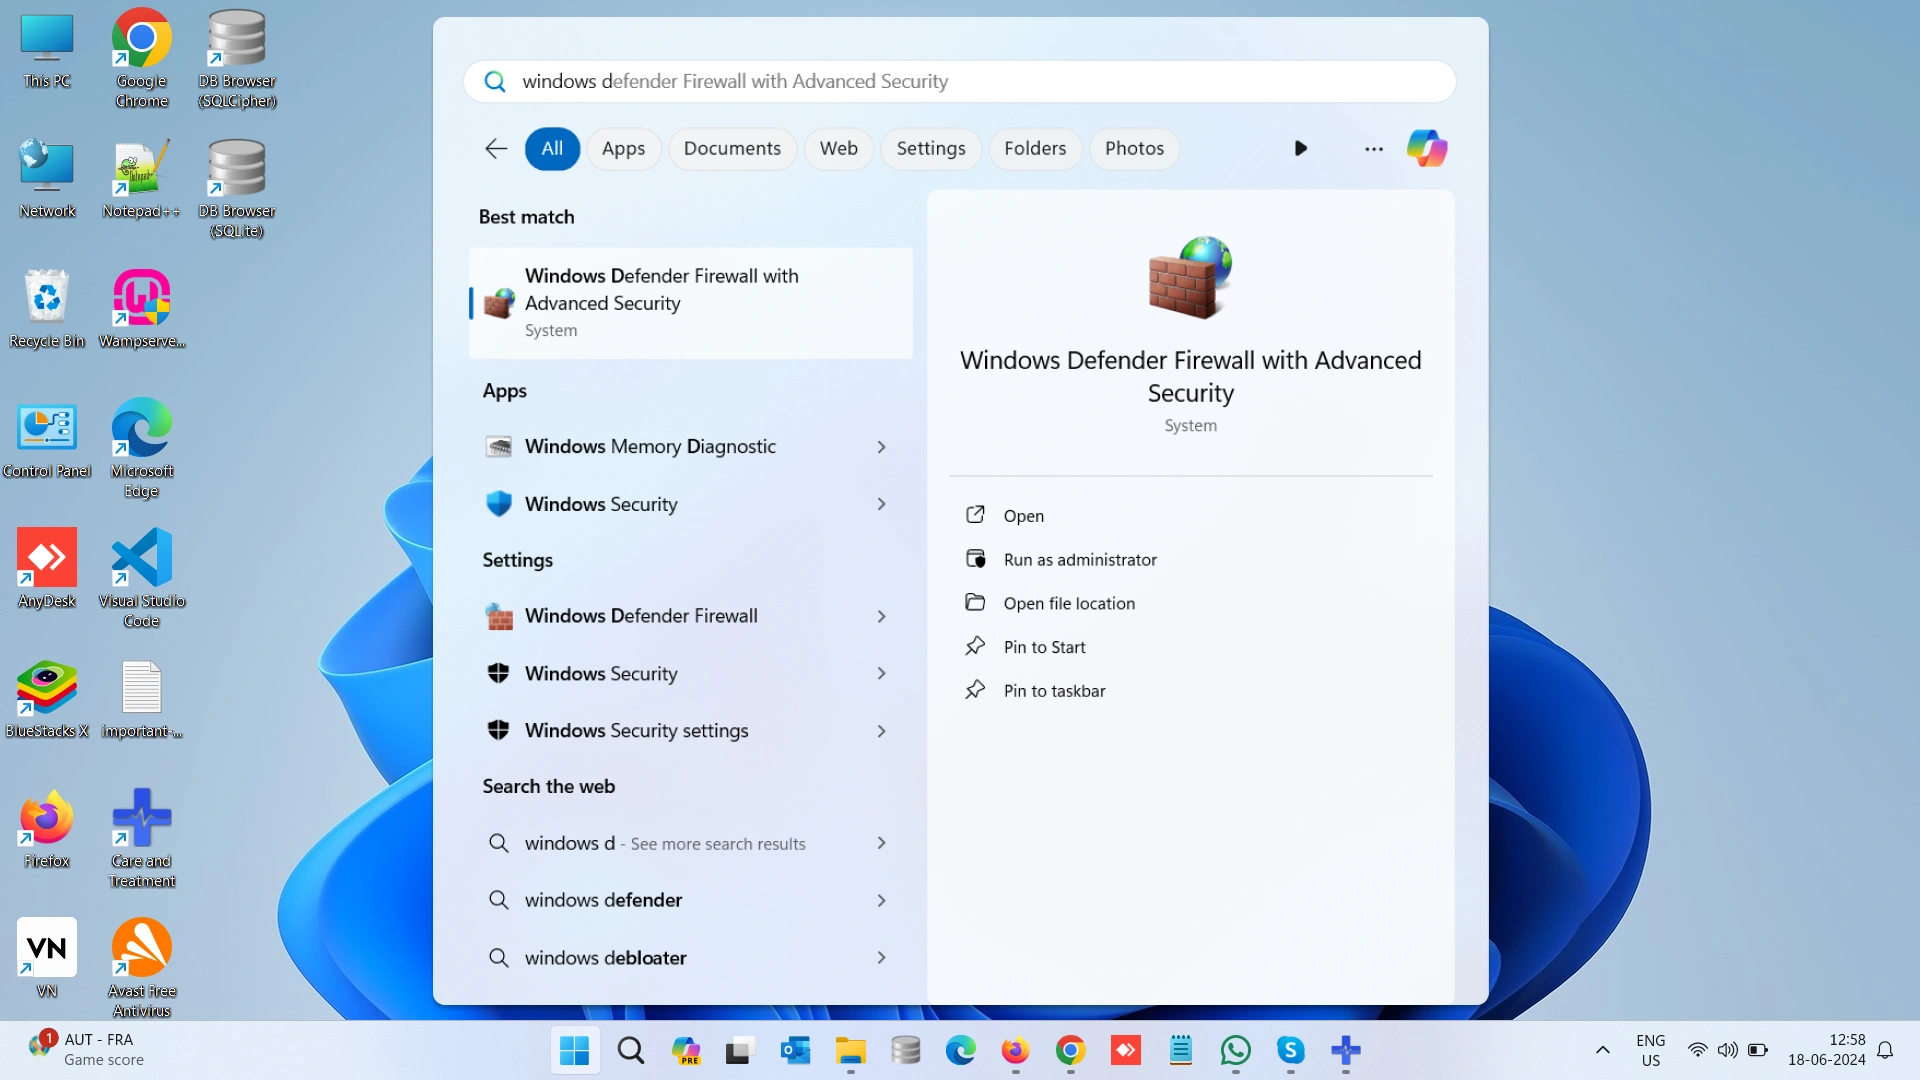
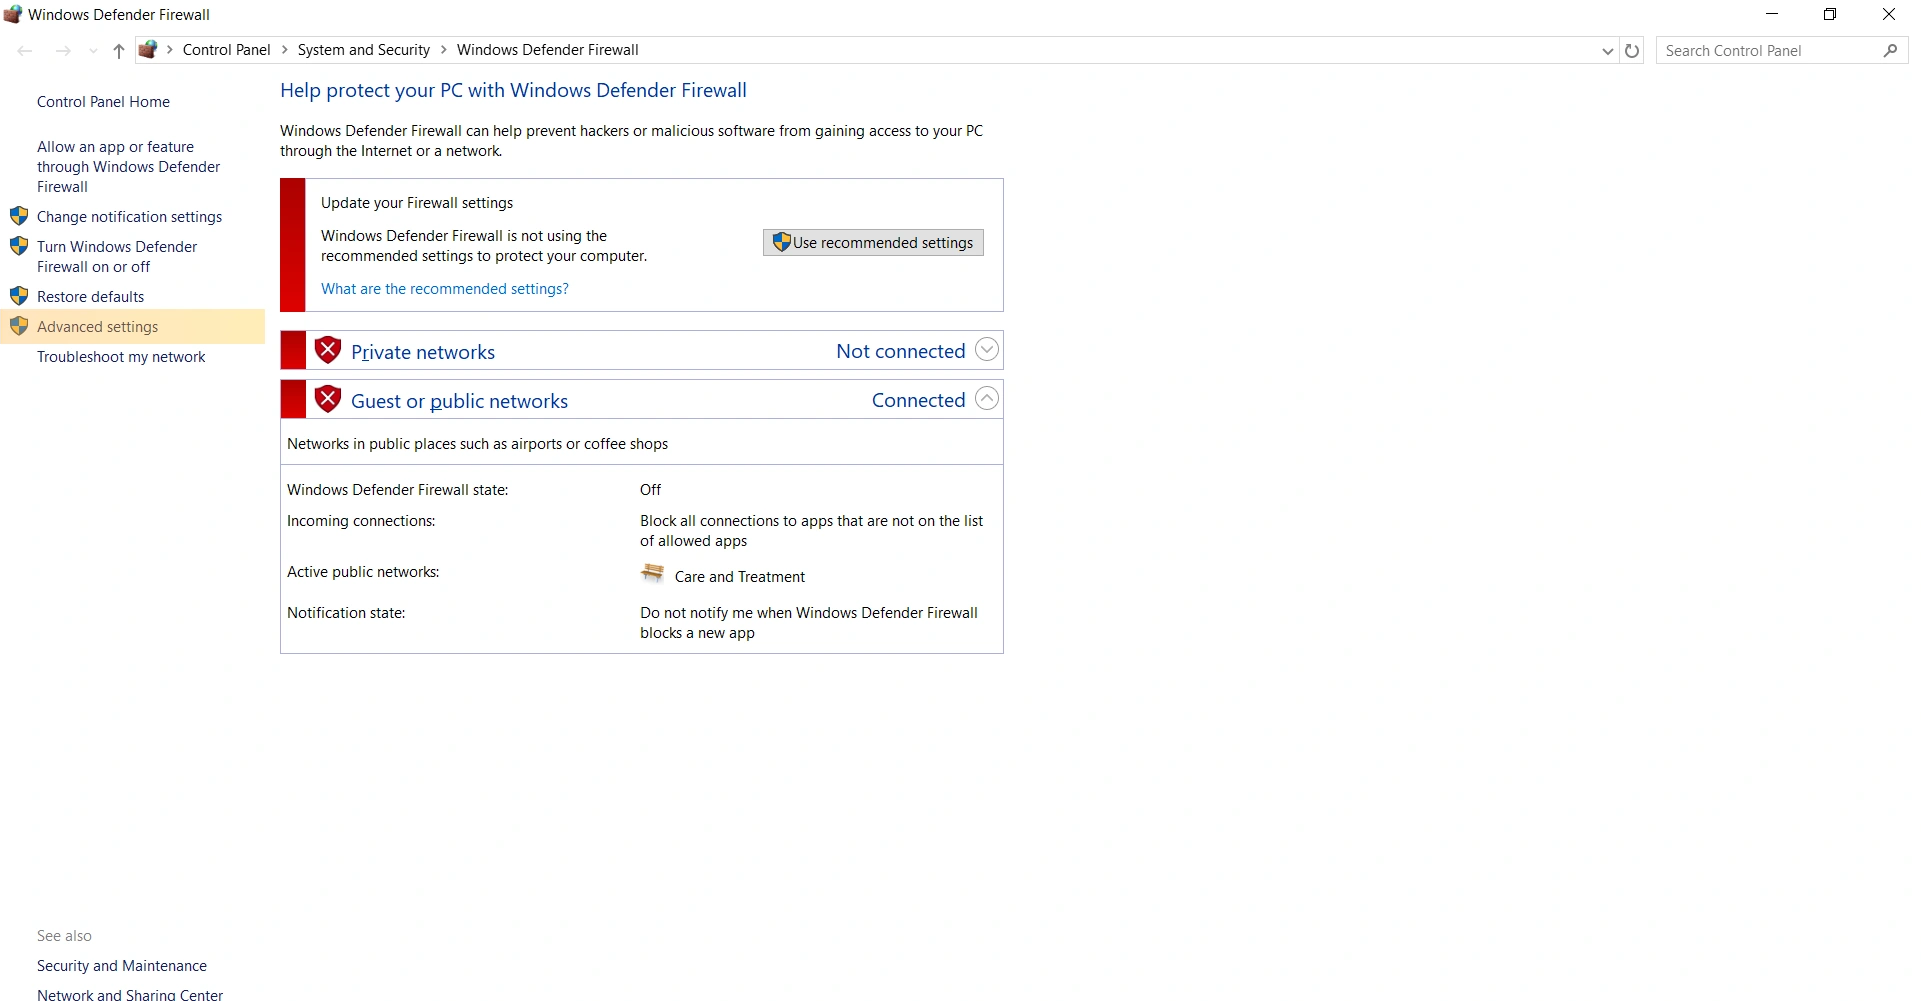
2. Access Advanced Settings:
In the Windows Defender Firewall window, look for an option that says “Advanced settings” in the left-hand pane. This is typically located towards the bottom of the list of options.
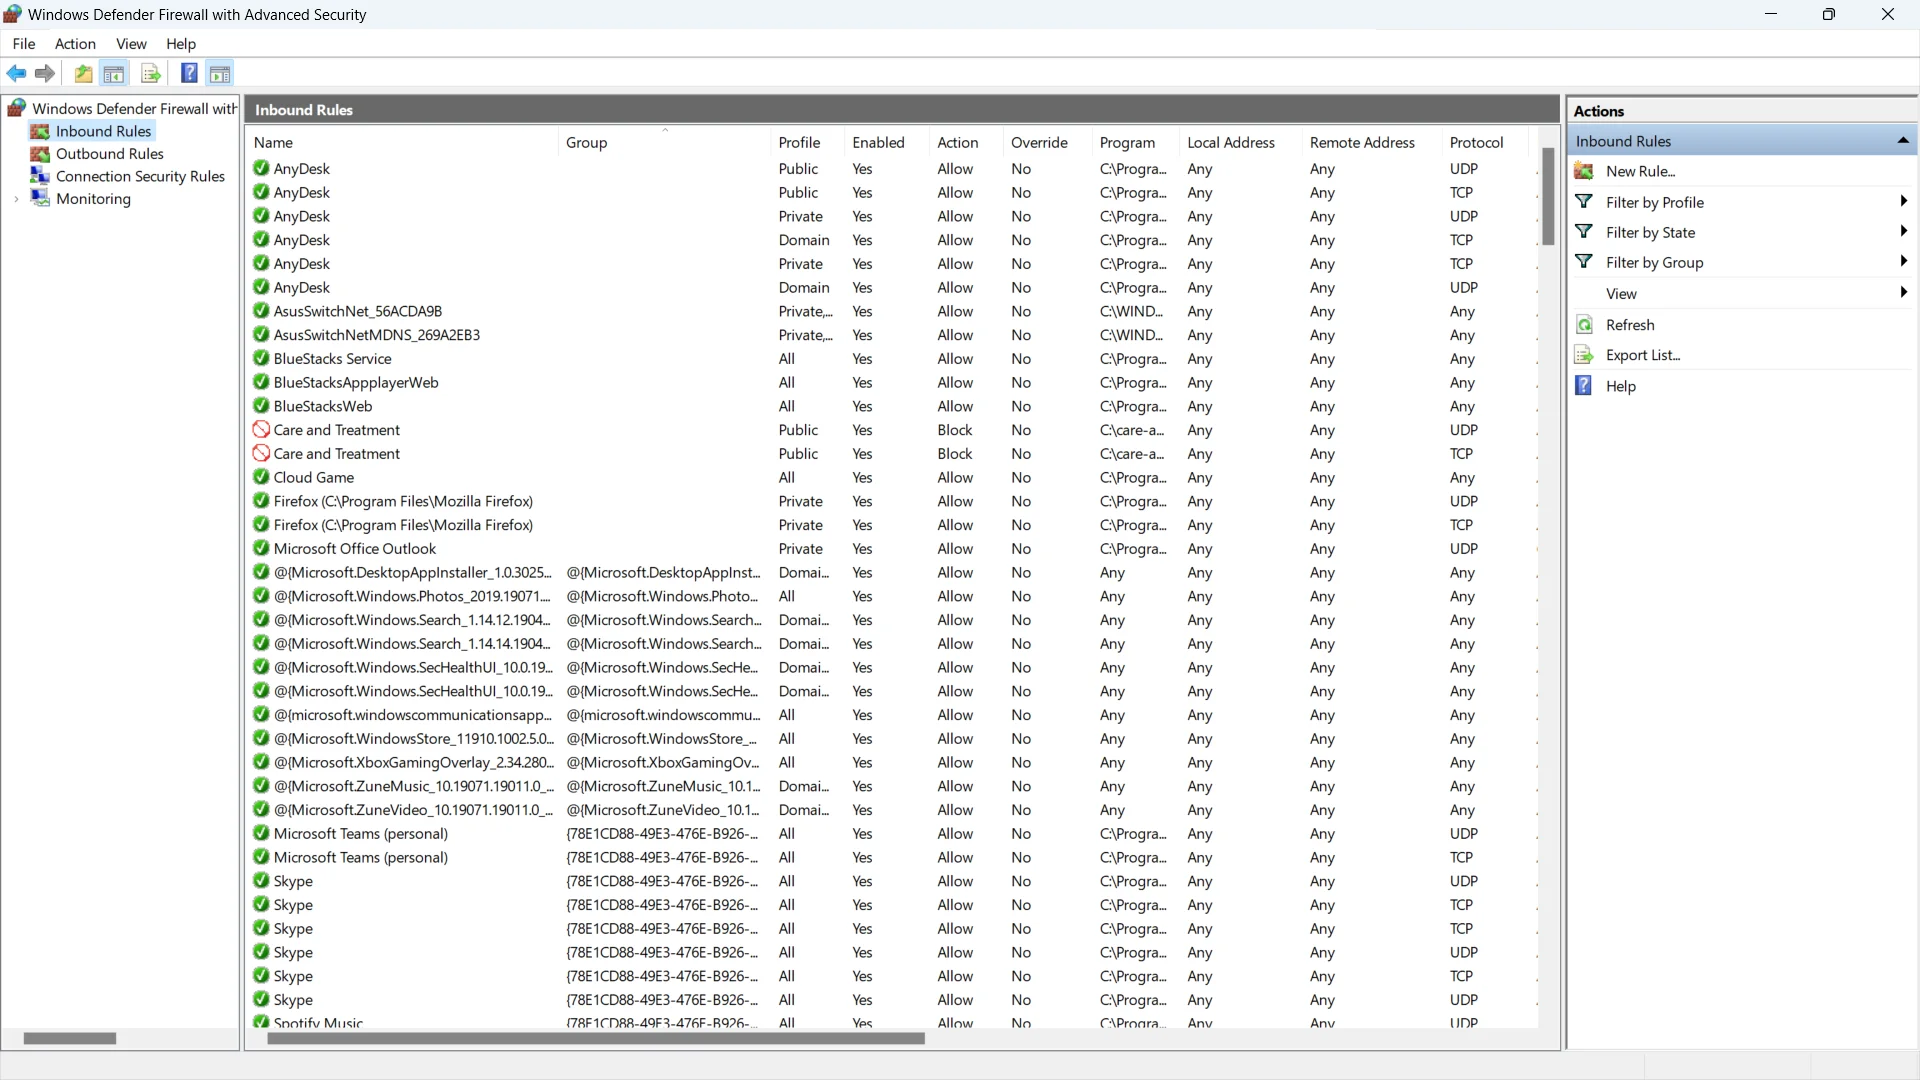
3. Navigate to Inbound Rules
In the Windows Defender Firewall with Advanced Security window, click on “Inbound Rules” in the left pane. This will display the inbound rules for your firewall.
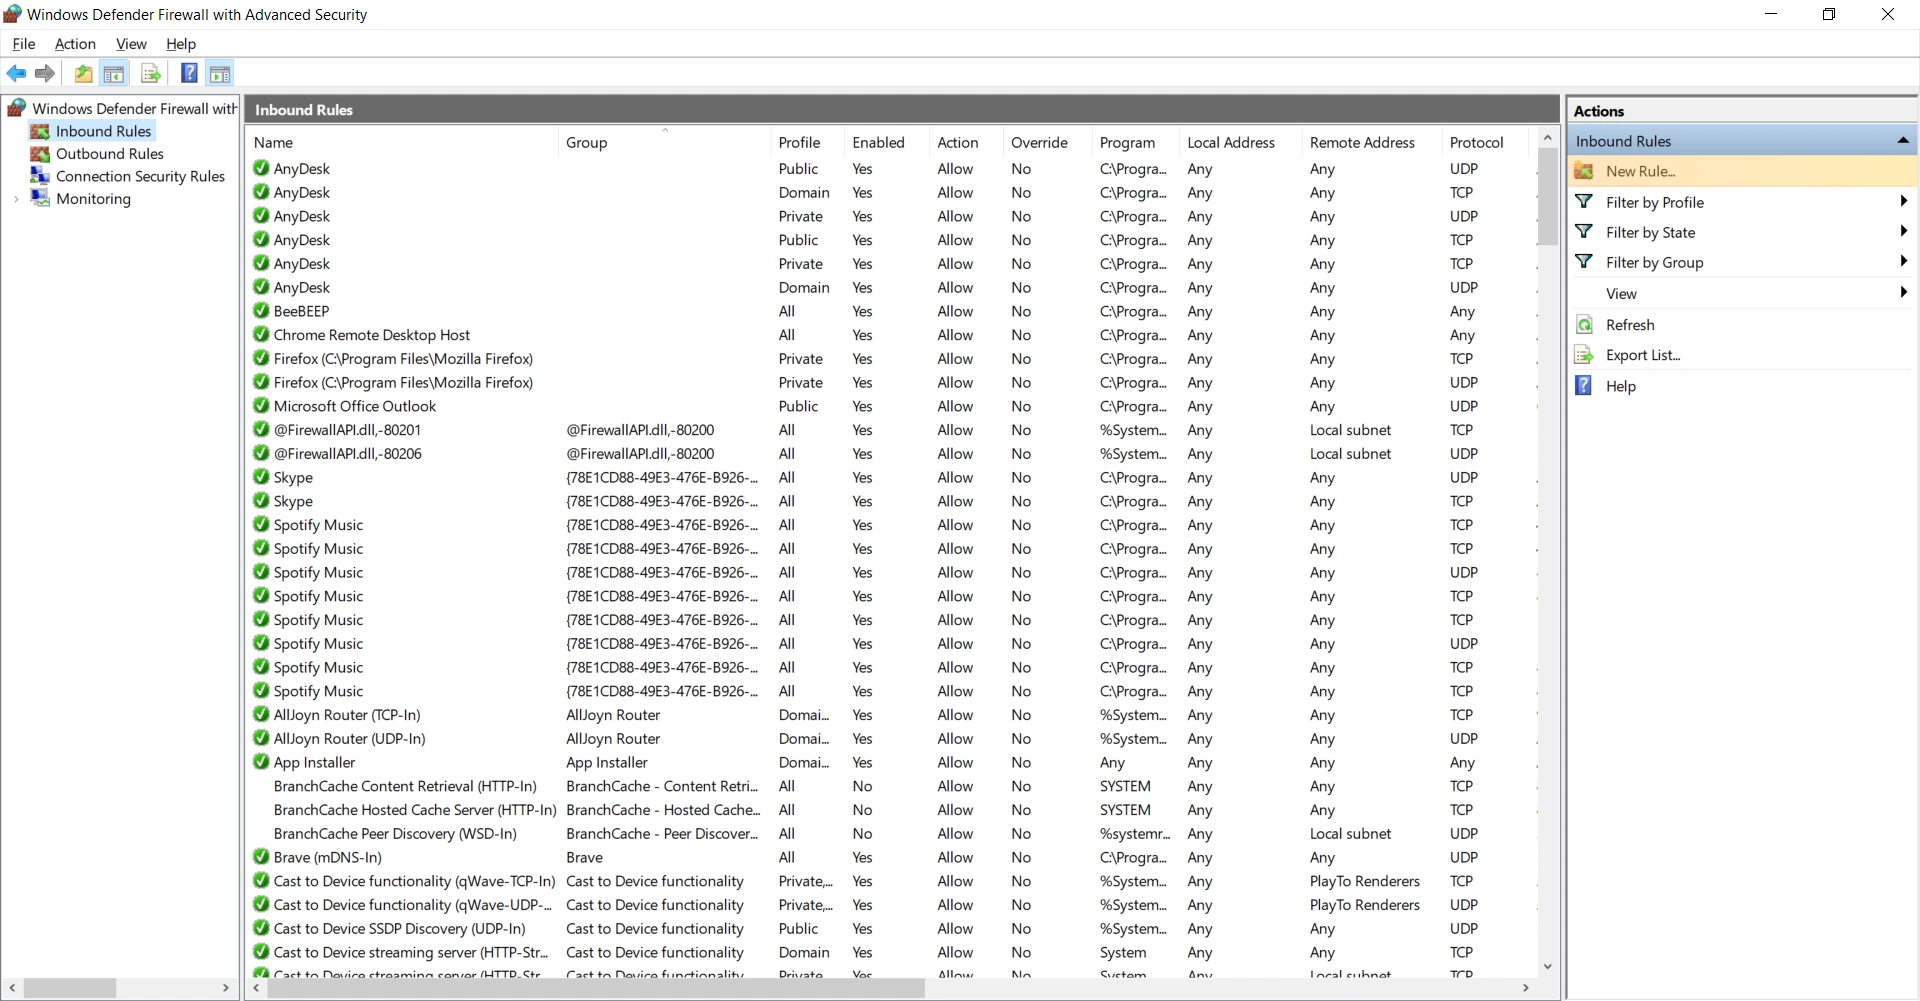
4. Create a New Rule
In the Windows Defender Firewall with Advanced Security window, click on “Inbound Rules” in the left pane. This will display the inbound rules for your firewall.
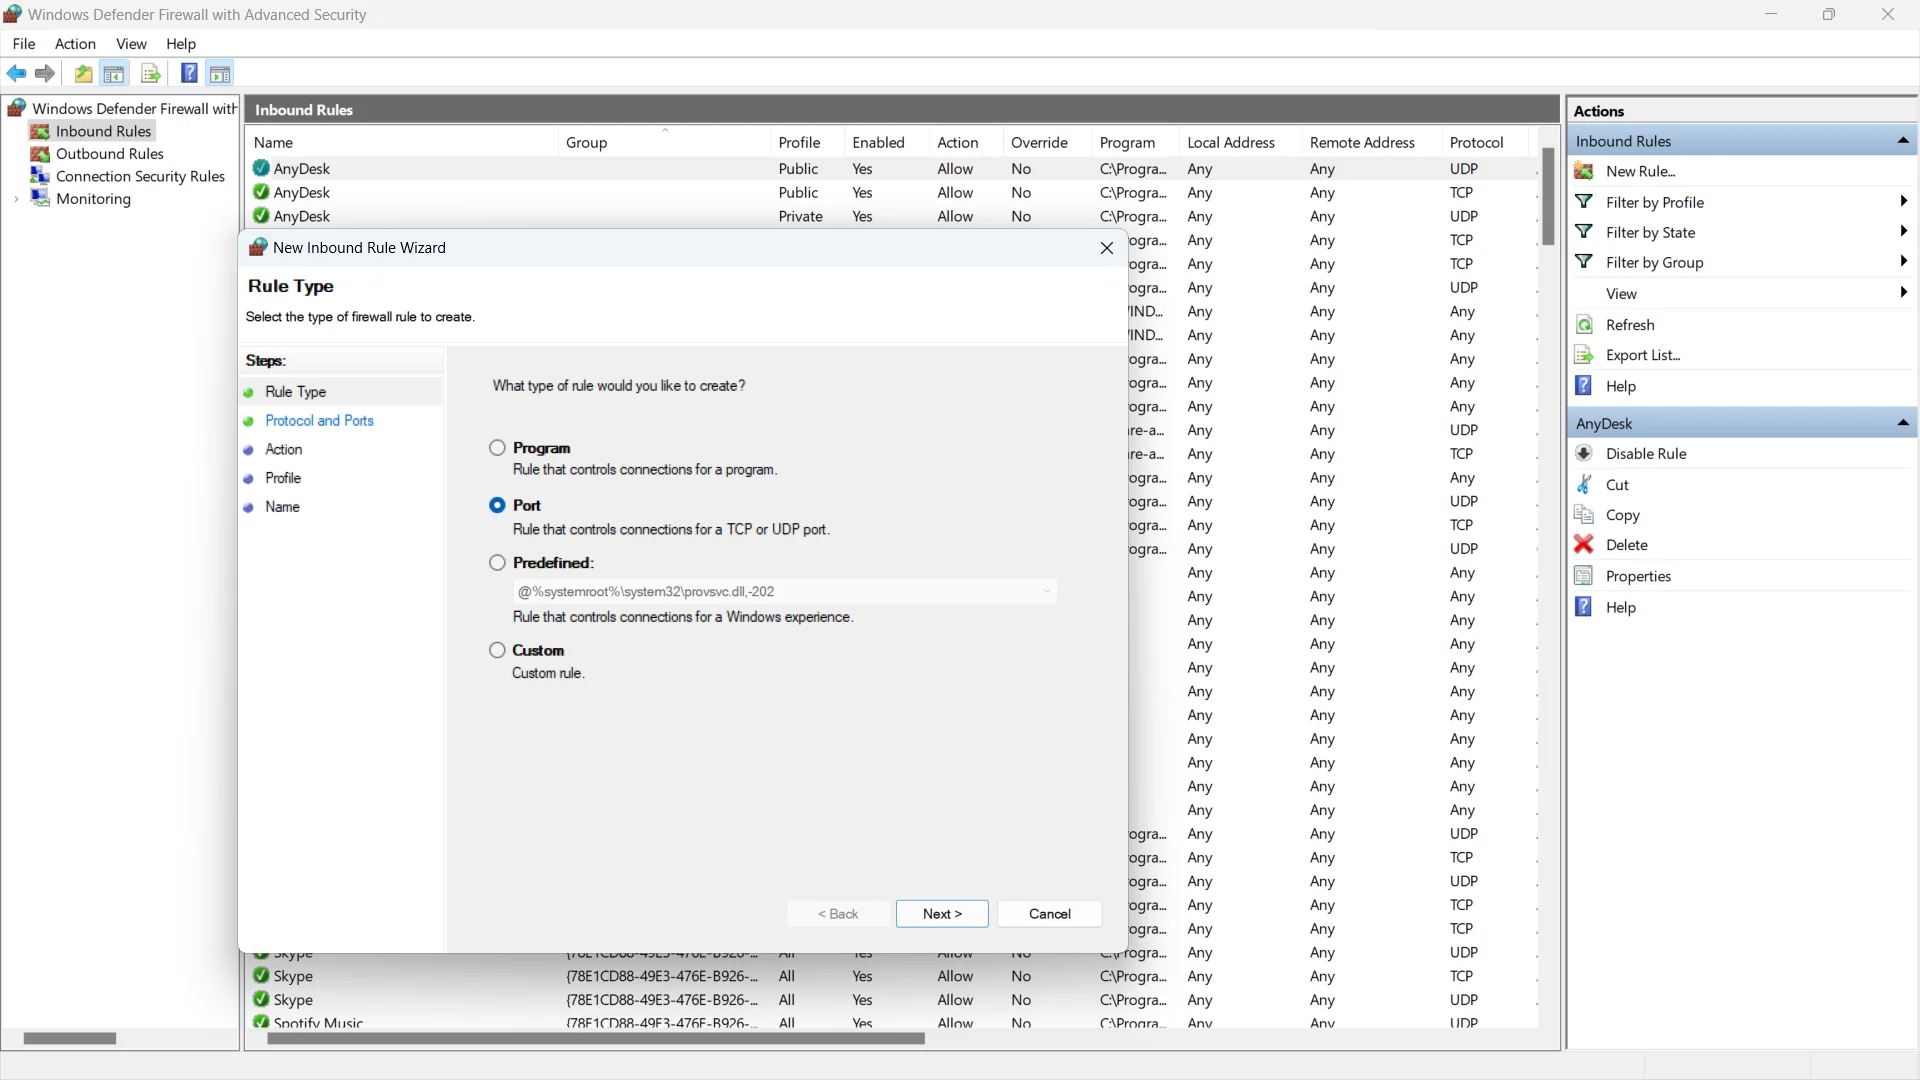
5. Select Rule Type
In the New Inbound Rule Wizard, select “Port” and click “Next”.
6. Specify TCP Port
Choose “TCP” and specify the port number you want to open (e.g., 3000).
Click “Next” to proceed.
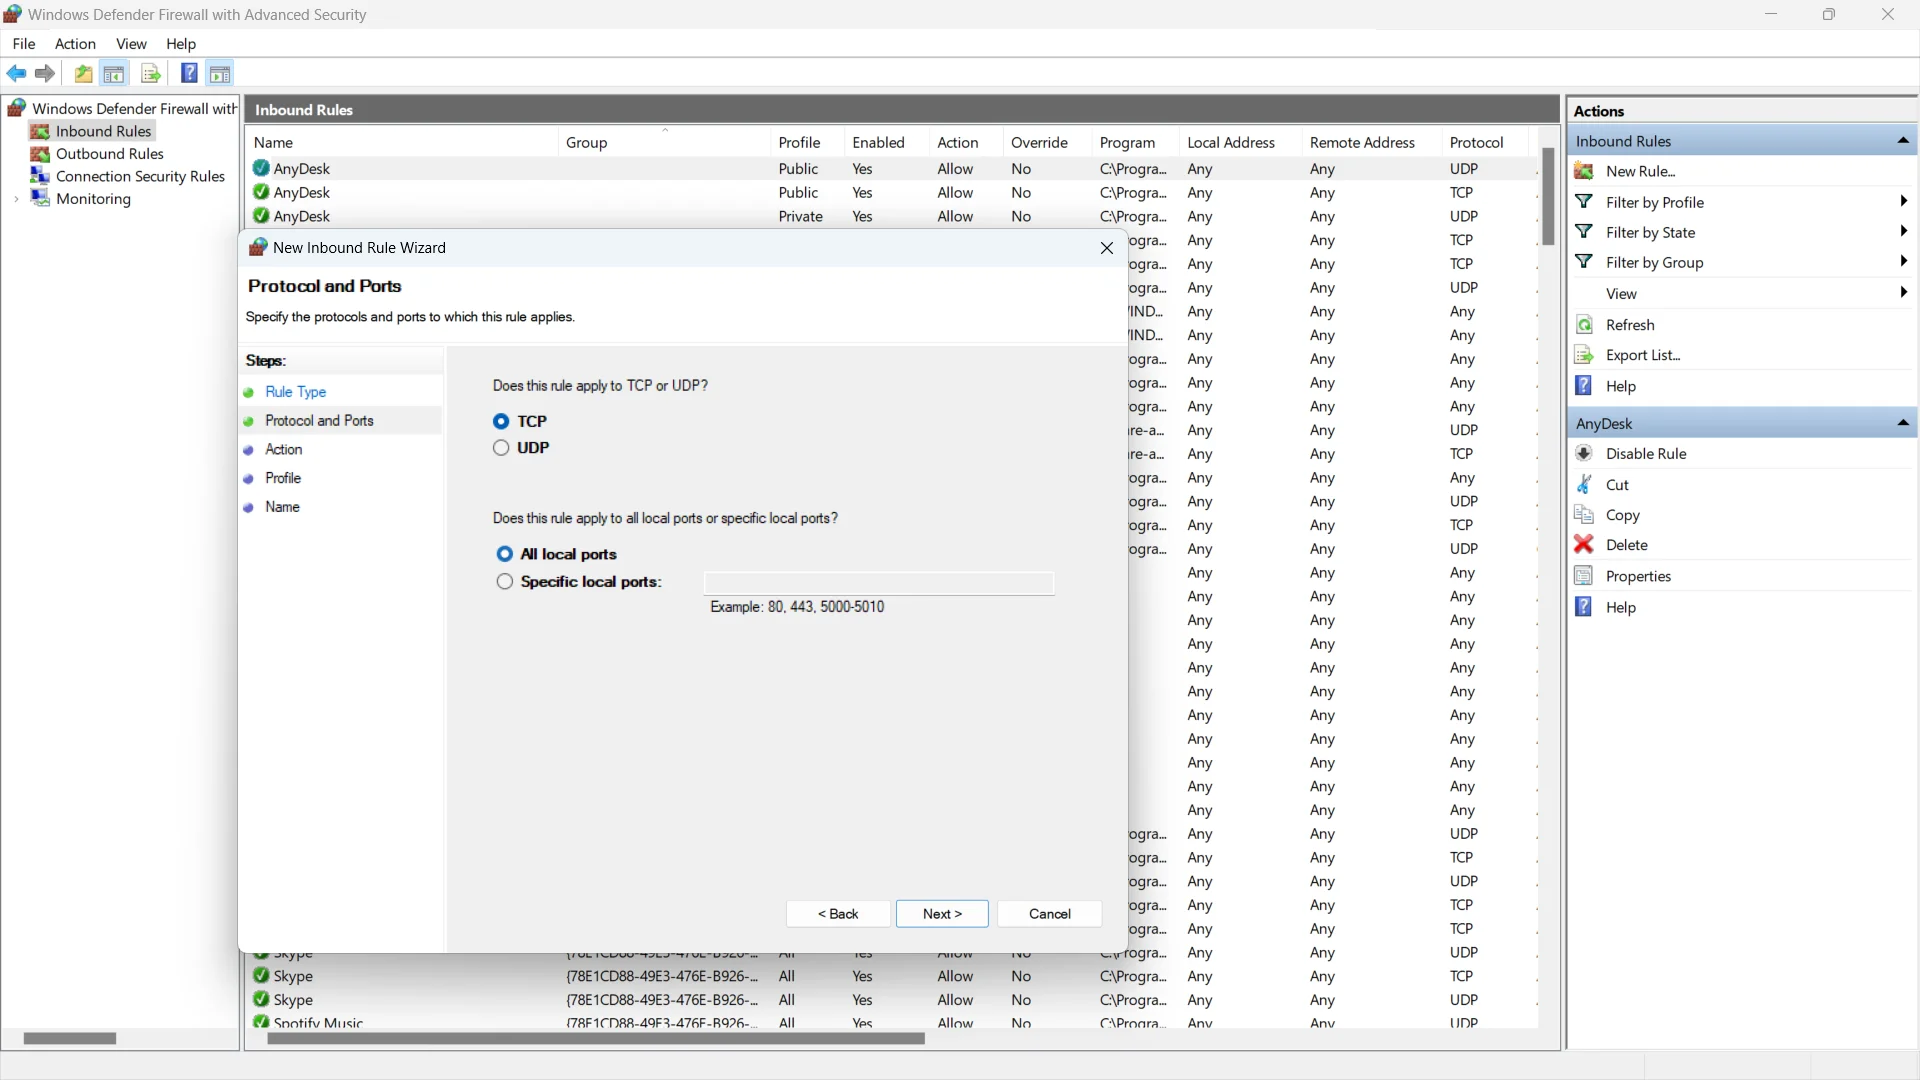
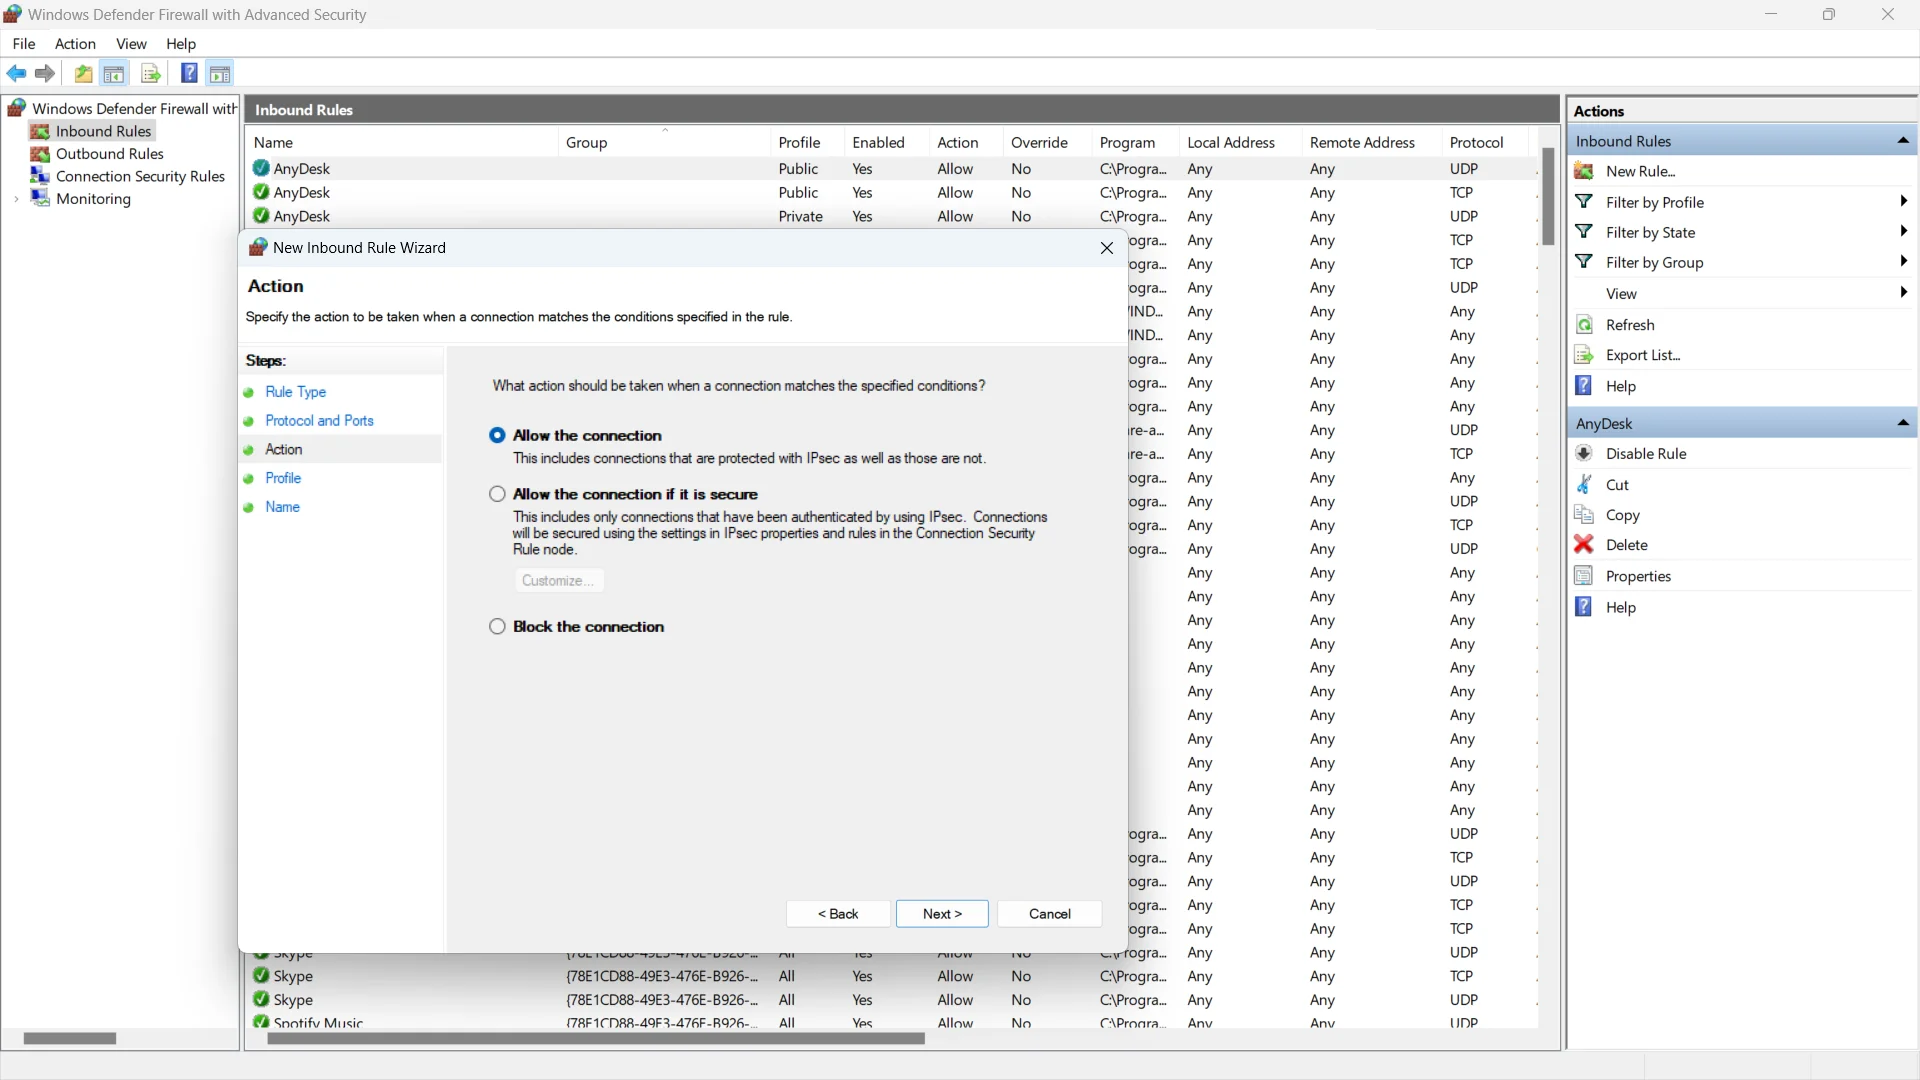
7. Allow the Connection
Select “Allow the connection” and click “Next”.
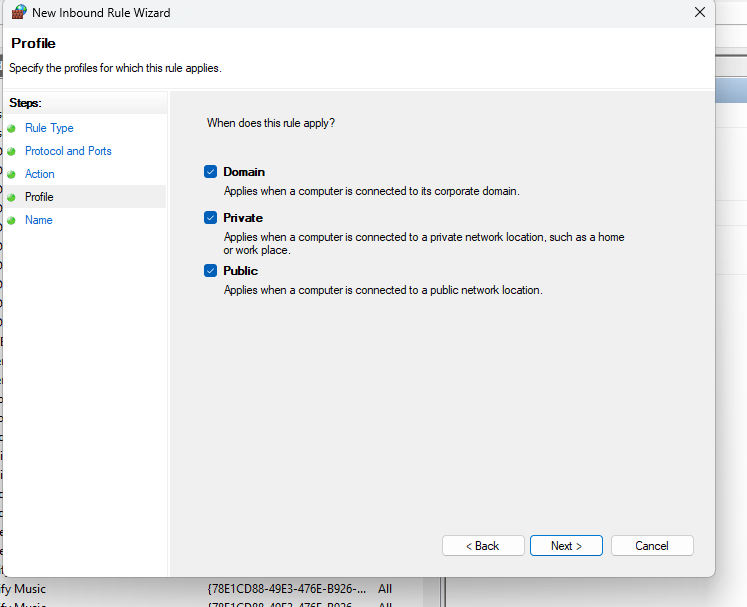
8. Apply Rule to All Profiles (or Customize)
Choose whether to apply the rule to all profiles (Domain, Private, Public) or customize it based on your network environment.
Click “Next”.
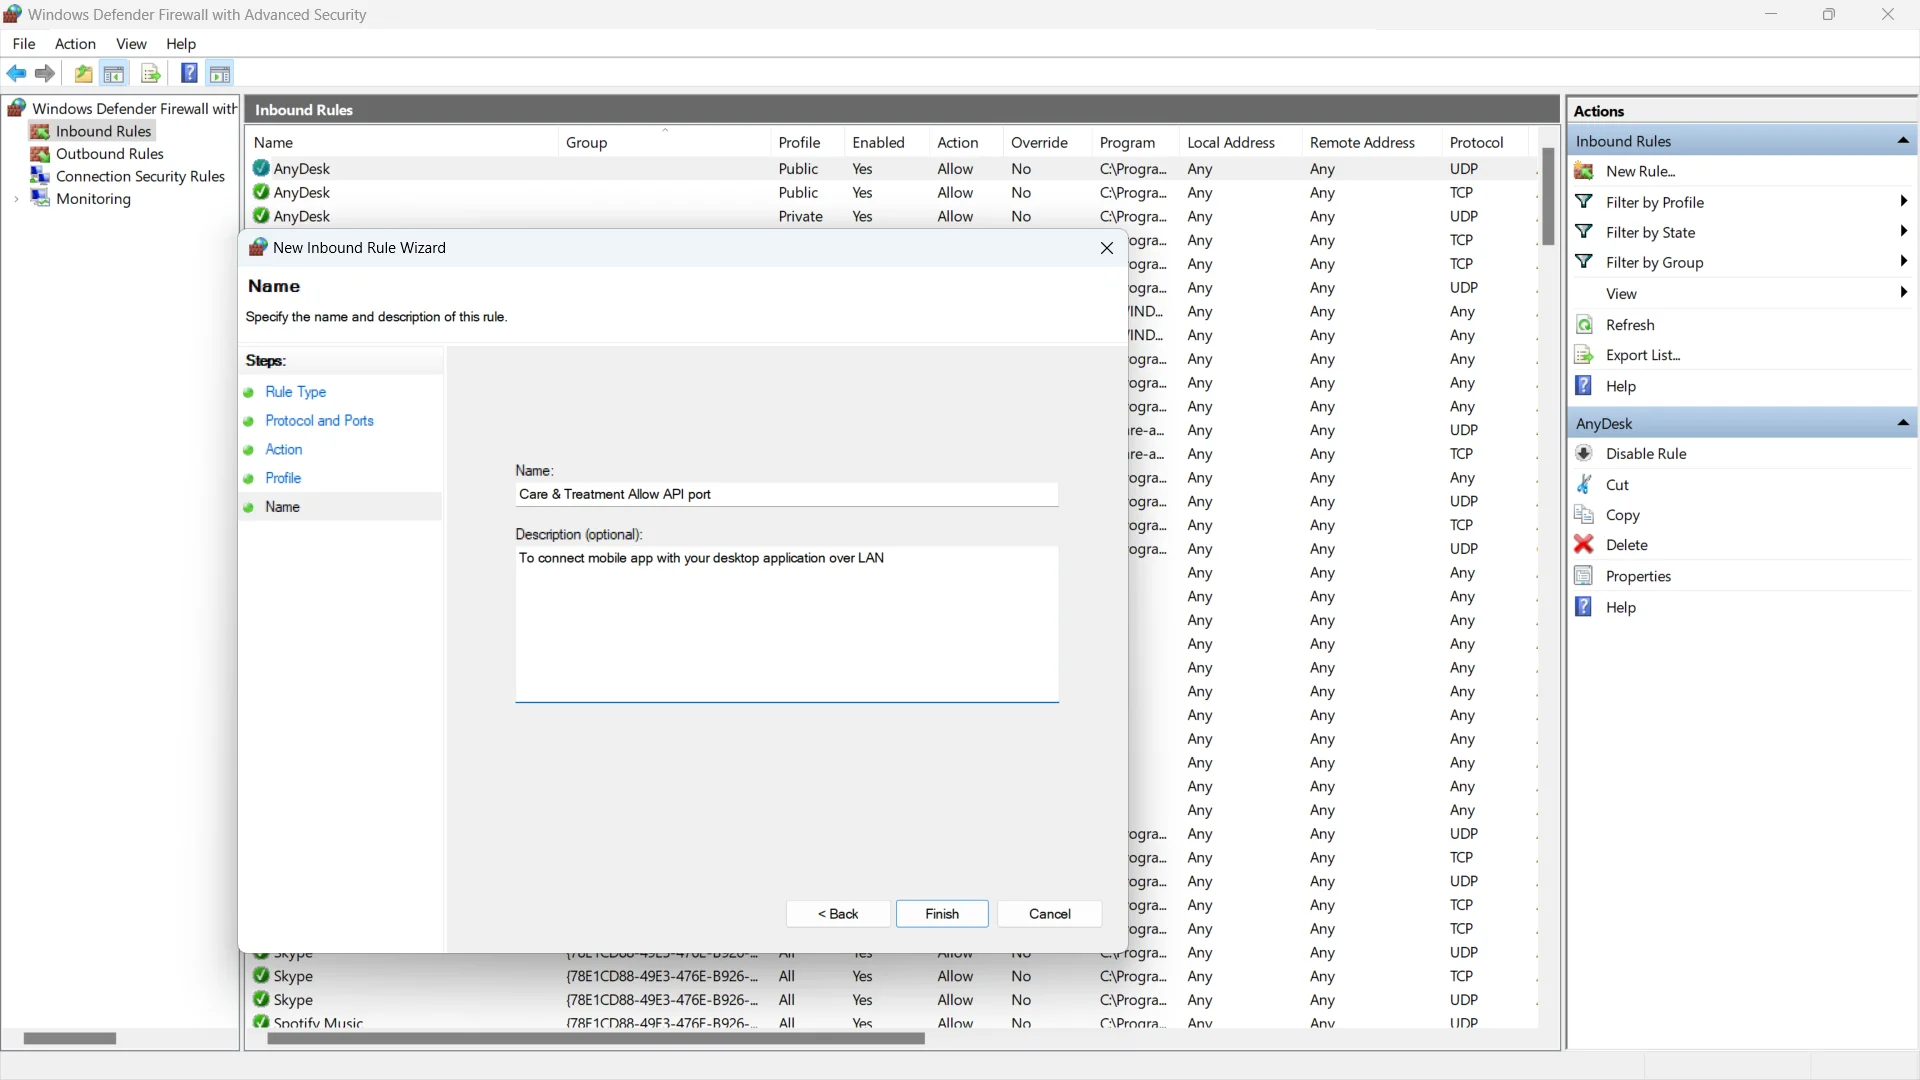
9. Give the Rule a Name and Description
Enter a name and description for the rule to help identify its purpose (e.g., “Care & Treatment Allow API port”).
Click “Finish” to create the rule.
10. Save the Rule
The new inbound rule will now appear in the inbound rules list in Windows Defender Firewall with Advanced Security.
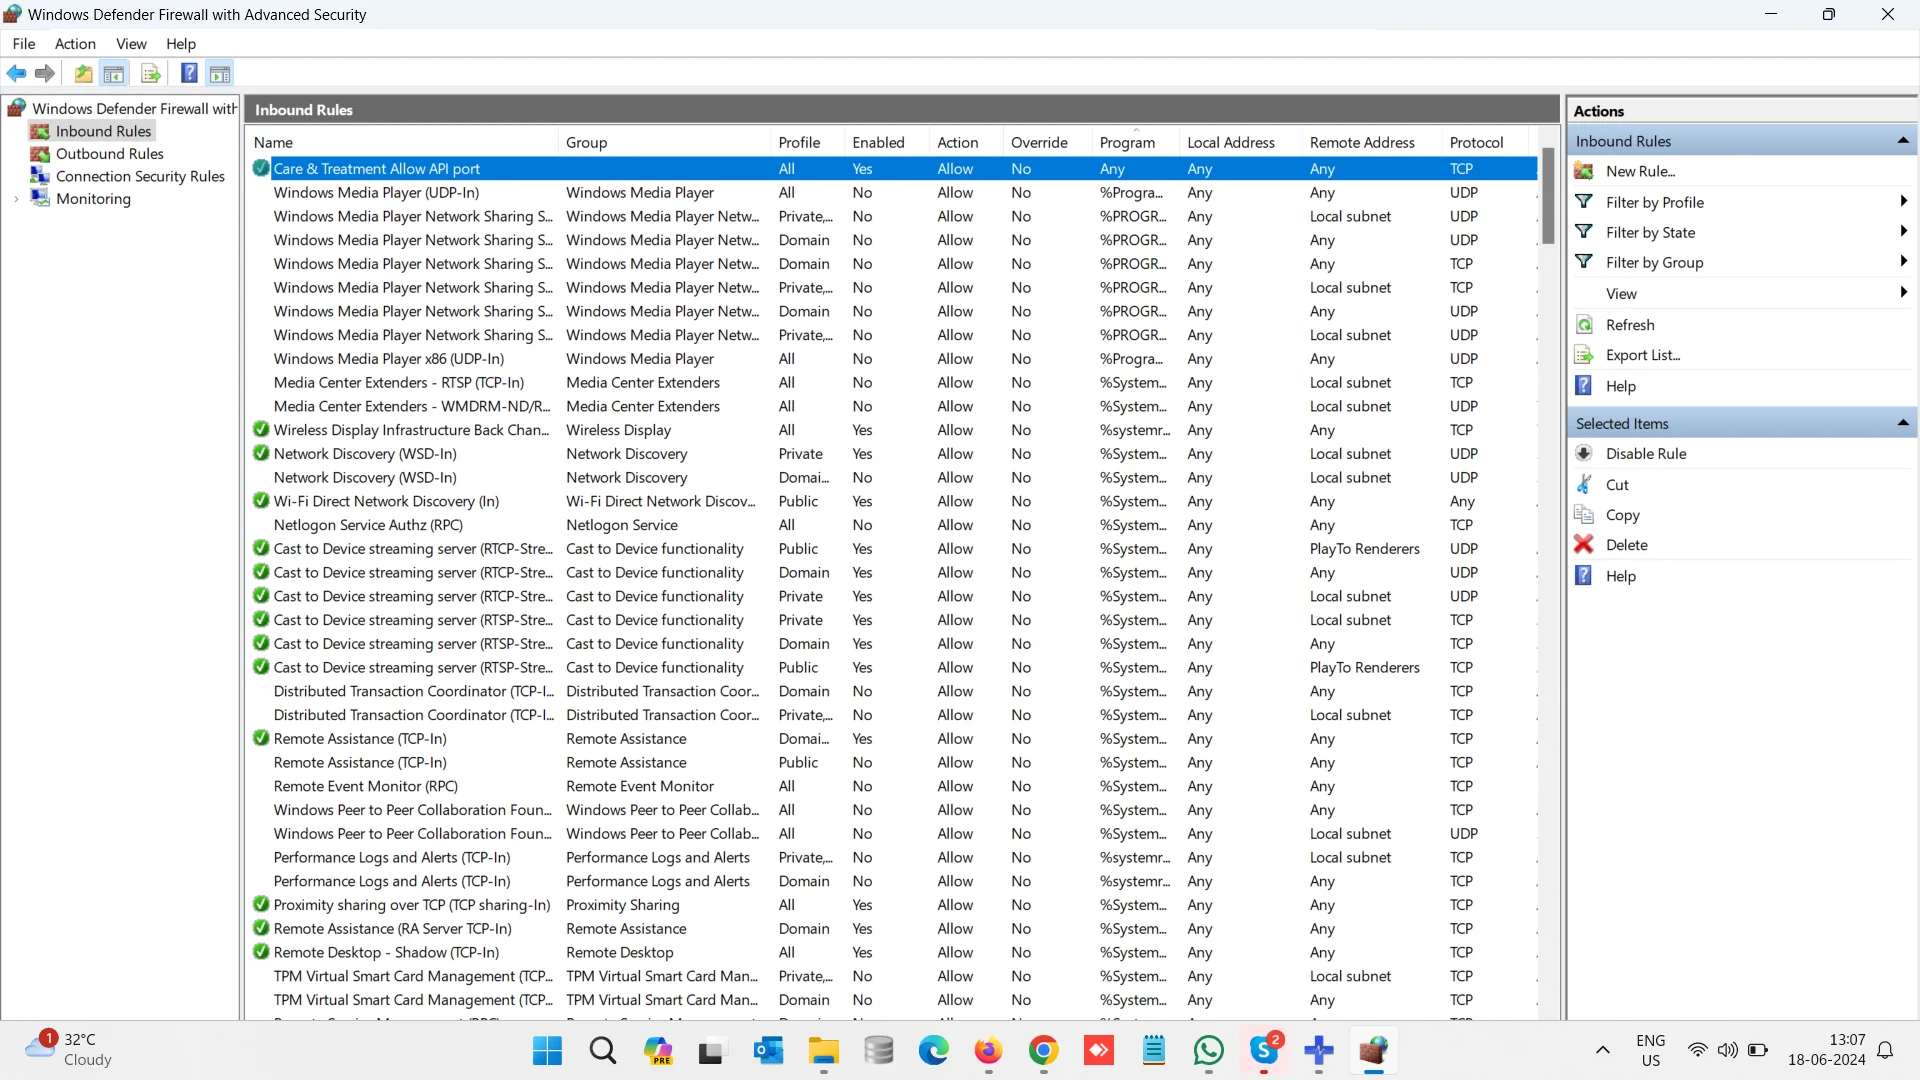
11. Verify and Test
You can test the rule by attempting to connect to the specified port from another device or application.
1. Open the settings menu on your primary device.
2. Go to Network & Internet
3. Here you have 2 option, if you are connected over Wifi or LAN.
4. If you are connected on Wi-Fi, click on Wi-Fi or if you are connected on LAN click on Ethernet
5. In case of Wi-Fi network, find your connected Wi-Fi network by name and click to go inside.
6. In case of LAN network, find your connected Ethernet port and click to go inside.
7. Find the Network profile type, make sure it is set to Private network
8. This settings is required in some computers not for all. But we recommend to set for your computer.
How to get started and
take treatment photos using a mobile?
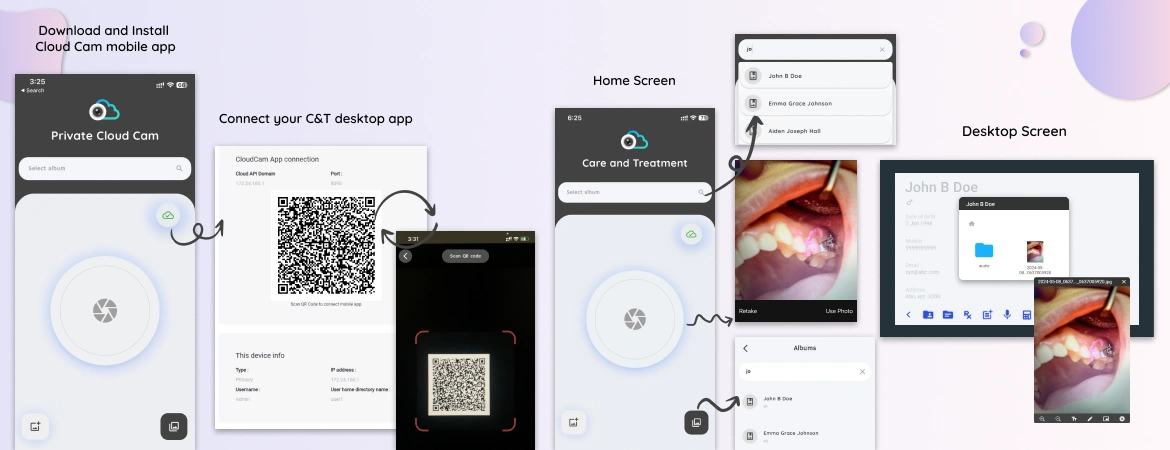
Download and Install Cloud Cam mobile app
- You need to download IOS or Android app in your mobile and both are available on App store and Play store.
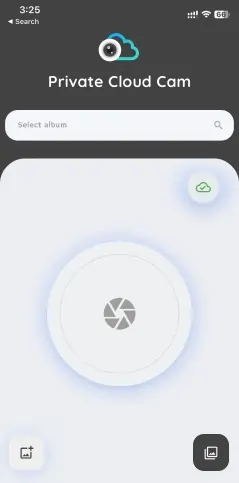
- Once you download, open the app. It will look like below.
- You will see Private Cloud Cam home screen. This app is multi-purpose and can be connected with your C&T desktop app.
Set same network connection for mobile and computer
- Make sure your mobile app Cloud Cam and your desktop app Care & Treatment both are on the same network.
- This means you need a LAN or Wi-Fi network on your premises. Internet is not mandatory, only local network is required for connection.
- If your computer is on the LAN network, you need to check which network it is using, you need to use same network Wi-Fi connection on your mobile phone you want to connect.
- If you are in the Wi-Fi network, then connect the same Wi-Fi on mobile phone and on your computer.
- So, same network is mandatory to connect your mobile camera using mobile app with desktop app.
- If you are on a different network, then connection will not be possible.
Add settings to connect your C&T desktop app
- Once you are on app the home screen, you need to open settings. To do that click on the cloud
icon.
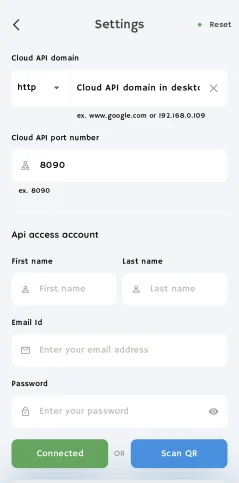
- In settings, you have 2 ways to add required settings. 1. Manual entry 2. Using QR code
- Manual entry require data to be filled by self and QR code allow you to scan the QR image available in your desktop app settings.
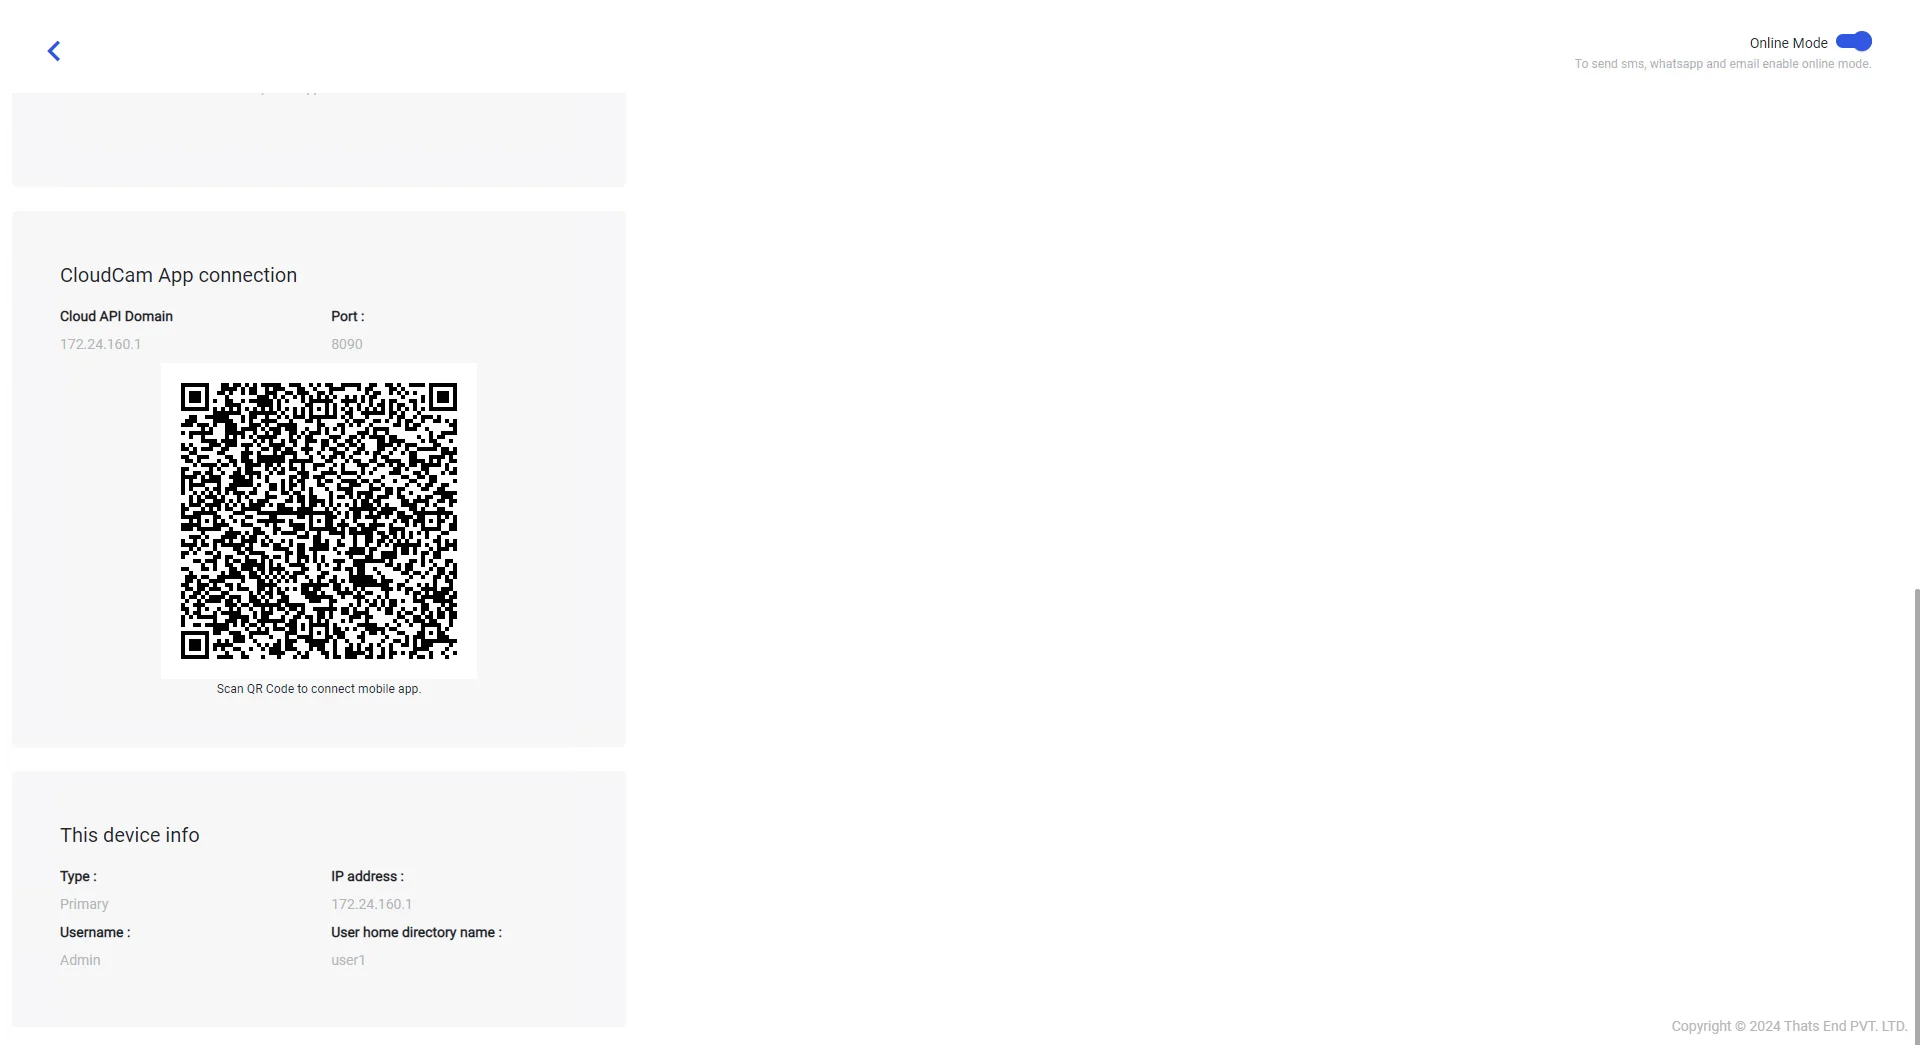
- Before you move forward, you need to open your desktop app and go to settings. You will find the Cloud Cam mobile app connection section where you will find connection settings, need to use in mobile application.
- Manual entry: Using this way, you need to enter details as shown in below screenshot. You need to add an IP address from your desktop app provided in Cloud API Domain. Also, you need to create your own account for API access account, so enter your details as you want like name, email and new password.
- Using QR code: It’s so easy to connect using QR code. You just have to open your desktop app settings where you will get QR code in Cloud Cam mobile app connection section. Now, open your Cloud Cam mobile app and go to settings. You will get Scan QR button. Click and scan QR in a desktop app and wait a while, it will finish the connection setup automatically.
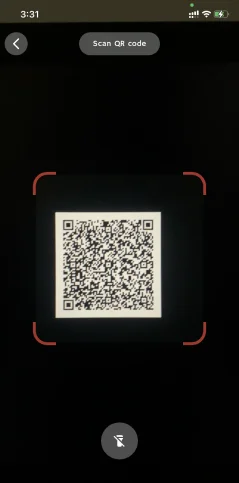
- Once your app settings are ready in any way manually or using QR code, you will be navigated to Care and Treatment home screen. This shows that your mobile app is connected with your desktop app.
- Now, you can start using mobile app to take treatment photos.
Search patient on Cloud Cam mobile app
- Once your app is connected, from home screen you can search patient.
- On home screen you will see a text box with placeholder Select album. Type your patient's name and it will show your suggestion with all relevant patient name.
- Choose your patient name from the suggested name or keep typing the more letters of patient name to get the exact match.
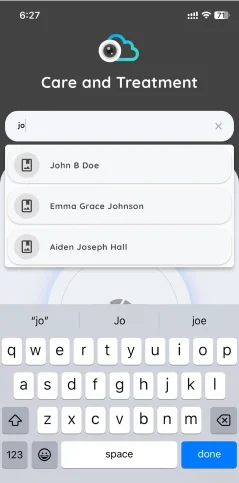
Take patient treatment photo
- Now, it’s time to take photo. Once you select your patient's name, you just have to click on the big shutter
button to start your camera.
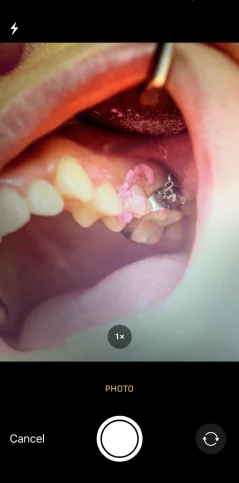
- As the camera is open take your photo as you want. Once the photo is captured, it will ask for confirmation.
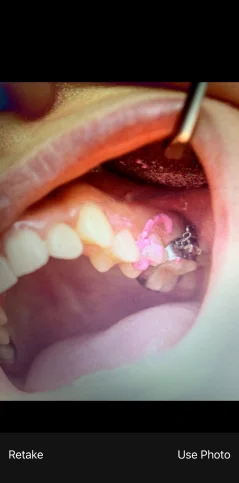
- You need to confirm for Retake or Use Photo As per confirmation, the app will upload the photo to your computer and will save automatically in your Care & Treatment desktop app.
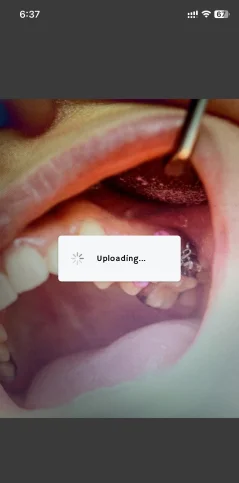
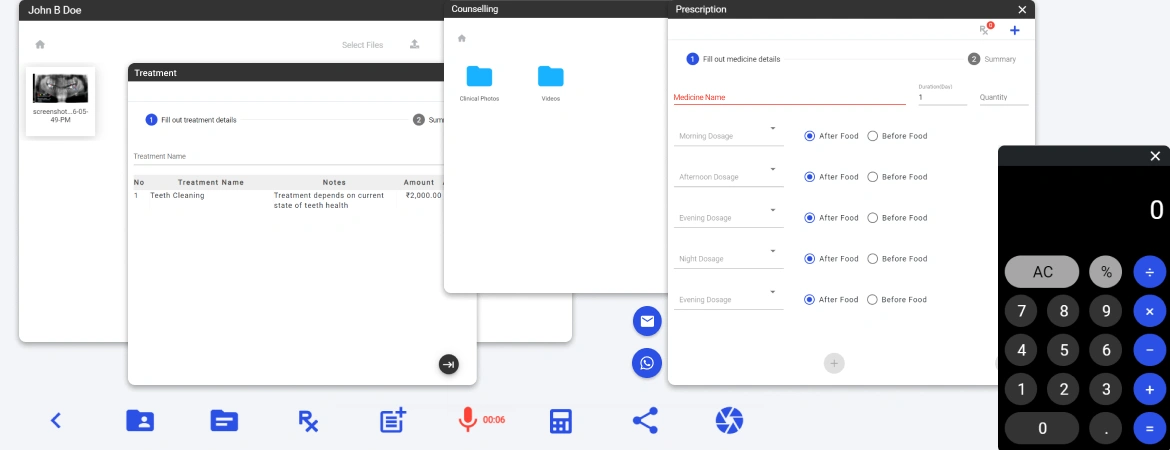
- As the photo is uploaded, it will be available on your computer. You can open the patient file in your Care & Treatment desktop app and check the new photo just clicked.
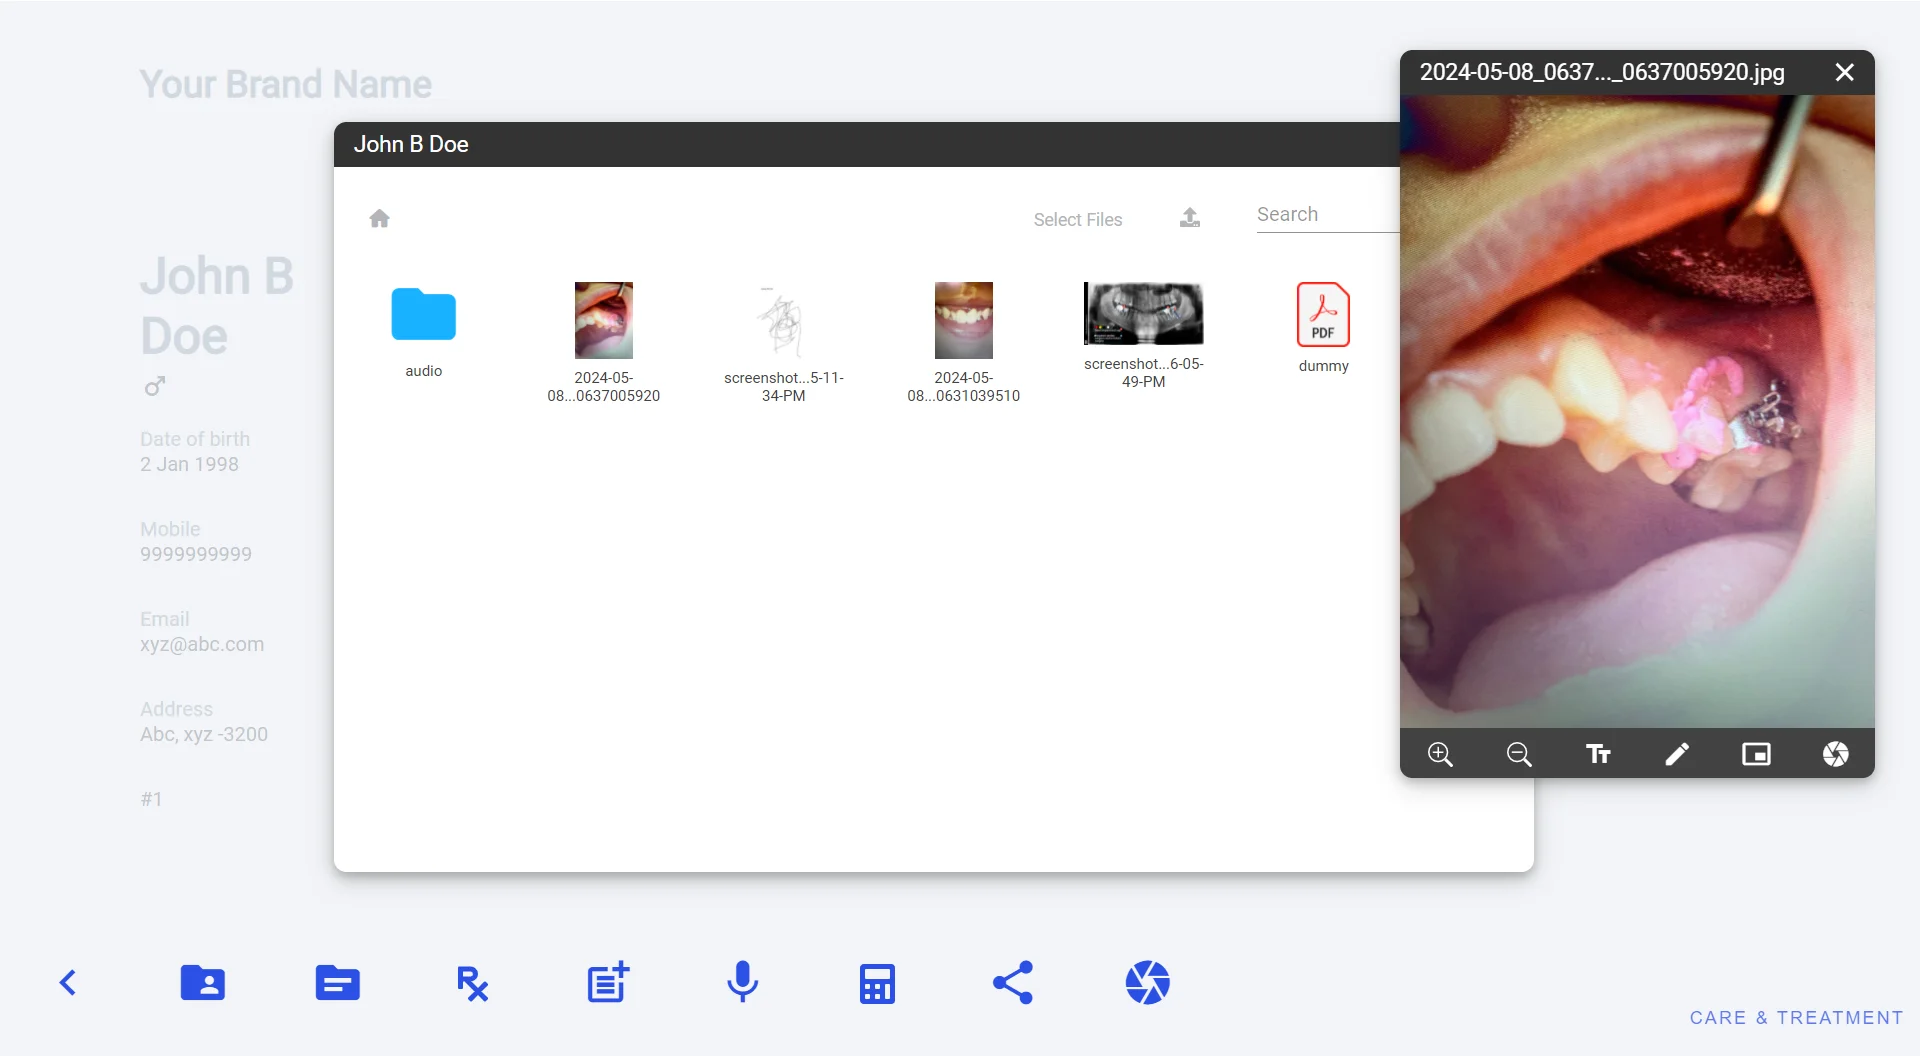
- This is the end of the process to take photo. You can repeat the process to take another photo for same patient or change the patient and do the same.
Adding Treatment Photos Using Mobile Gallery
- As a consulting doctor who visits multiple clinics, capturing many treatment photos in your gallery is part of your routine. When you return to your clinic, the Care & Treatment desktop app simplifies uploading these photos directly into your patients' files.
- Now, it’s time to add photos. Once you select your patient's name, just click on the gallery icon. Allow permission by simply clicking on 'Full Access Permission.
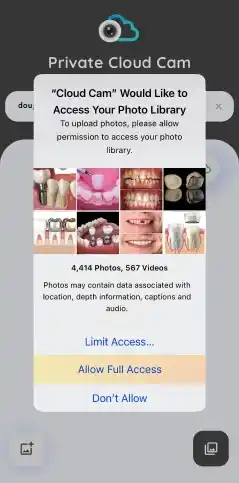
- Your gallery is now open. Select your photos and tap the "Add" button located at the top right corner. Your selected photos will be uploaded one by one.
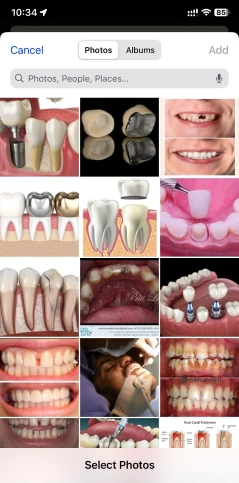
- Your selected photos will be uploaded one by one.
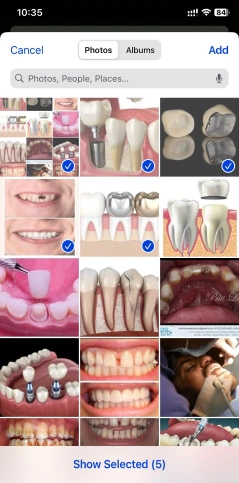
- As the photos is uploaded, it will be available on your computer. You can open the patient file in your Care & Treatment desktop app and check the uploaded photos.
Access patient treatment photo in your mobile
- When you finish taking your photos, go back to home screen. you will see the album icon at bottom right corner. Click to find patient file to view treatment photos.
- When you open Albums formally known as Patient File screen, you will need to search for the patient name in a search box or you can scroll through the list.
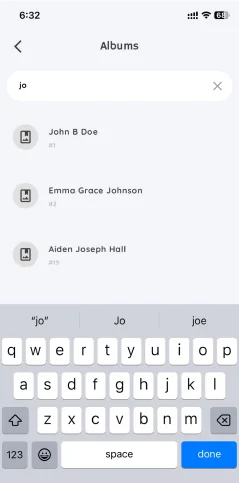
- Once you get the right patient you are looking for, click on and you will be navigated to Patient File where you will see all the photos saved in your computer.
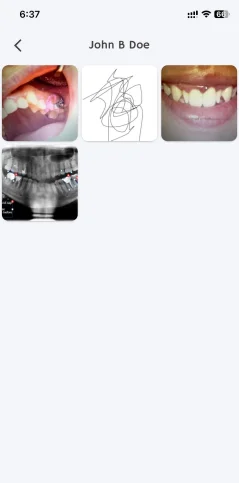
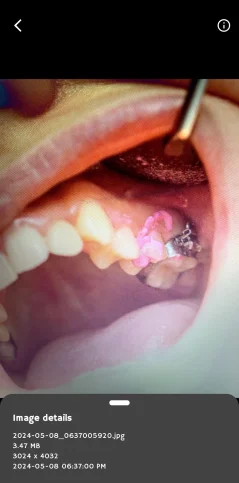
- You can click on any image to view in full-screen mode and also zoom to check details.
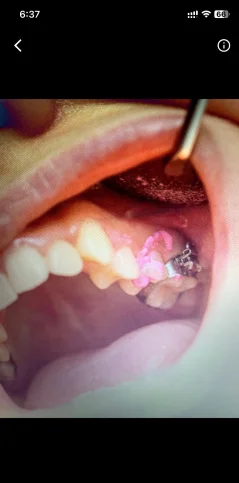
- To view photo’s raw data you can click on info icon at top right corner of full-screen mode.
To sum up, this is the amazing feature which is very user friendly and effective. By using this feature, you don’t have to organize your patient data, you can take advantage of your high-resolution mobile camera, your mobile storage won’t get full of your professional practice data, no internet connection required just the same network. So, there are lots of advantages and absolutely very easy.


