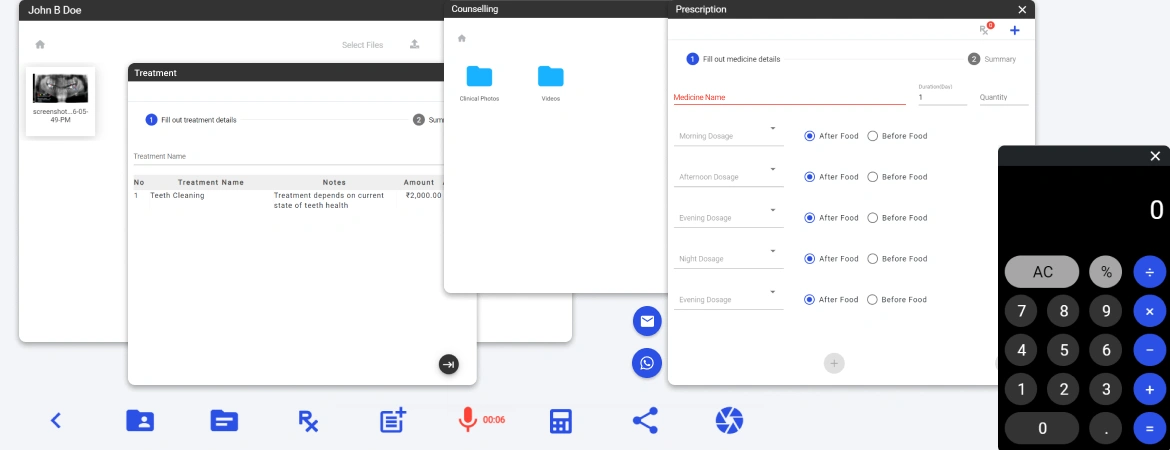
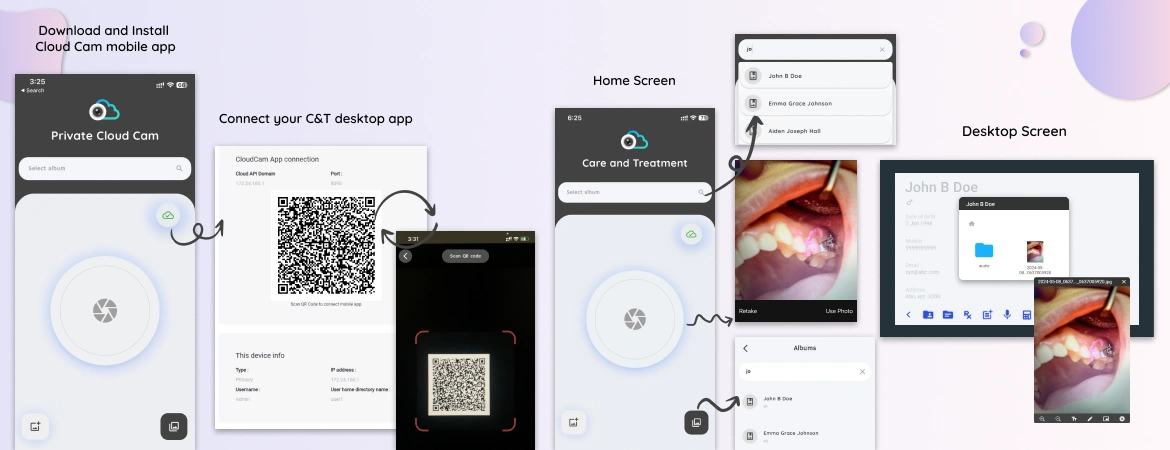
Patient consultation is one of the important part of medical practice. This plays a crucial role in patient convincing. Having easy, quick but simple patient consultation increase the higher chances of patient satisfaction. Care and Treatment provide state of the art process for your patient consultation, very simple to understand by patient and result oriented for doctors. There is no other easy way, provided by other softwares or online service.
Care and Treatment desktop app provides the best way for patient consultations to improve general practice and align with modern techno driven approach. It has features which are really needed for doctors. This includes communication, data sharing and data management for individual patient.
This app has features to perform techno driven patient consultation and all of those are very easy and as a doctor you can use them quickly in front of the patient.
Prerequisites for setting up Care & Treatment desktop app
First you need to set up your own Care and Treatment desktop app in your computer. It's a window operating system based desktop software which required few clicks to finish installation process. Go to download page and follow the instructions and you will have your own installation ready. Once you install the app you will have an app icon on your computer desktop. Open the app by double clicking on icon and follow the app tour to get basic overview.
How to start Patient Consultation ?
To start with patient consultation, you need to add your patient in Care and Treatment app. This is a very easy process and you can follow the patient directory page. Quickly, you can add new patient from your app dashboard. Once you have a patient in your app, you can start patient consultation by searching and click on patient name, new screen will open where you can start patient consultation. Your new screen will look like below.
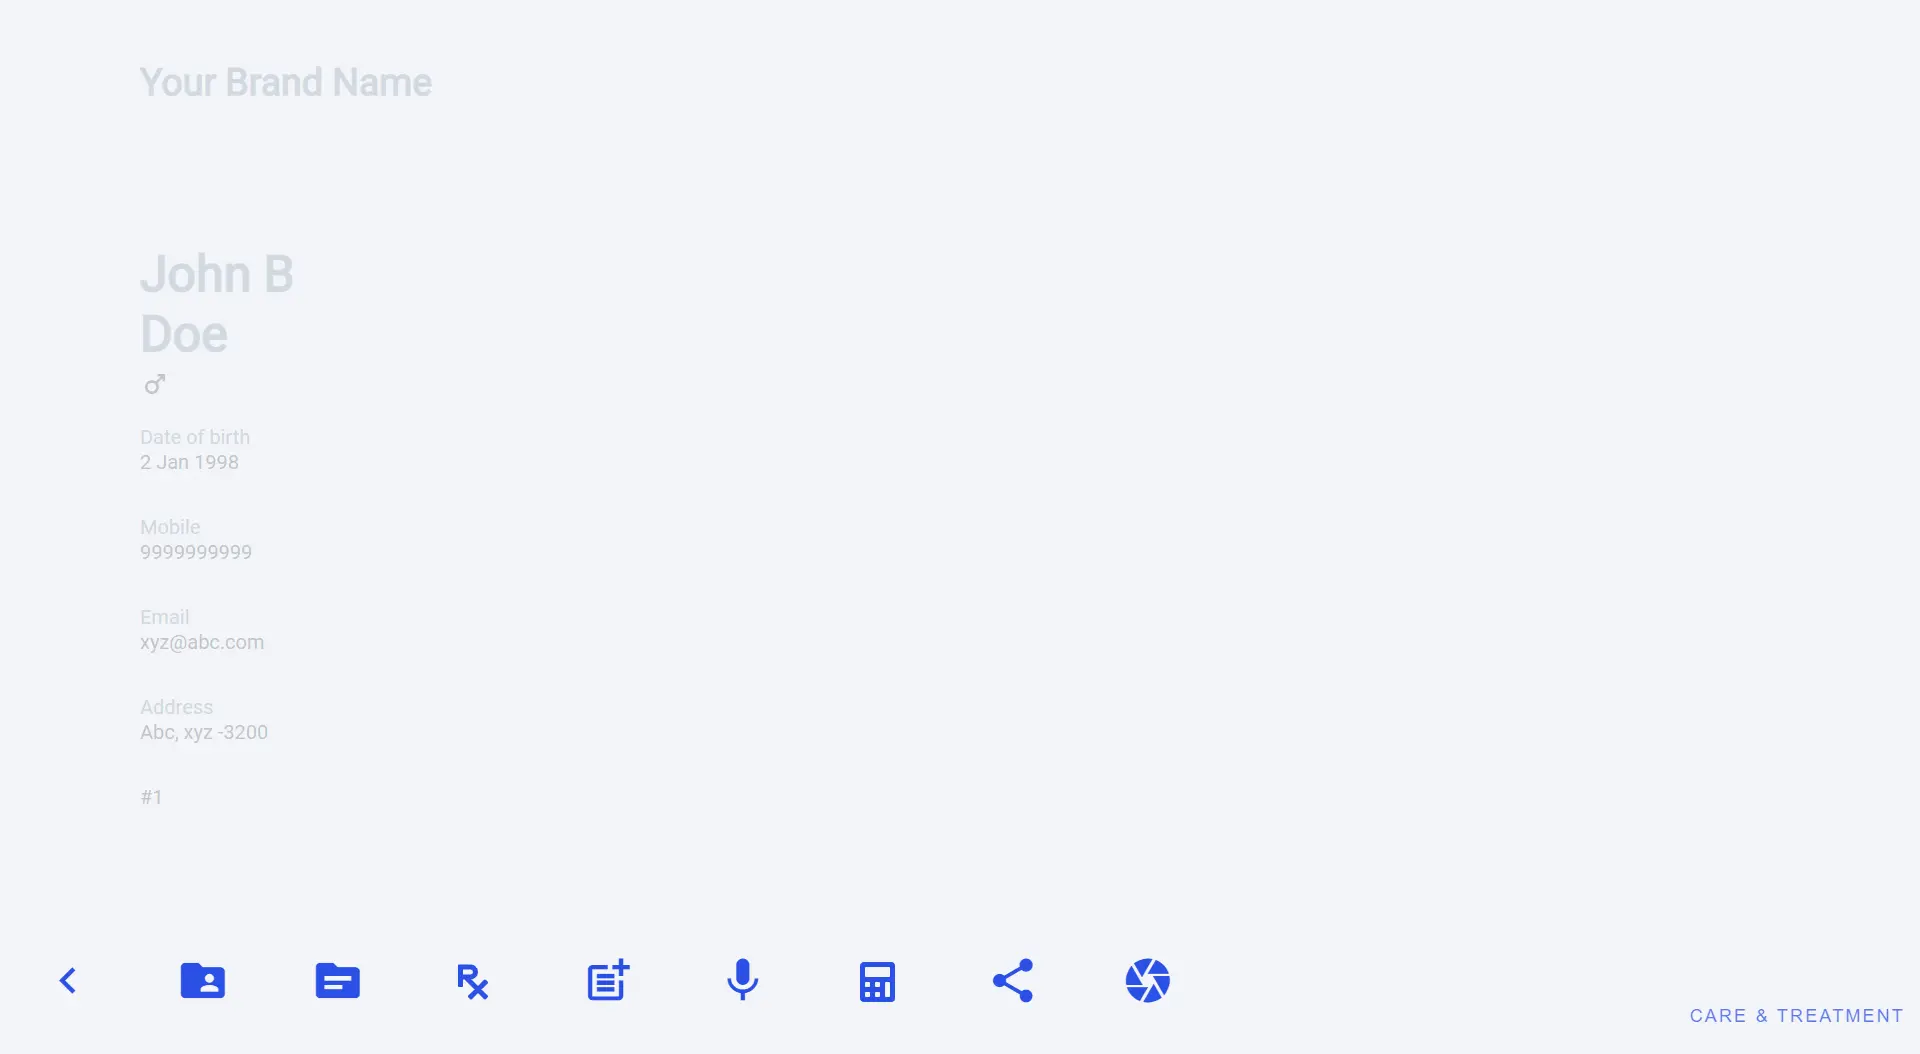
So, easy way to get started with techno driven patient consultation is, during your OPD you need to search the patient name or mobile number and find the right patient or add new patient. Click on the patient name and your patient consultation screen will open and you can start the consultation process with the patient. Here’s a breakdown of what it entails.
Available features for Patient Consultation.
 Patient File
This is your original digital file for your patient where you save all the data like consultation docs, prescription, treatment plan, consultation audio, X-rays, etc.
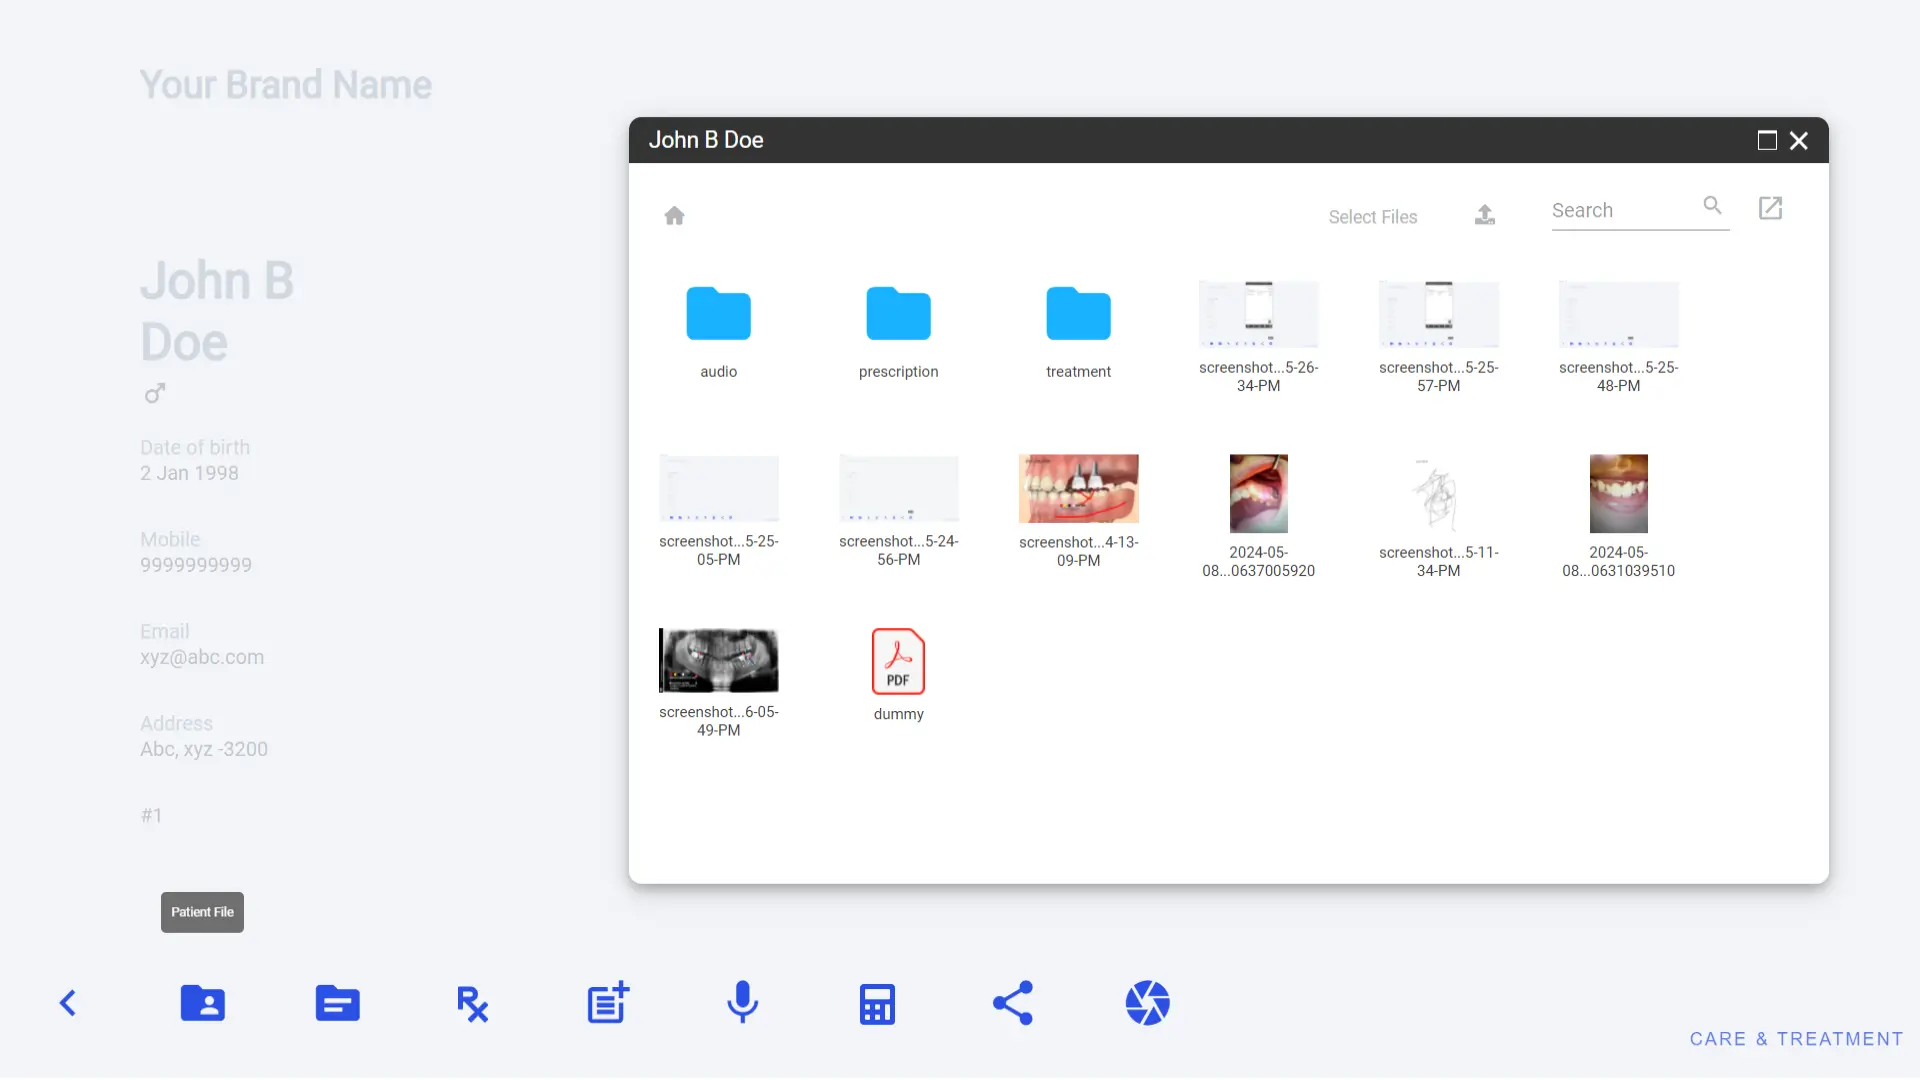
To add external images or docs of patient, you can connect your WhatsApp web or pen drive and download the docs and upload in the patient file. Once external images and docs are uploaded or copy and paste you can start using those and even share.
To open a physical folder of a specific patient, you will see an open external icon at the top right corner of the patient file window, click and it will open a direct folder. In direct folder, you can perform simple copy, paste and delete action for docs in patient file.
To find a specific file in a window, there is a search box at the top right side of the window. You can type the file name. It will show relevant files with a similar name. This makes your process faster when there are too many documents.
For more operation, right click on any file and you will get 2 options.
1. Rename: Allow you to change the file name.
2. Share: Allow you to a share file with any WhatsApp number or email.
You can open any image or PDF file by double click. This will open a new screen where you can present your treatment plan or procedure to the patient. This is your main digital consultation screen. To know more about this feature, go to the page Digital Consultation.
 Counselling DOCs
Counselling DOCs provide readymade template for images and videos of body anatomy and treatments which can be used for consultation with patient. This makes easy to explain the treatment and keep medical records of diagnosis.
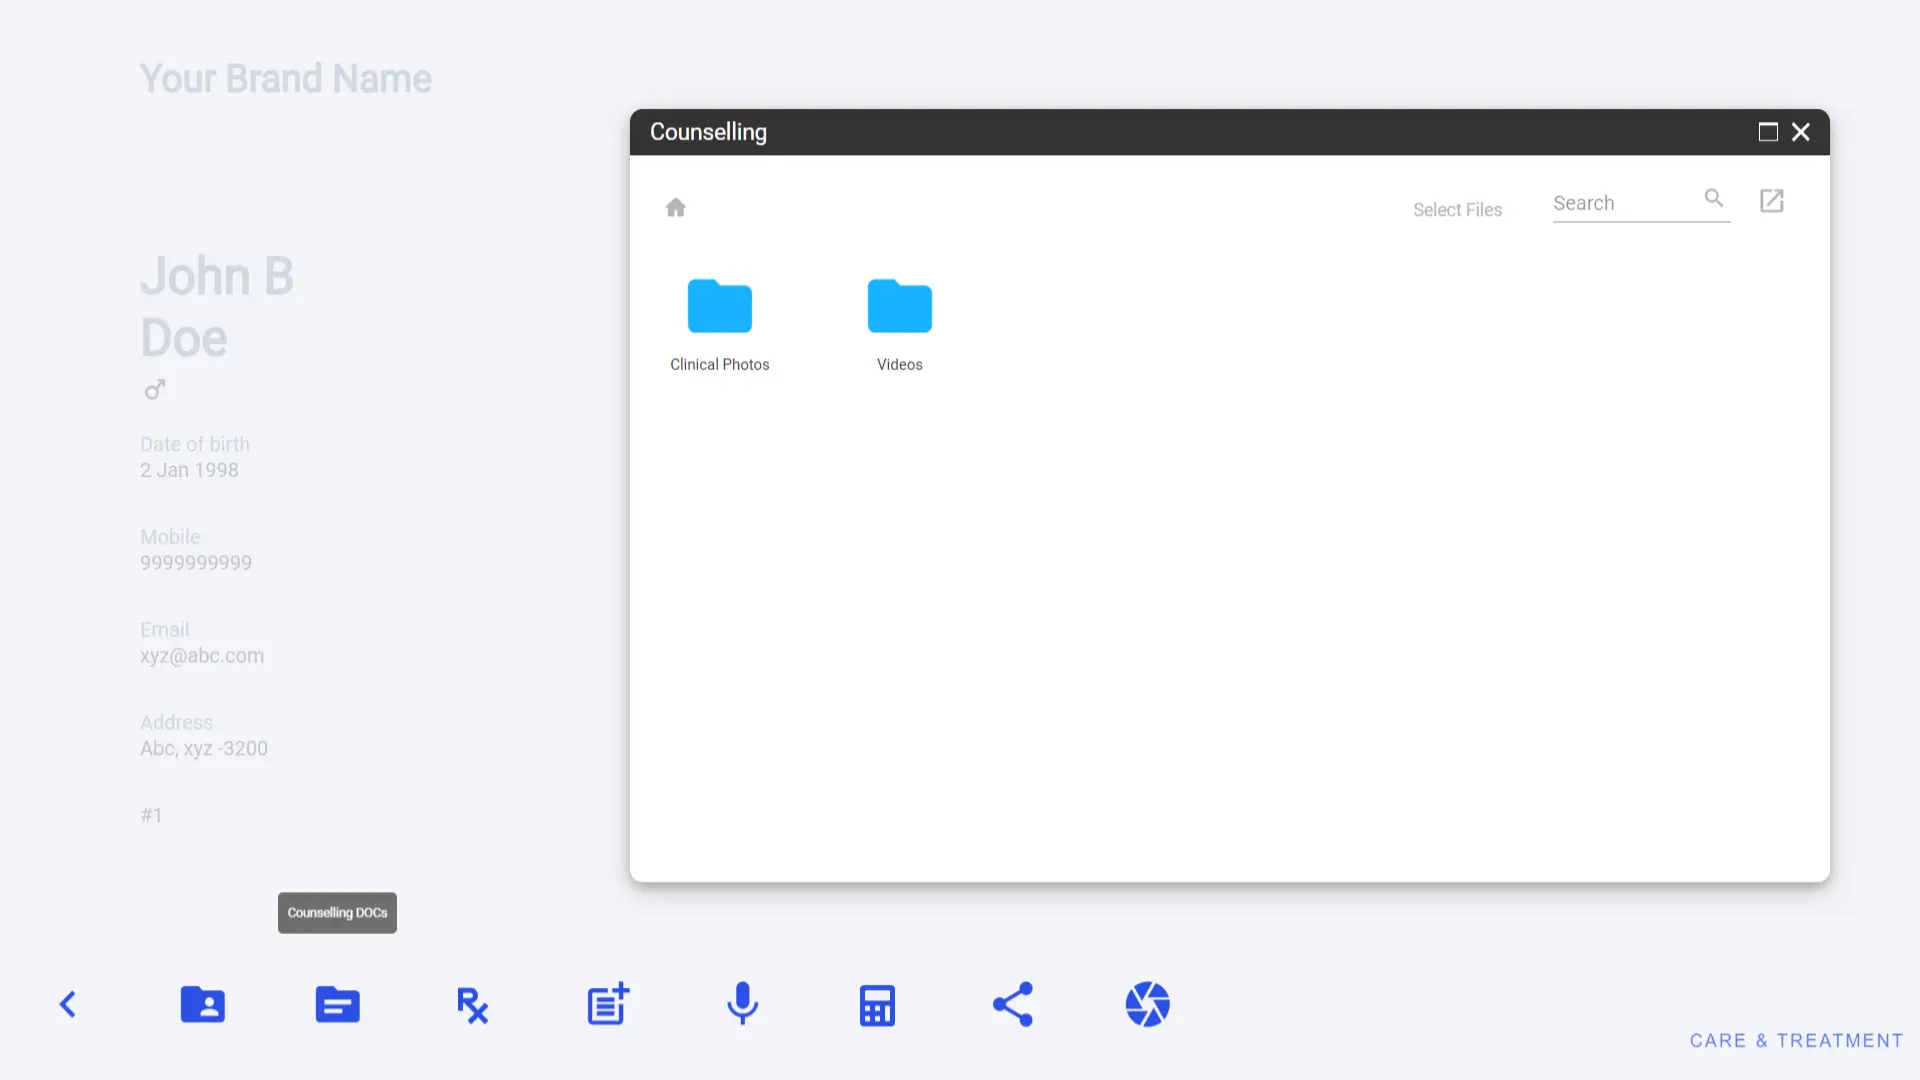
Basic process is open your required counselling doc by double click. This will open a new screen where you can present your treatment plan or procedure to the patient. This is your main digital consultation screen. To know more about this feature, go to section Digital Consultation Screen. At the end of your consultation you can take a screenshot of your screen to keep the medical record, It’s so easy.
You can also add your own templates, which can be used later during patient consultation. To add your custom template, open the physical folder of Counselling DOCs window. To do that click on open external icon at top right corner of the window. It will open a folder. In folder, you can perform simple copy, paste and delete action for your template.
 Prescription
Prescription is one of the useful feature for your practice and you need it frequently. It’s very easy, quick and simple that you will love this feature to generate your prescription and share with your patient via WhatsApp or Email. Compared to other software and online services, this requires minimum input to generate prescription as you want and same time save inside patient file for future records.
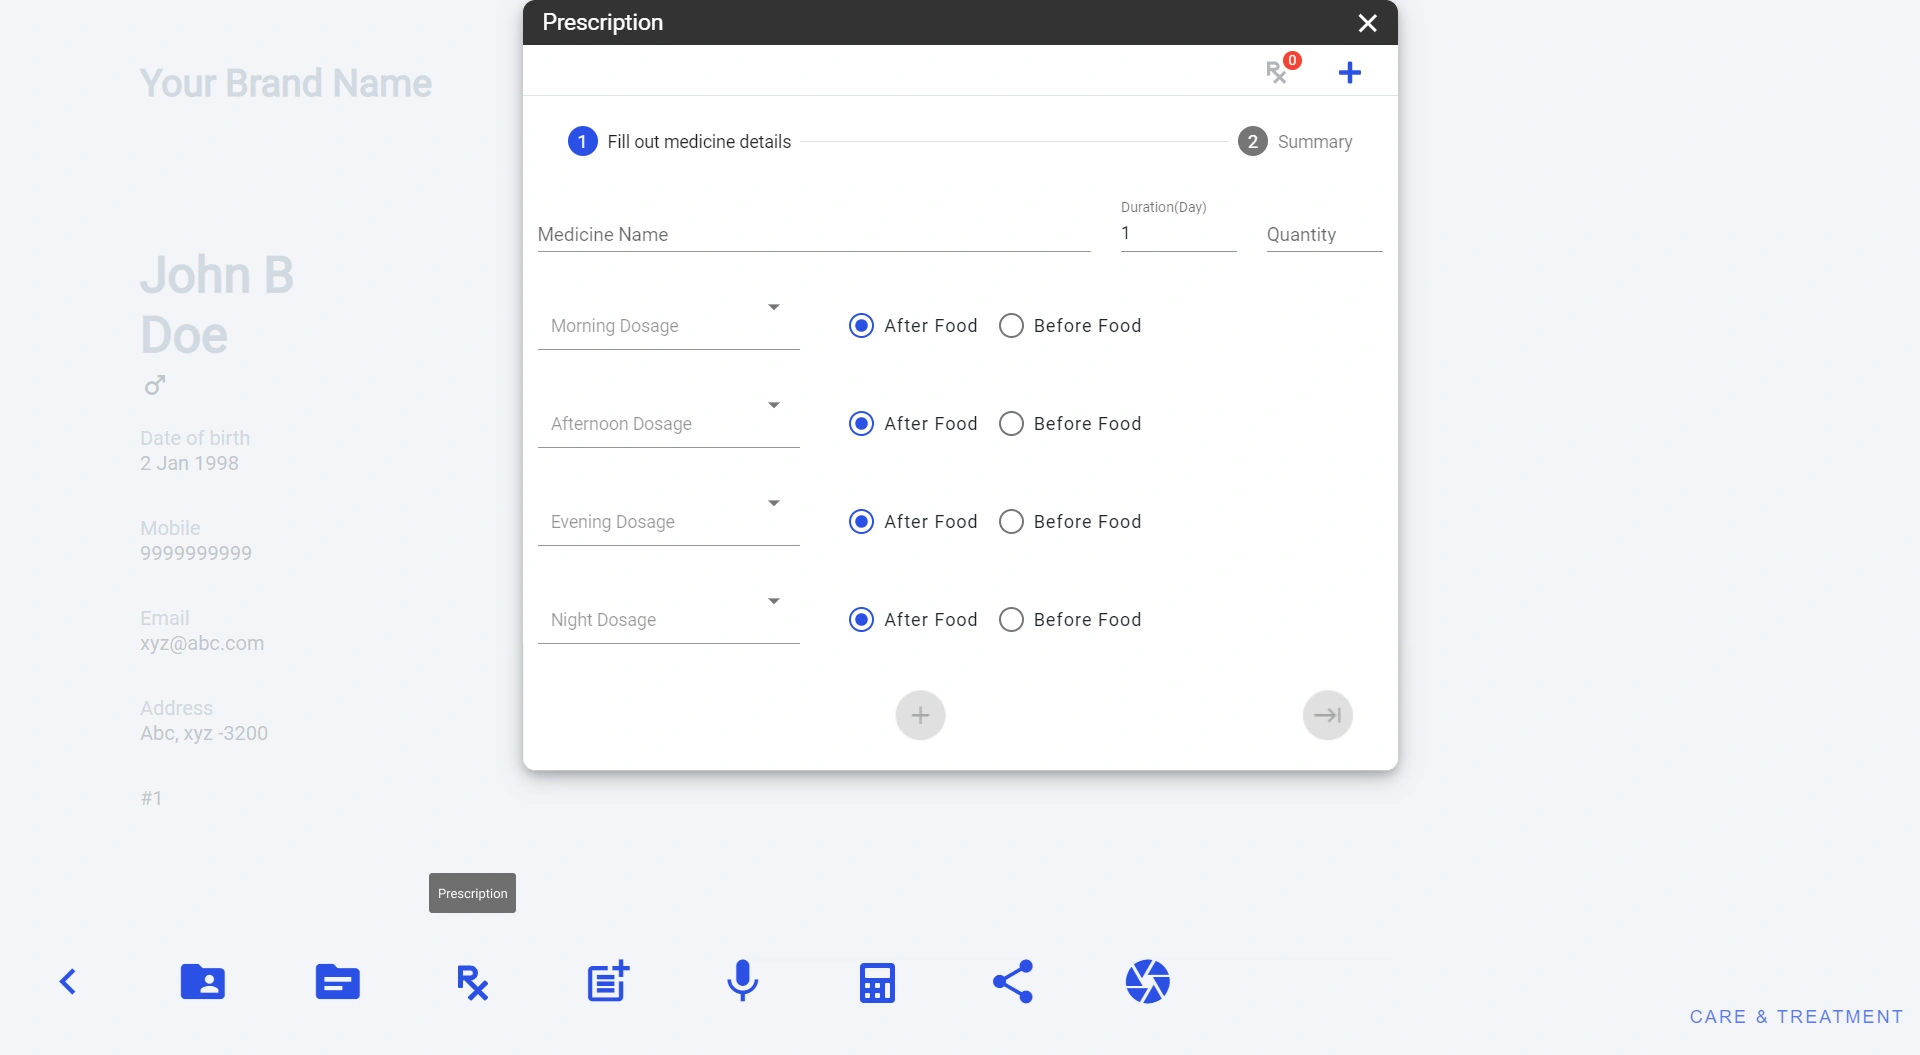
To generate prescription, you need a list of medicines. So, first you add new medicine by clicking on plusicon at the top right corner of the prescription window. It will open a new small pop-up window to add new medicine as below.
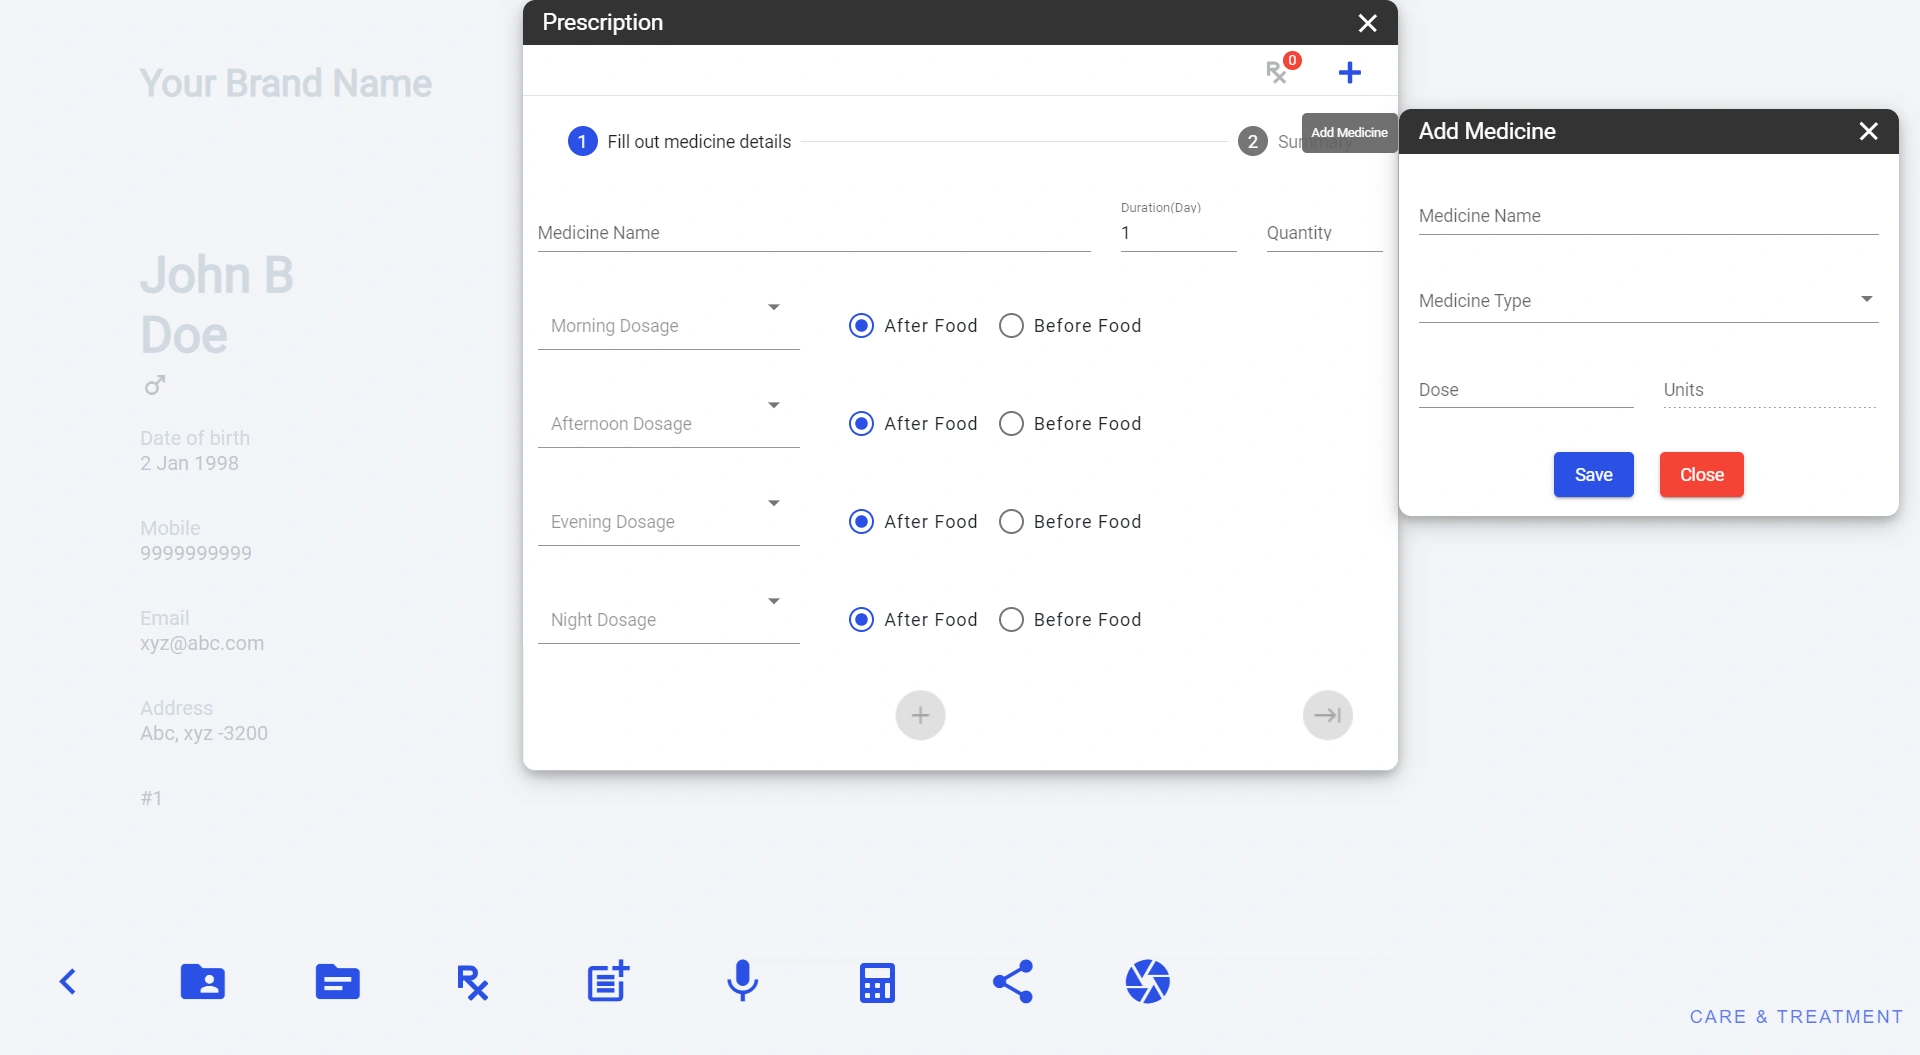
Add required details of medicine and click on save button. You can add as many medicines as you want, there is no limitation. Once you finish adding medicines, you are ready to create new prescription. You can add new medicines at any time and also edit already added medicine info. This is so easy, and you can manage everything in one place.
To start with the new prescription follow below steps.
1. Type medicine name or select from suggestion.
2. Enter duration in days. This means how many days you want to prescribe the medicine. This can be simple number like 1,2,3 etc.
3. Select your dosage for specific time with after/before food instruction.
4. Click on button to add medicine in the prescription list.
5. Follow the same process to add another medicine in your prescription list. Keep going until you finish with all medicines.
6. Once done click on next button or summary tab, it will show a summary of the prescription.
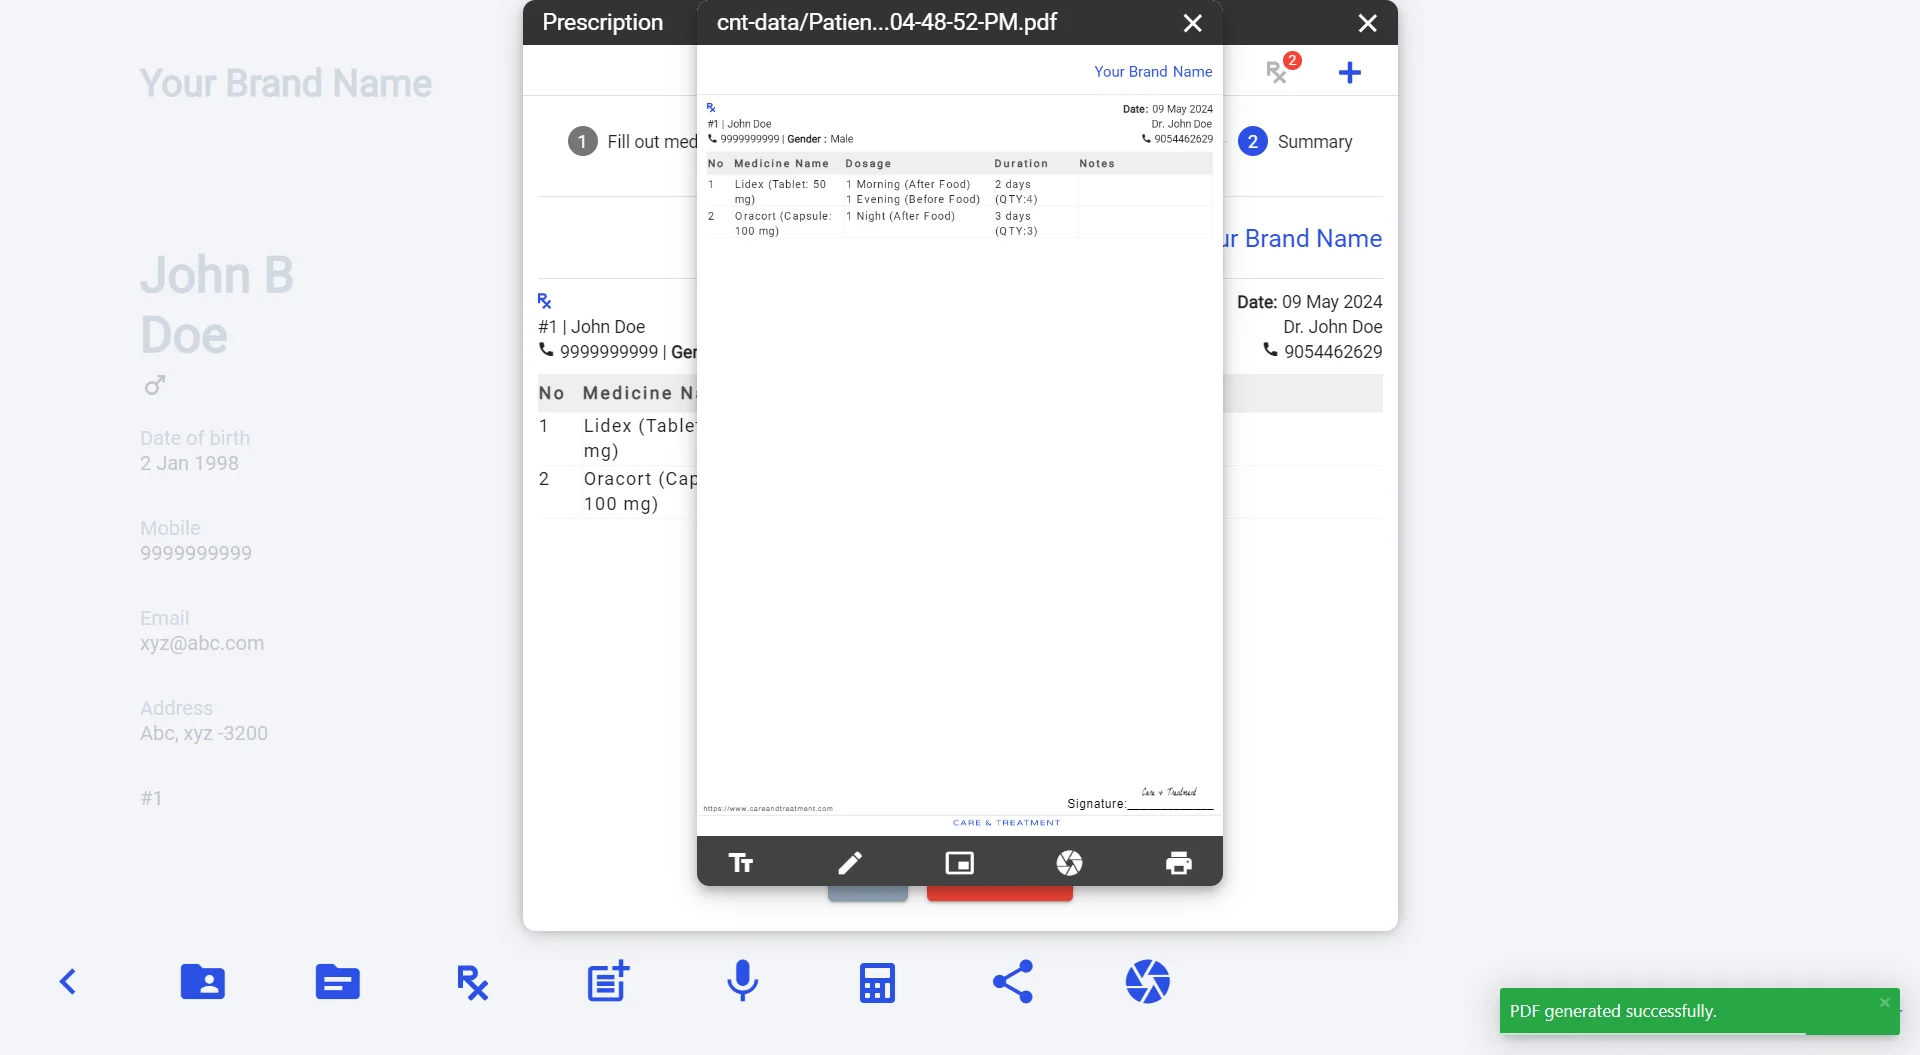
7. Click on generate PDF button to get the prescription PDF. It will save the newly generated prescription in patient file and also open in new window.
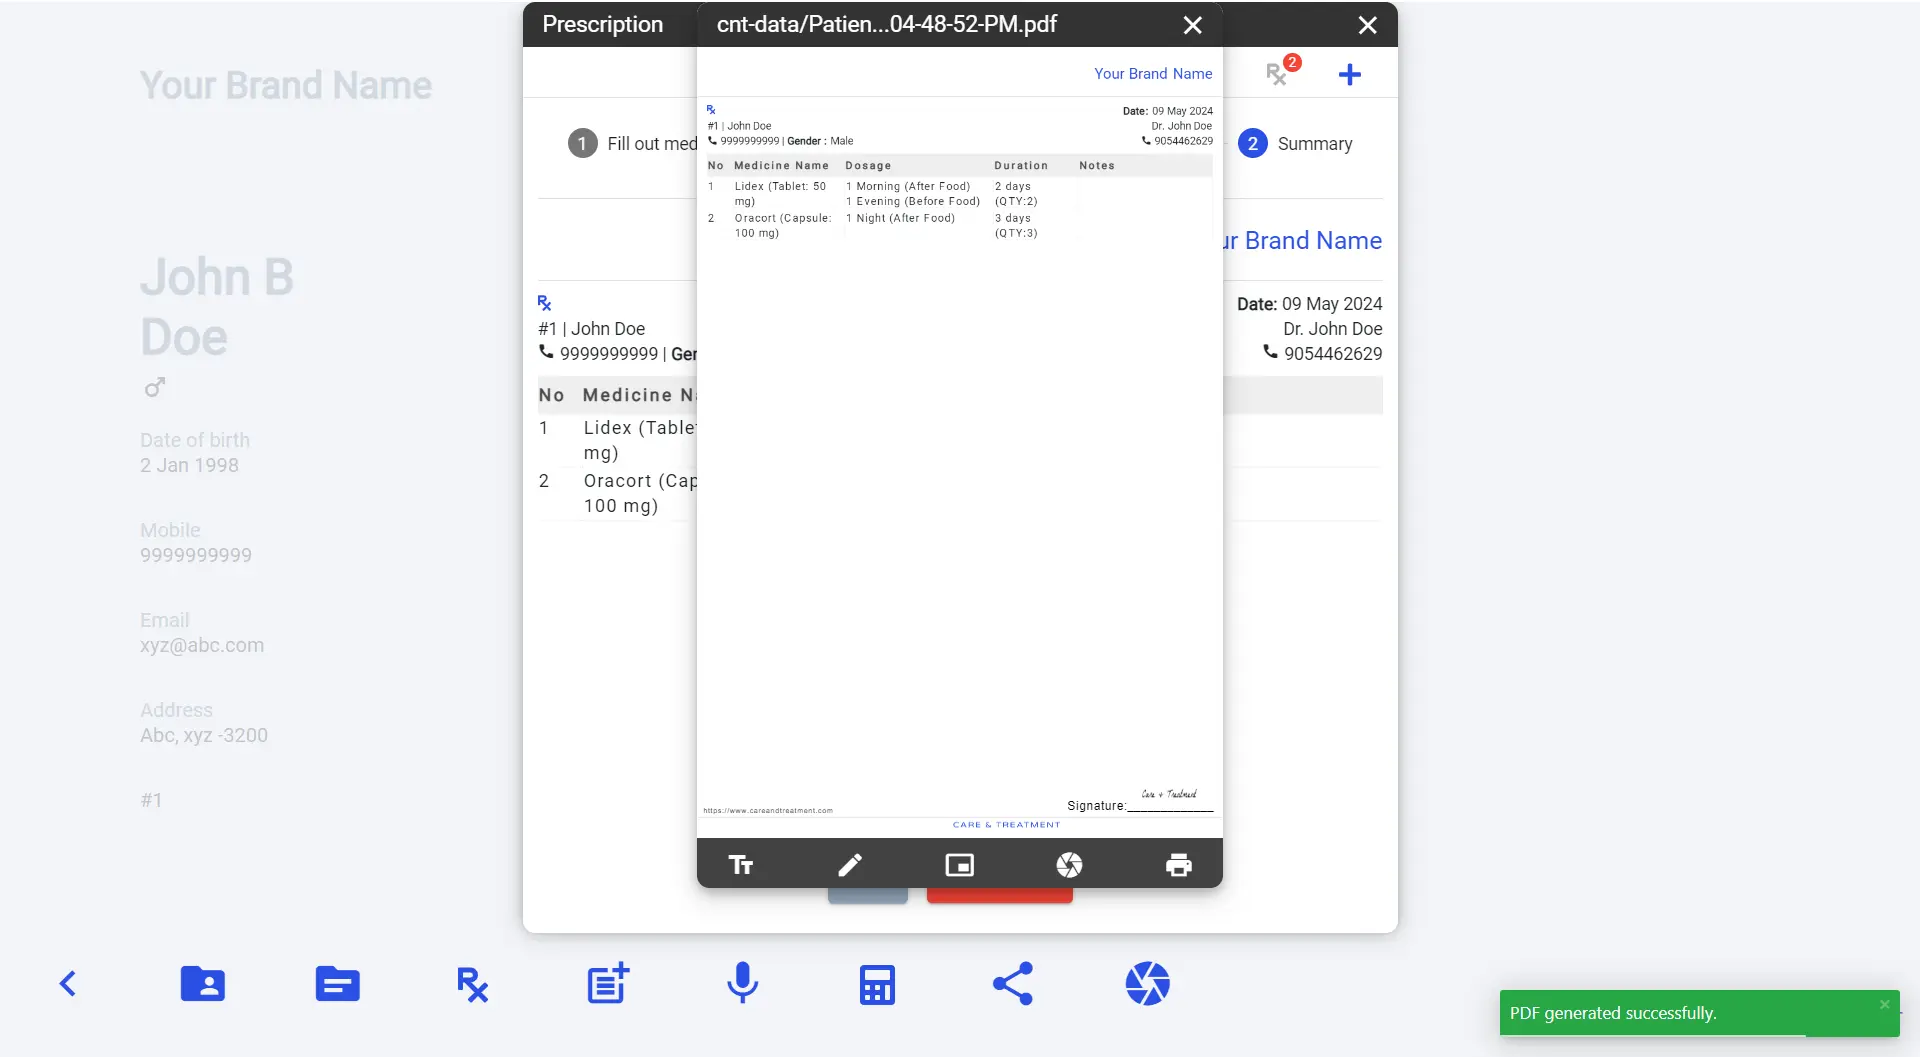
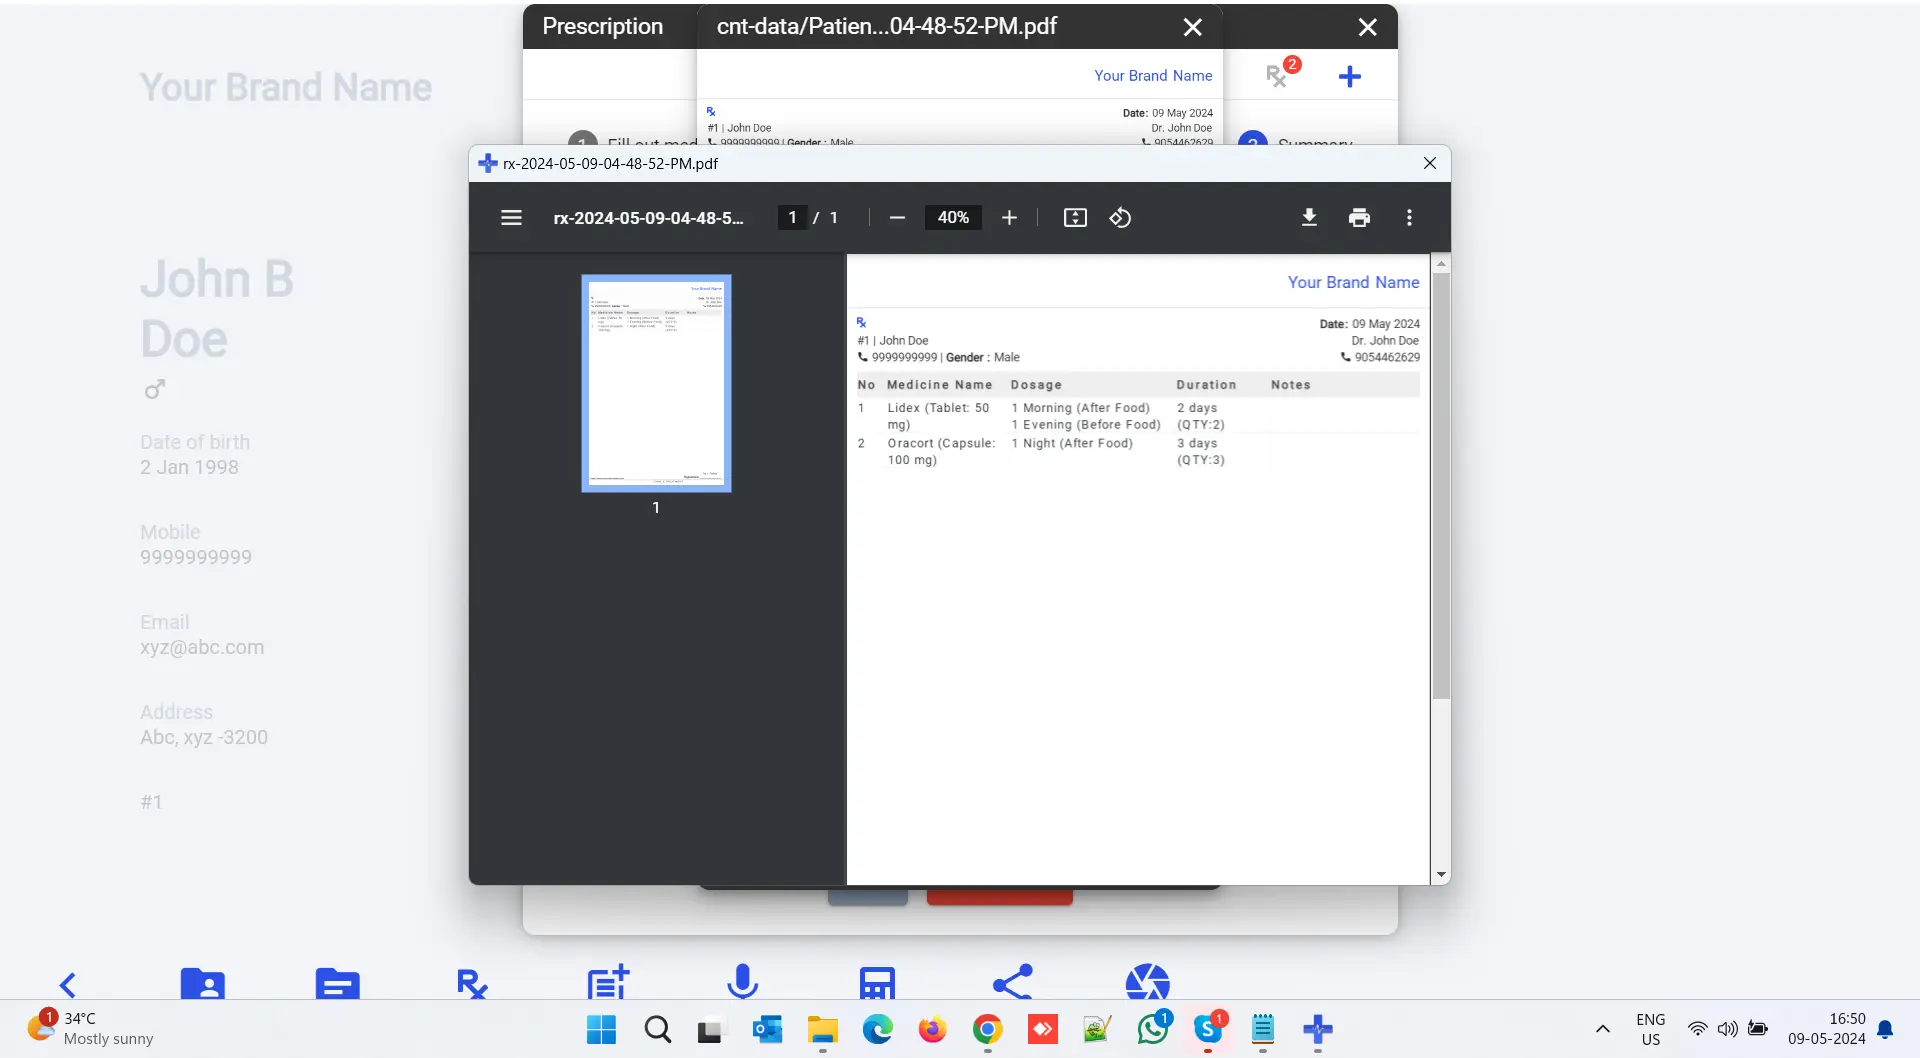
8. You can take the print of the prescription by clicking on the print icon on prescription PDF window.
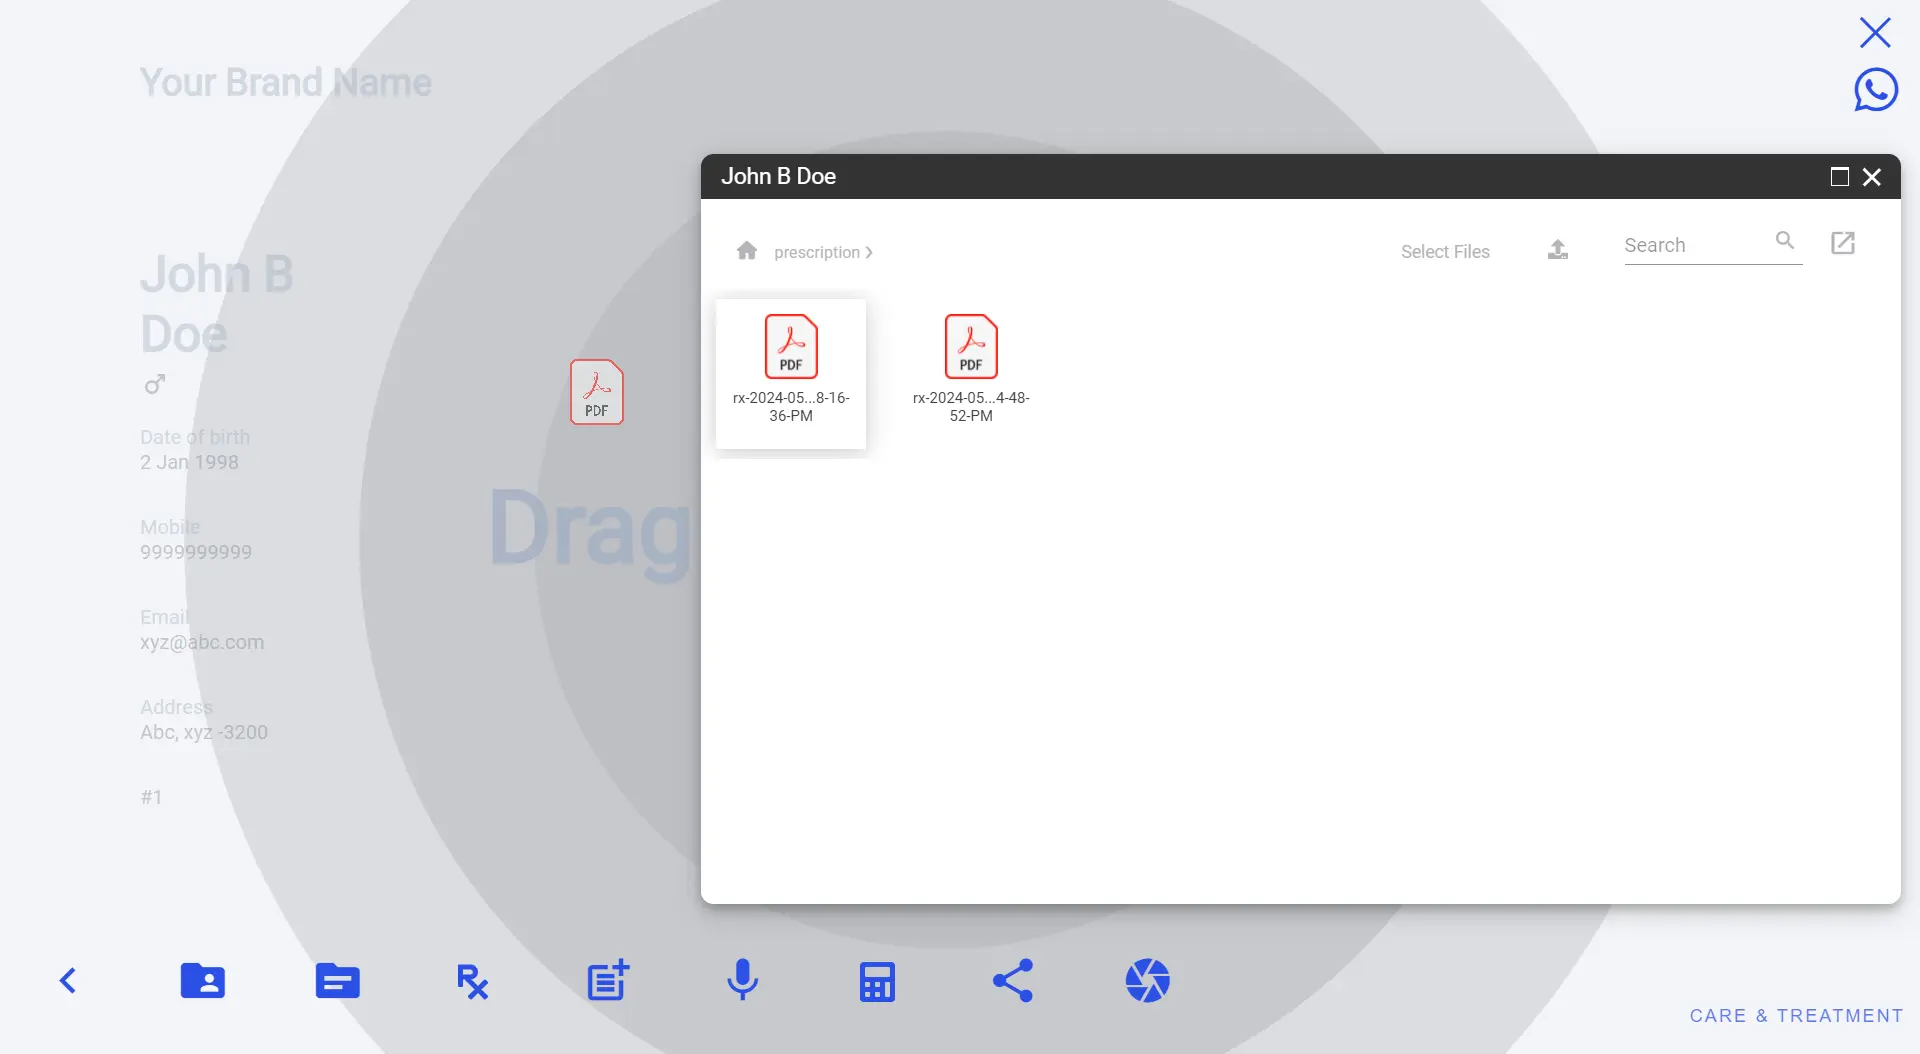
9. You can share the prescription PDF with patient on their WhatsApp or Email. Just go to share and select WhatsApp
or Email
. When share starts, it will open your patient file and you can pick the right prescription PDF and drag and drop to send WhatsApp or Email, It’s so easy.
 Treatment
It’s difficult when keeping the treatment log, specially when it’s a long-term process. Care and Treatment provide effective but simple feature called Treatment to manage agreed treatment plan along with price. It’s almost similar to a prescription. Generating treatment plan and share with your patient via WhatsApp or Email is very easy. Compared to other software and online services, this requires minimum input to generate treatment plan along with price and same time save inside patient file for future records.
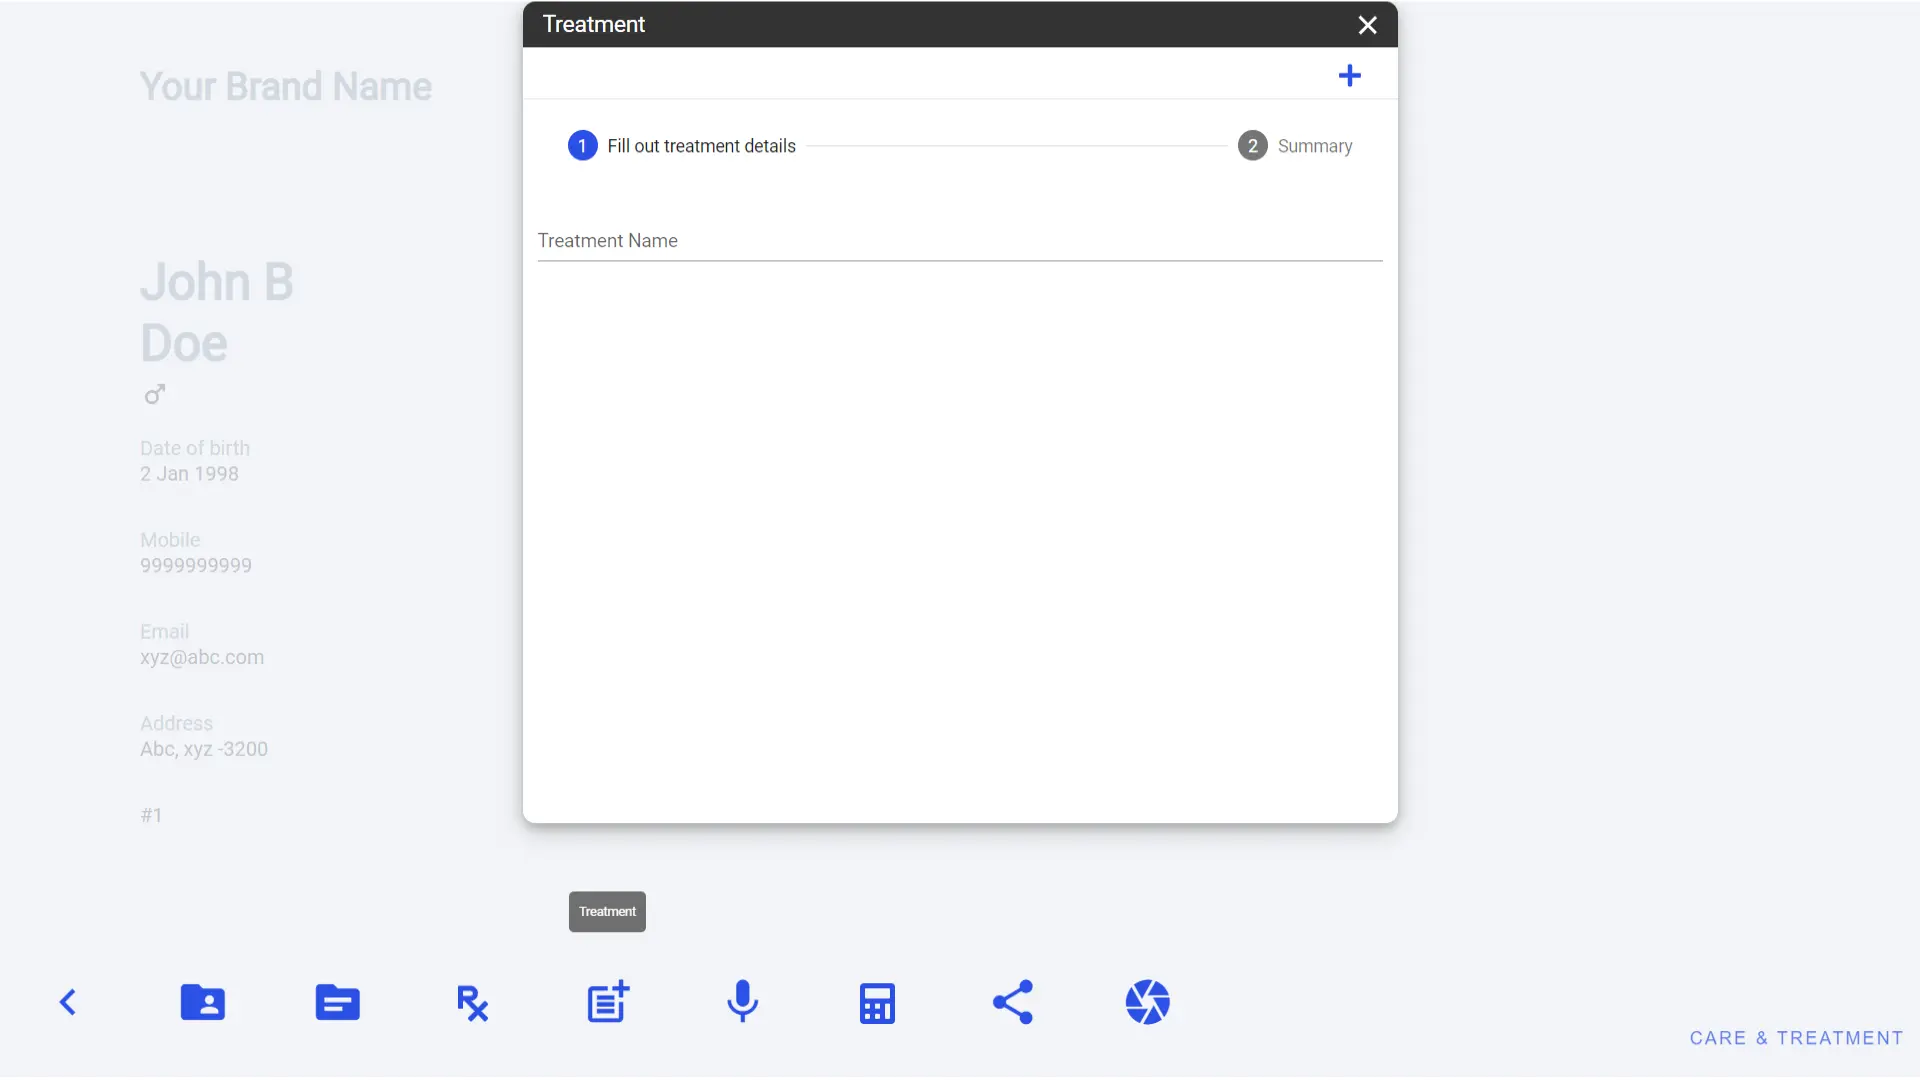
To generate treatment plan, you need a list pre saved treatments list. So, first you add new treatment by clicking on plus icon at top right corner of treatment window. It will open a new small pop-up window to add new treatment as below.
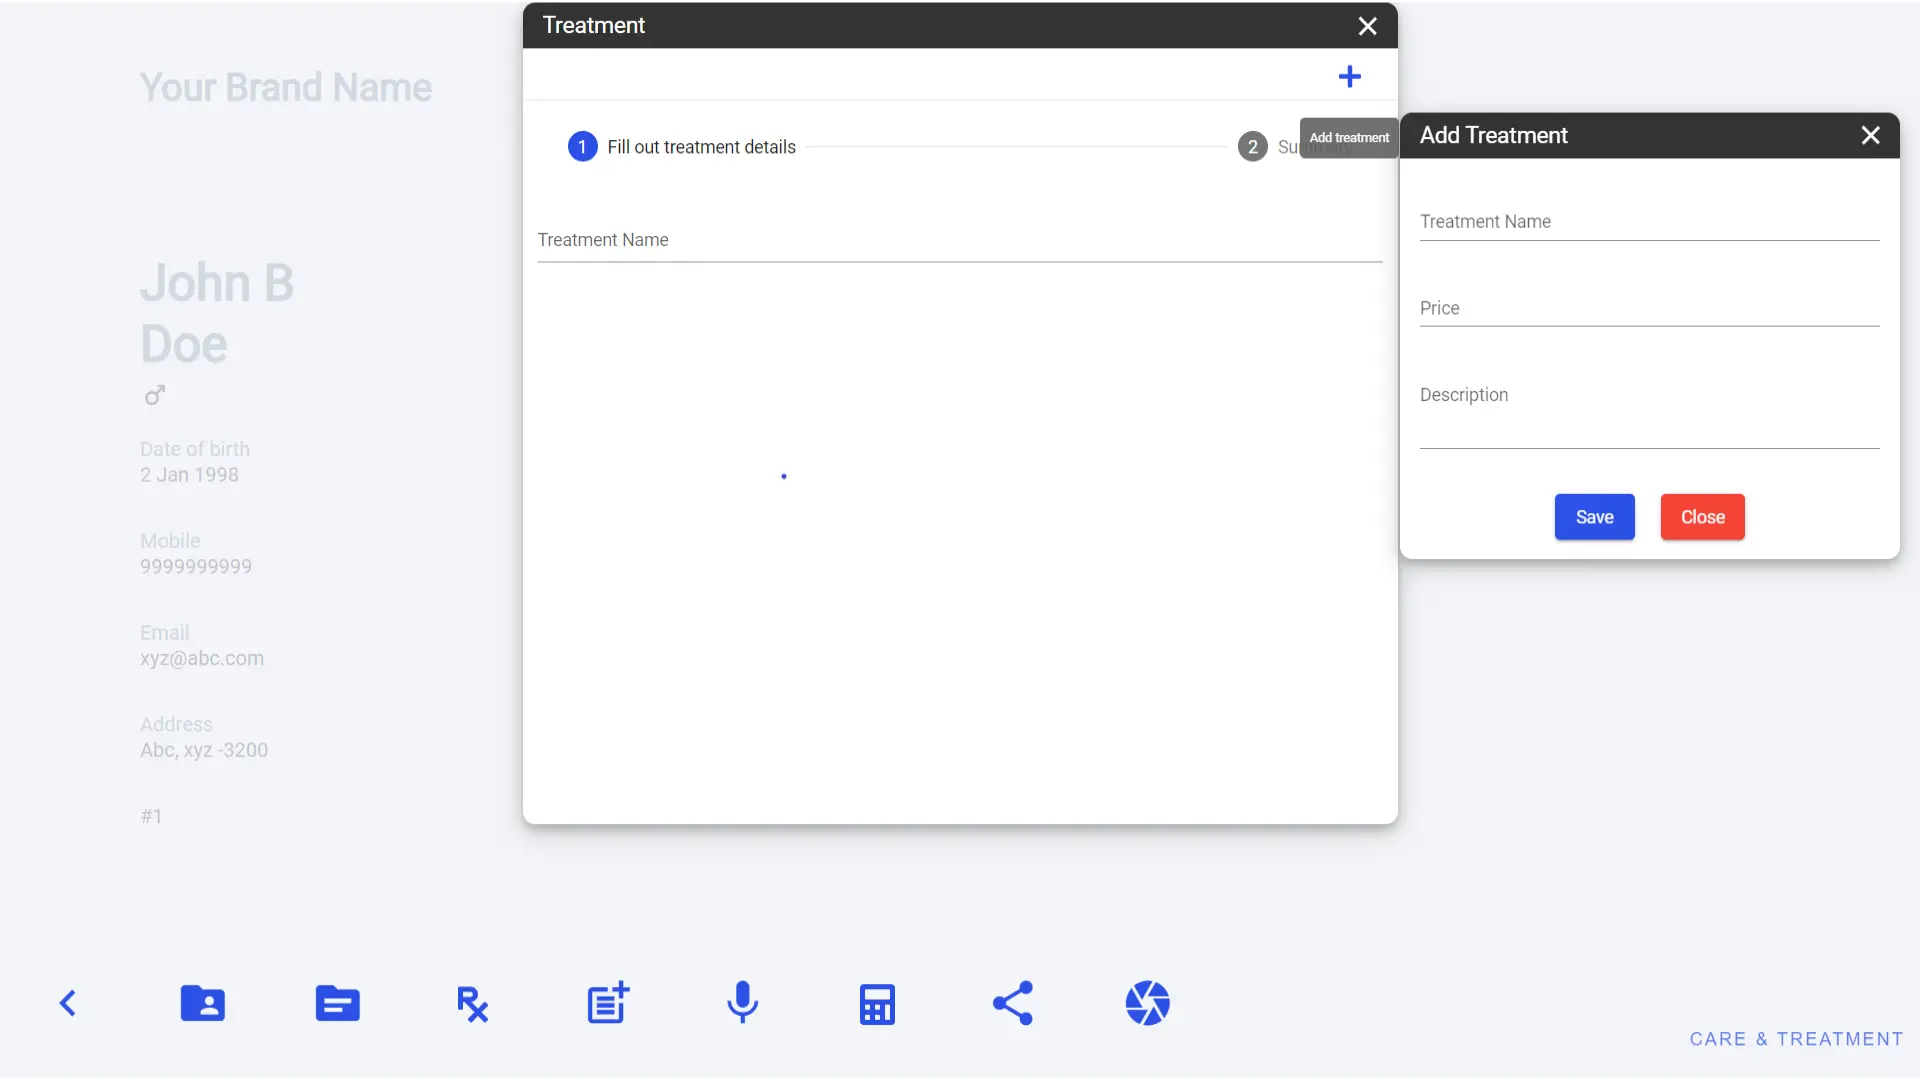
Add required details of treatment and click on save button. You can add as many treatments as you want, there is no limitation. Once you finish adding treatments, you are ready to create a new treatment list for your patient. You can add new treatment at any time and also edit already added treatment info. This is so easy, and you can manage everything in one place.
To start with the new treatment follow below steps.
1. Type treatment name or select from suggestion. Upon selection it will be added to your list.
2. Keep selecting all the treatments you would like to add in a list one by one.
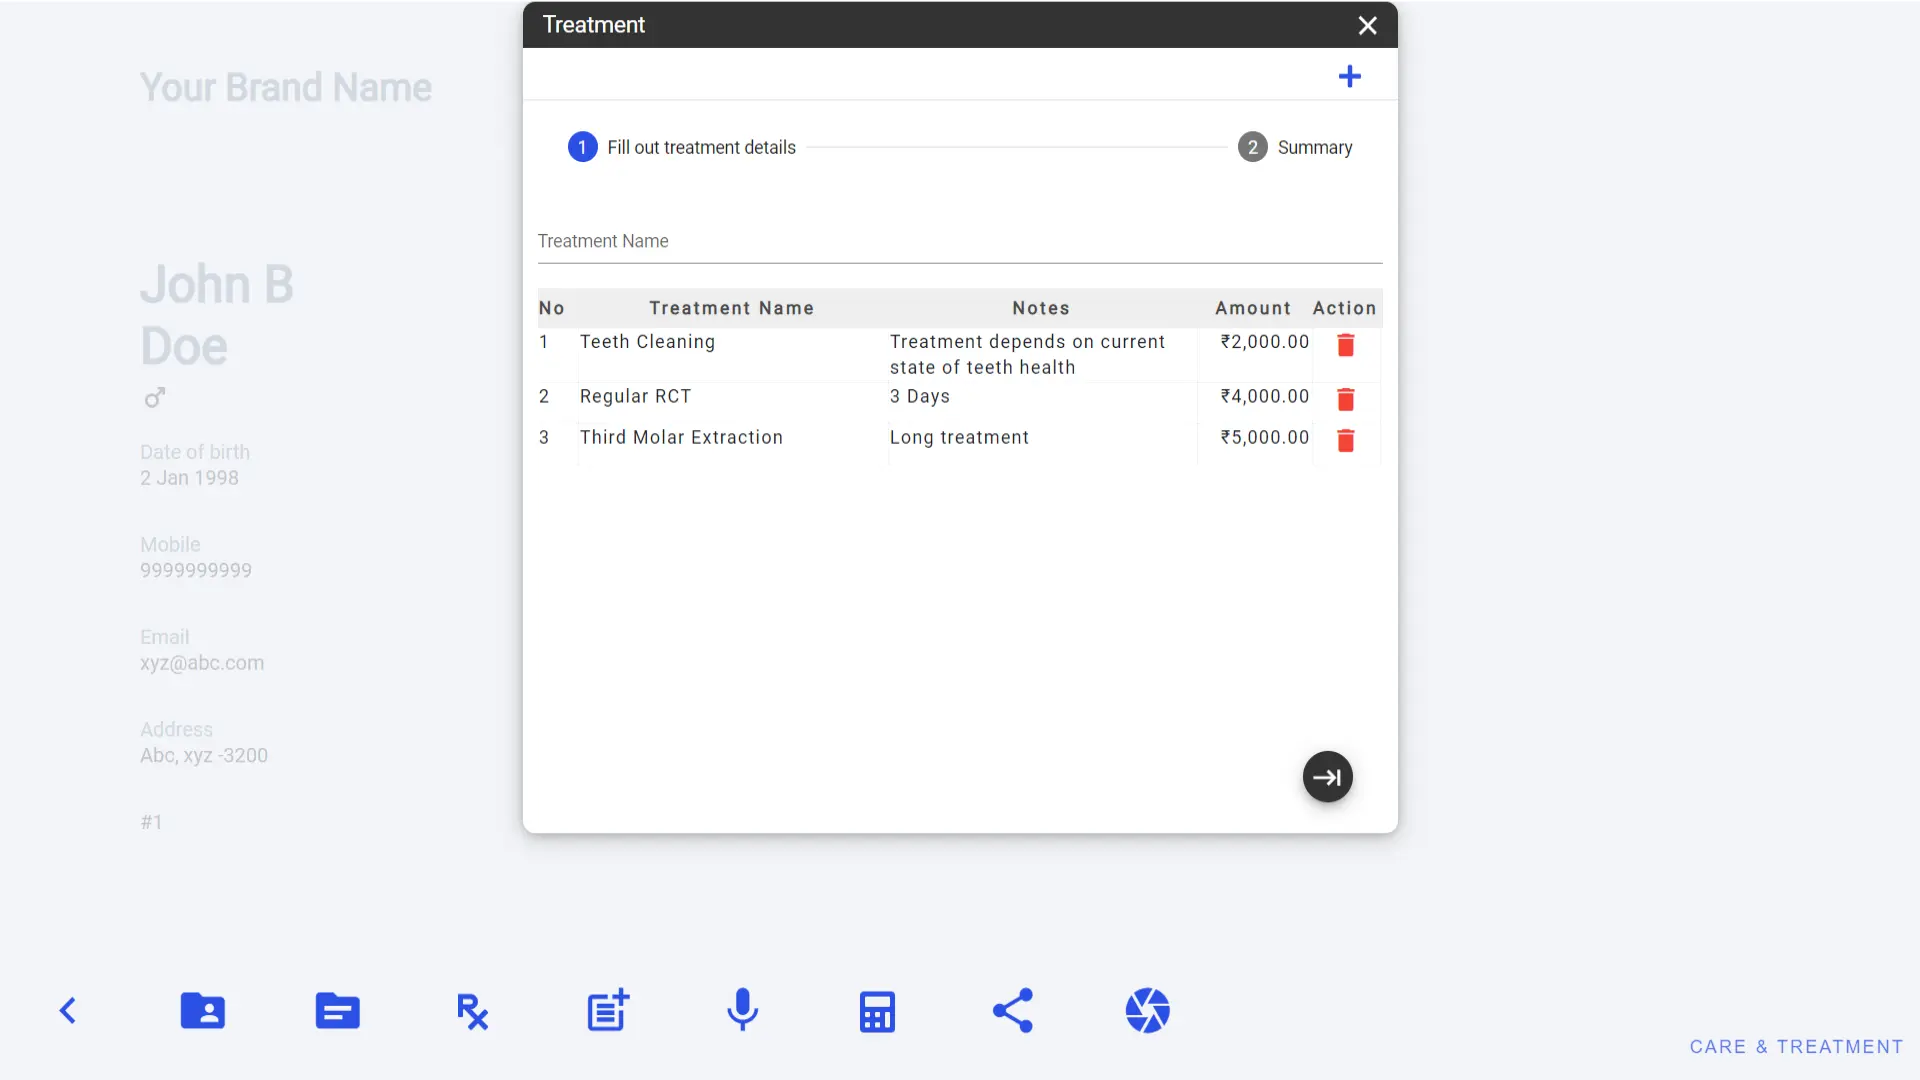
3. If you have any additional process, you can choose Other Charges option from the list.
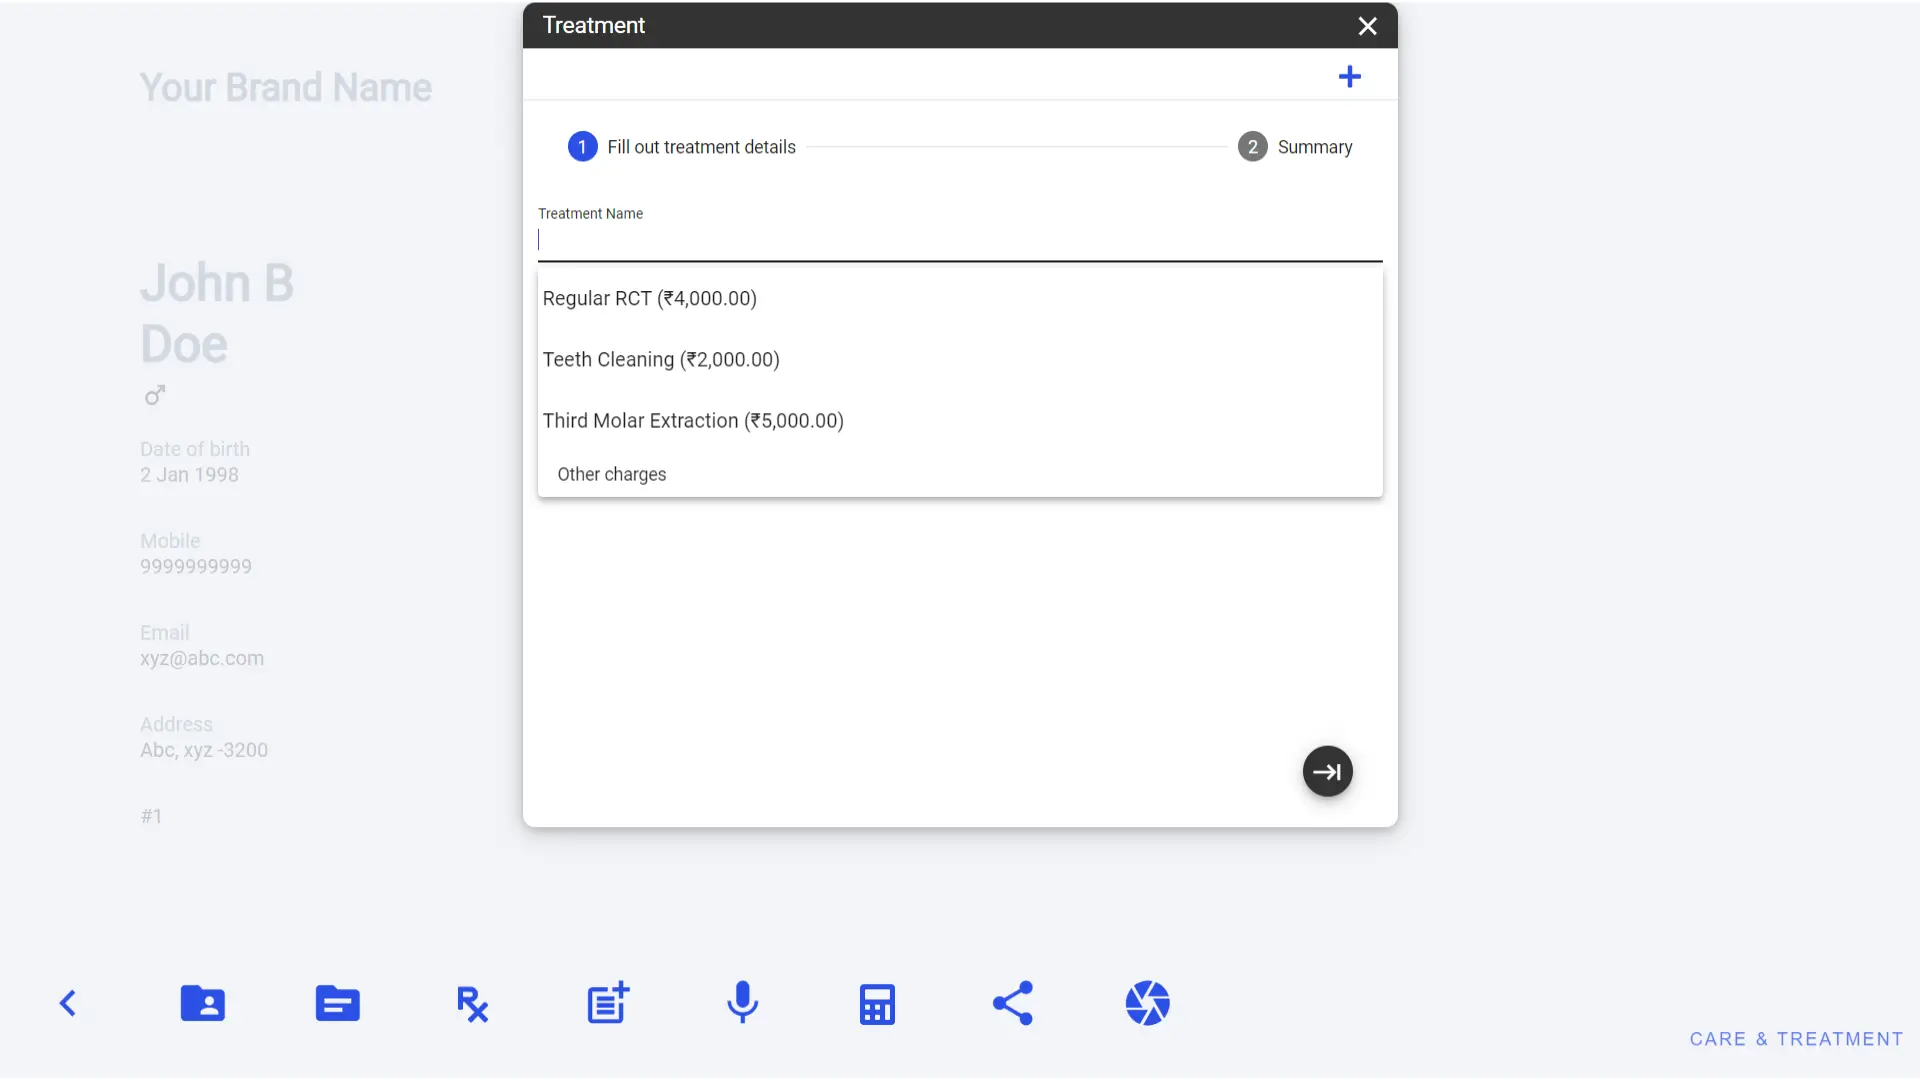
4. Other charges, allow you to add custom treatment or process name along with price in your list. Once you add data click on Add the button.
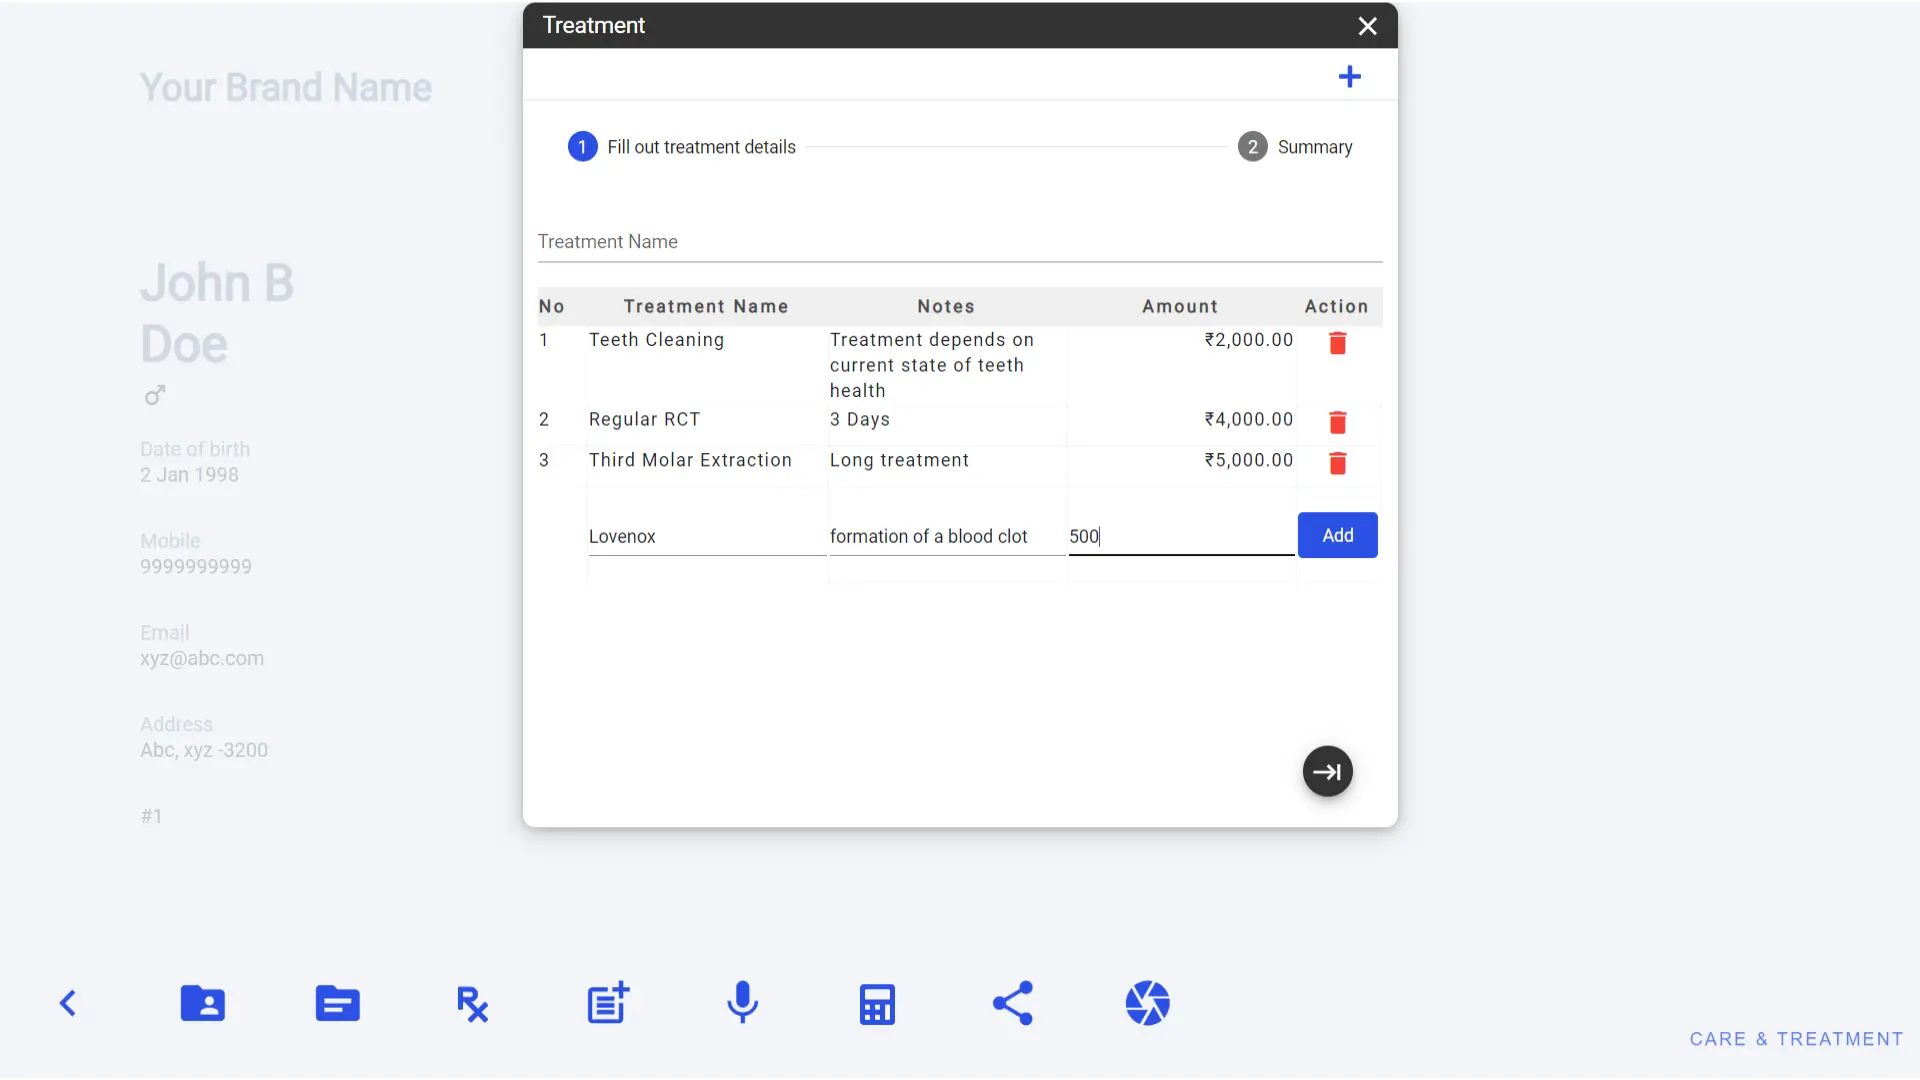
5. If you want to remove any selected treatment you can click on bin button.
6. Once done click on next button or summary tab, it will show a summary of the treatment list.
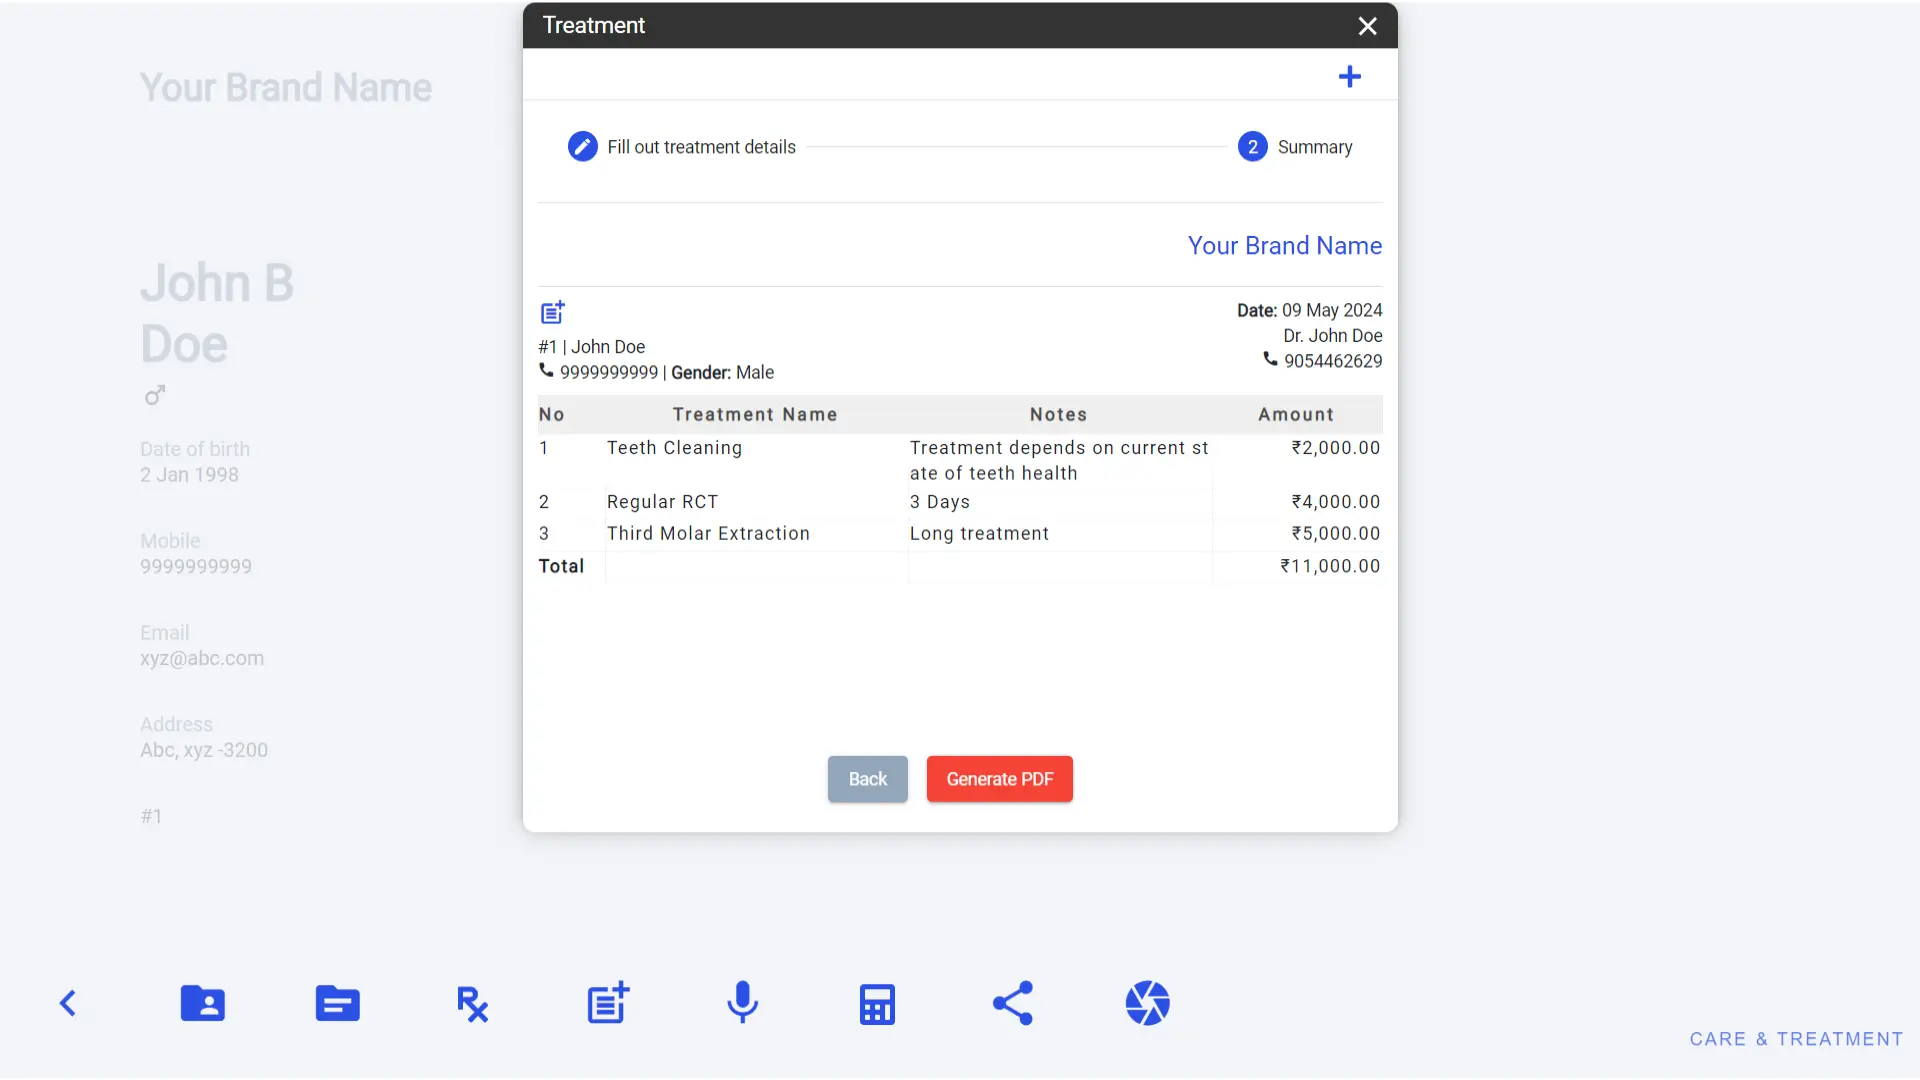
7. Click on generate PDF button to get the treatment PDF. It will save the newly generated treatment in patient file and also open in new window.
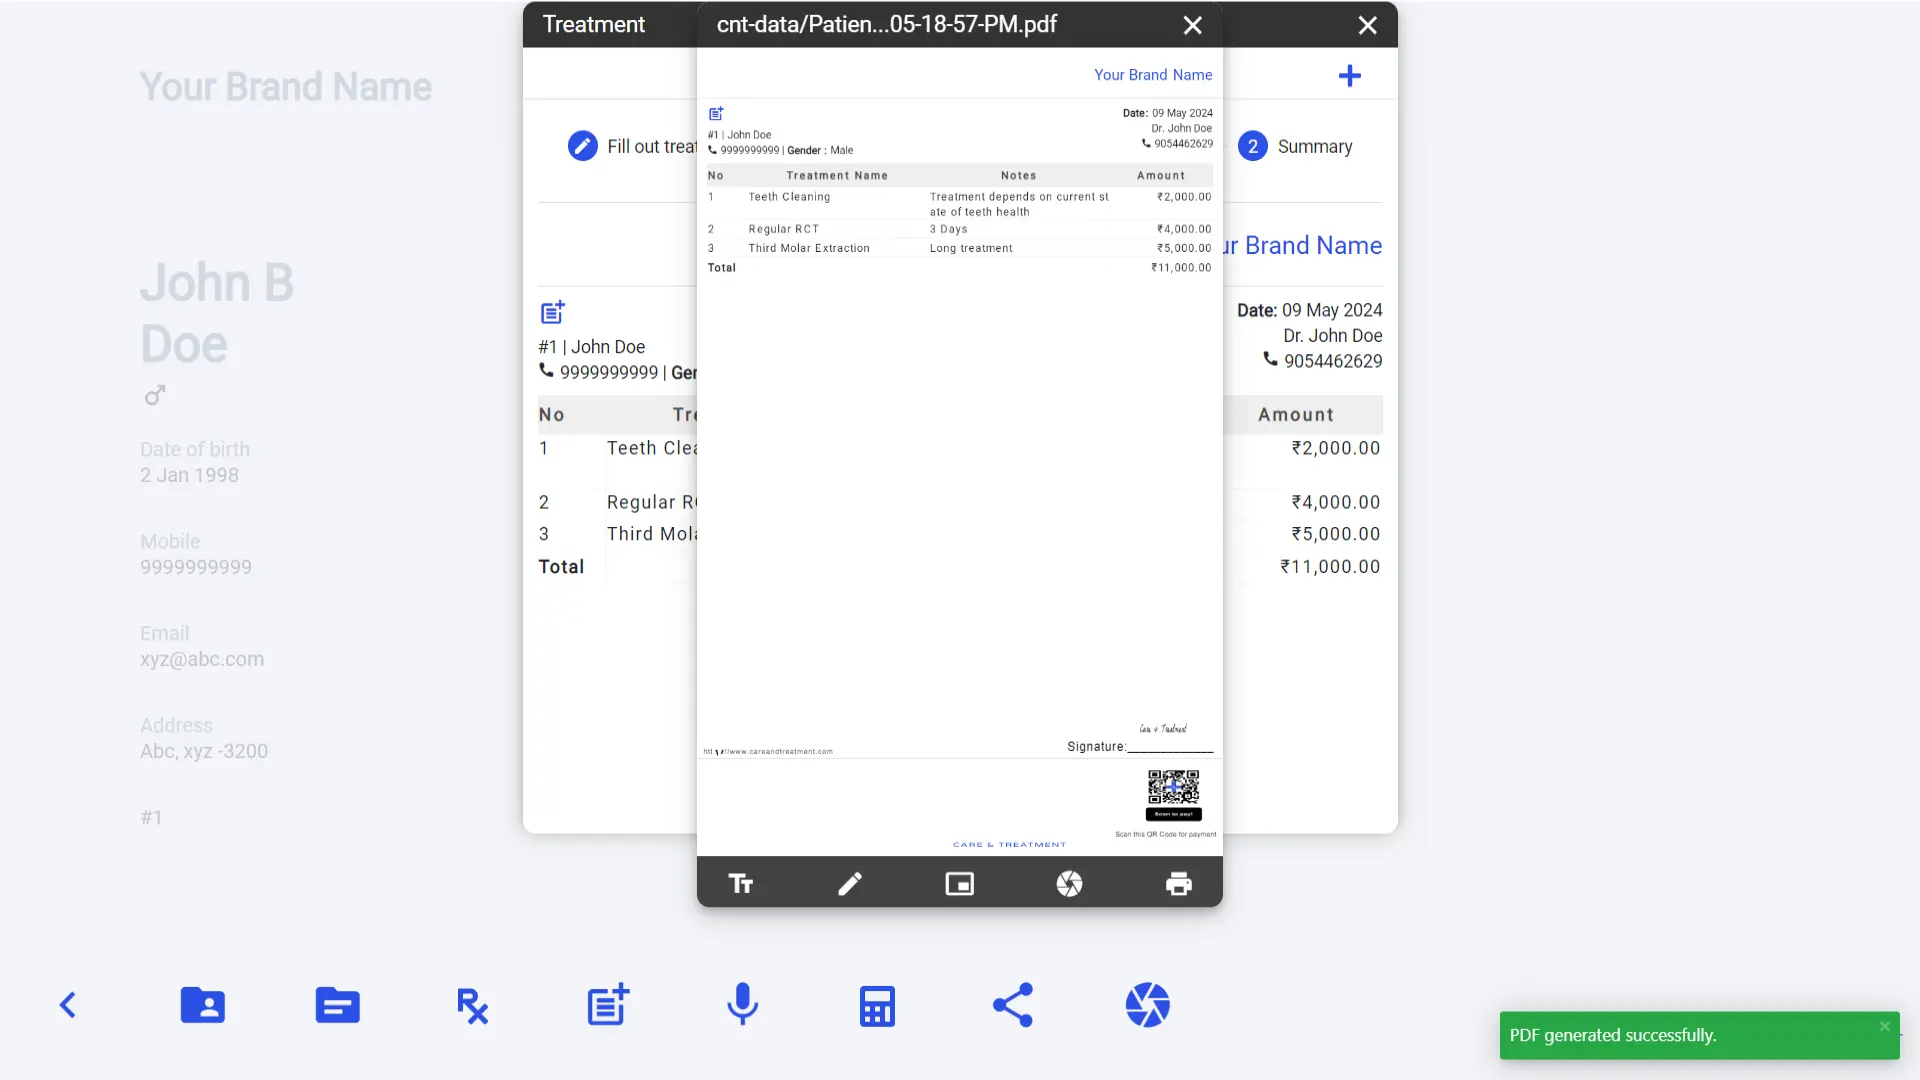
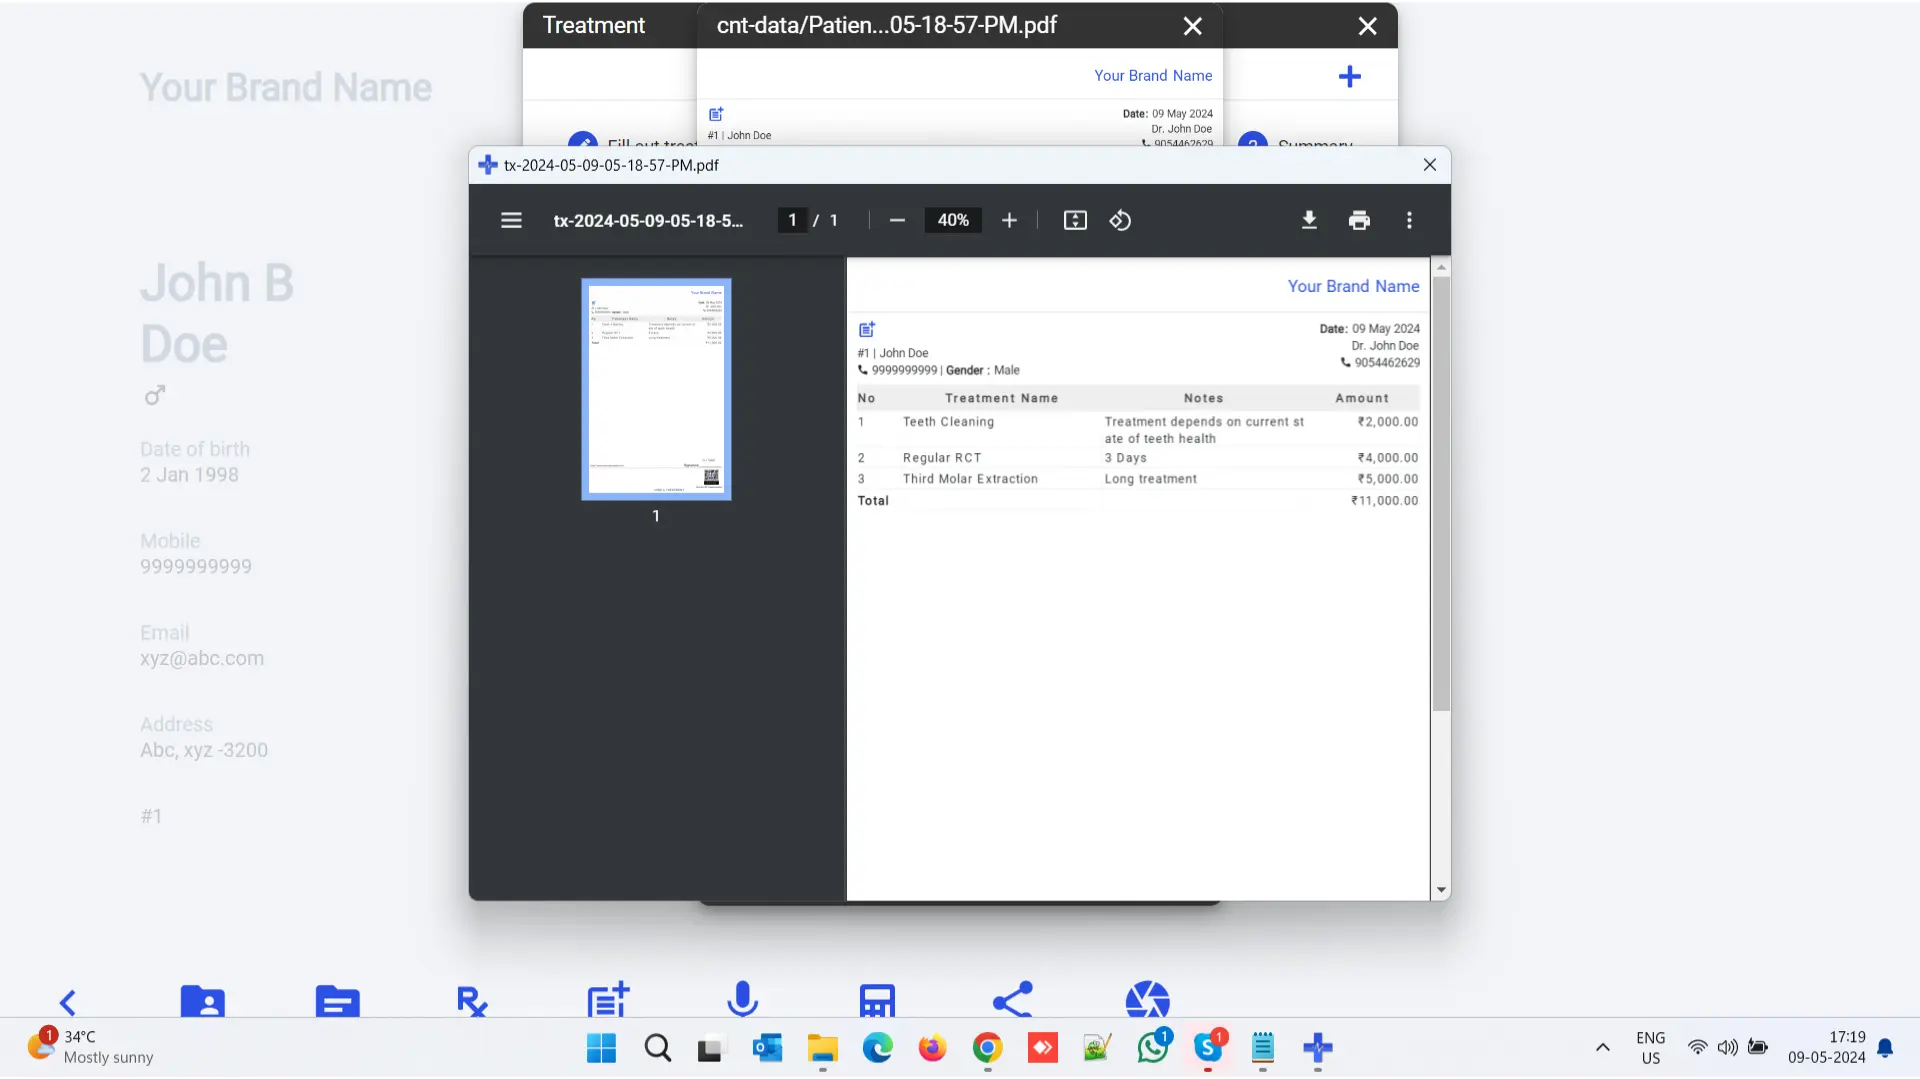
8. You can take a print of the treatment by clicking on print icon on prescription PDF window.
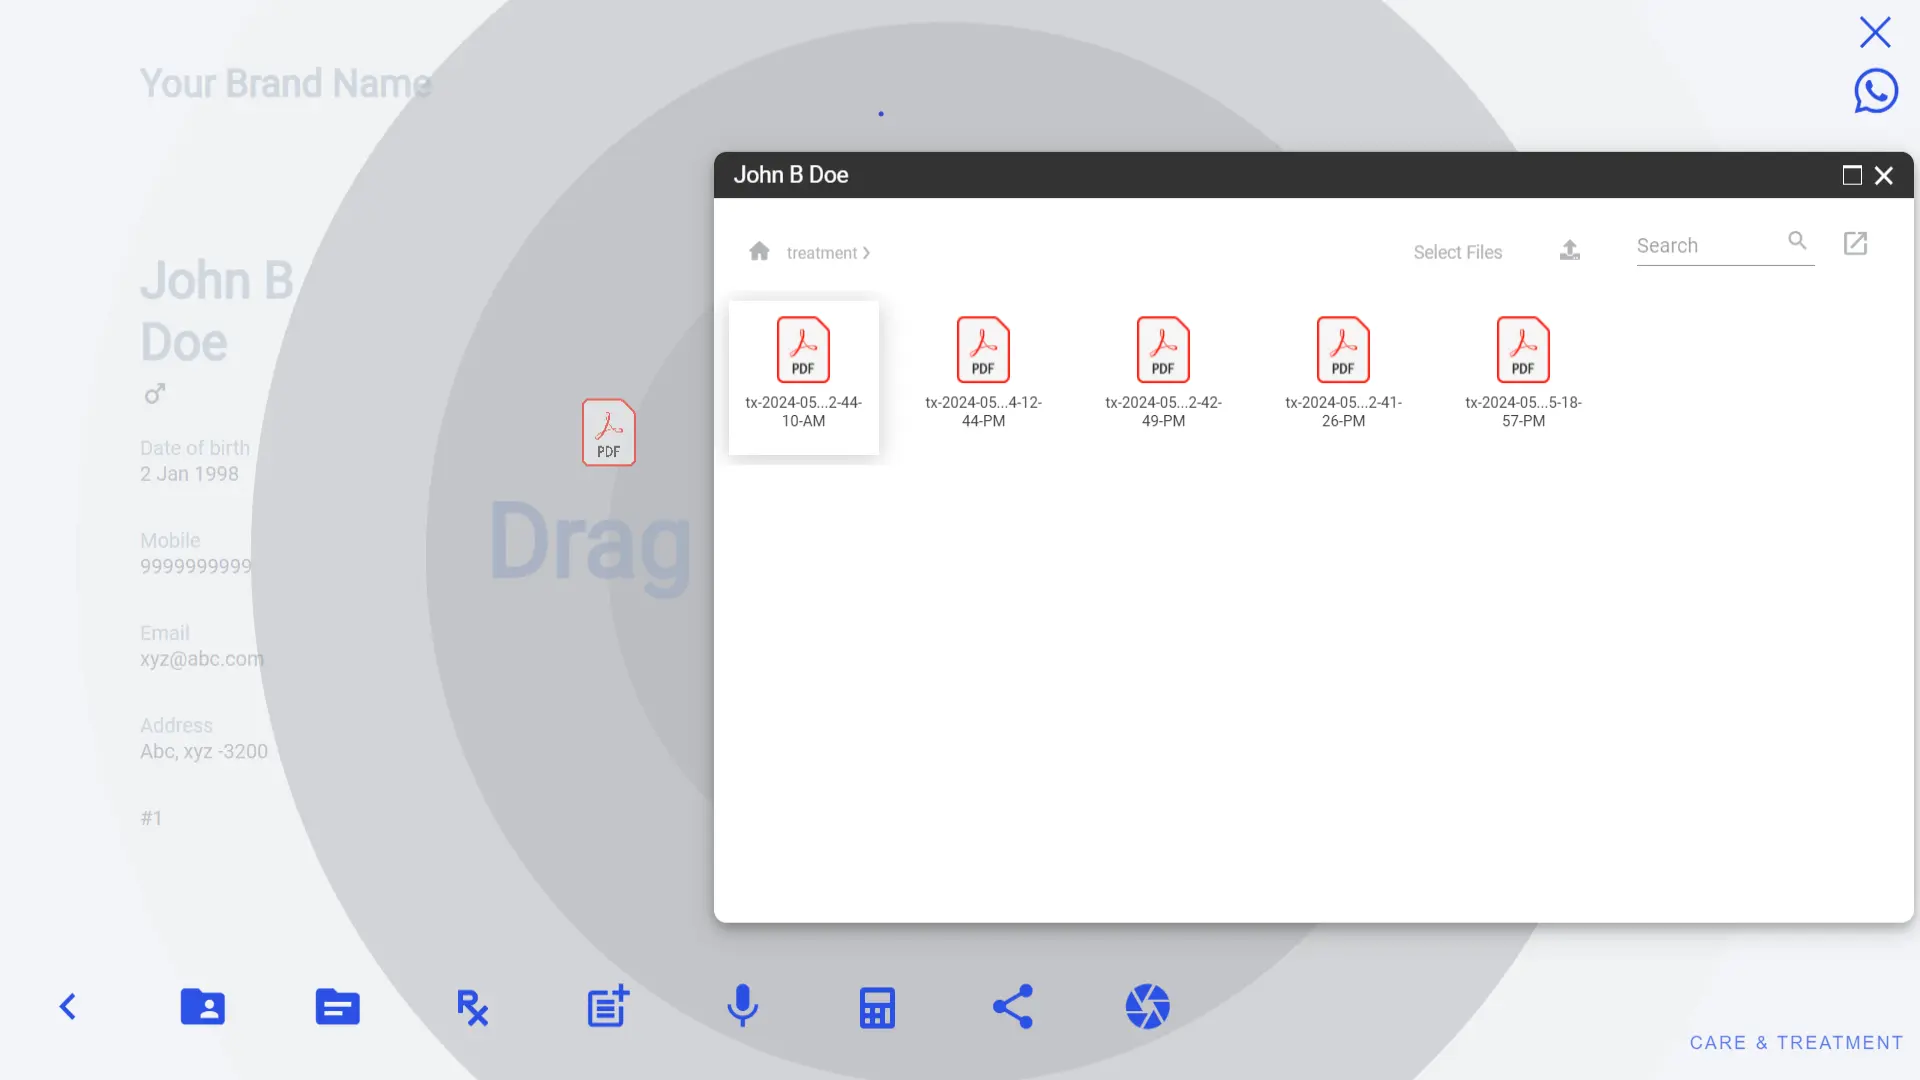
9. You can share the treatment PDF with patient on their WhatsApp or Email. Just go to share and select WhatsApp
or Email
. When share starts, it will open your patient file and you can pick the right prescription PDF and drag and drop to send WhatsApp or Email, it’s so easy.
 Audio Recording
This is completely out of the box feature which allow doctors to record their patient consultation audio. This is so effective that doctors love a lot as once consultation is over and you forgot something you can easily replay the recording and make sure the required things.
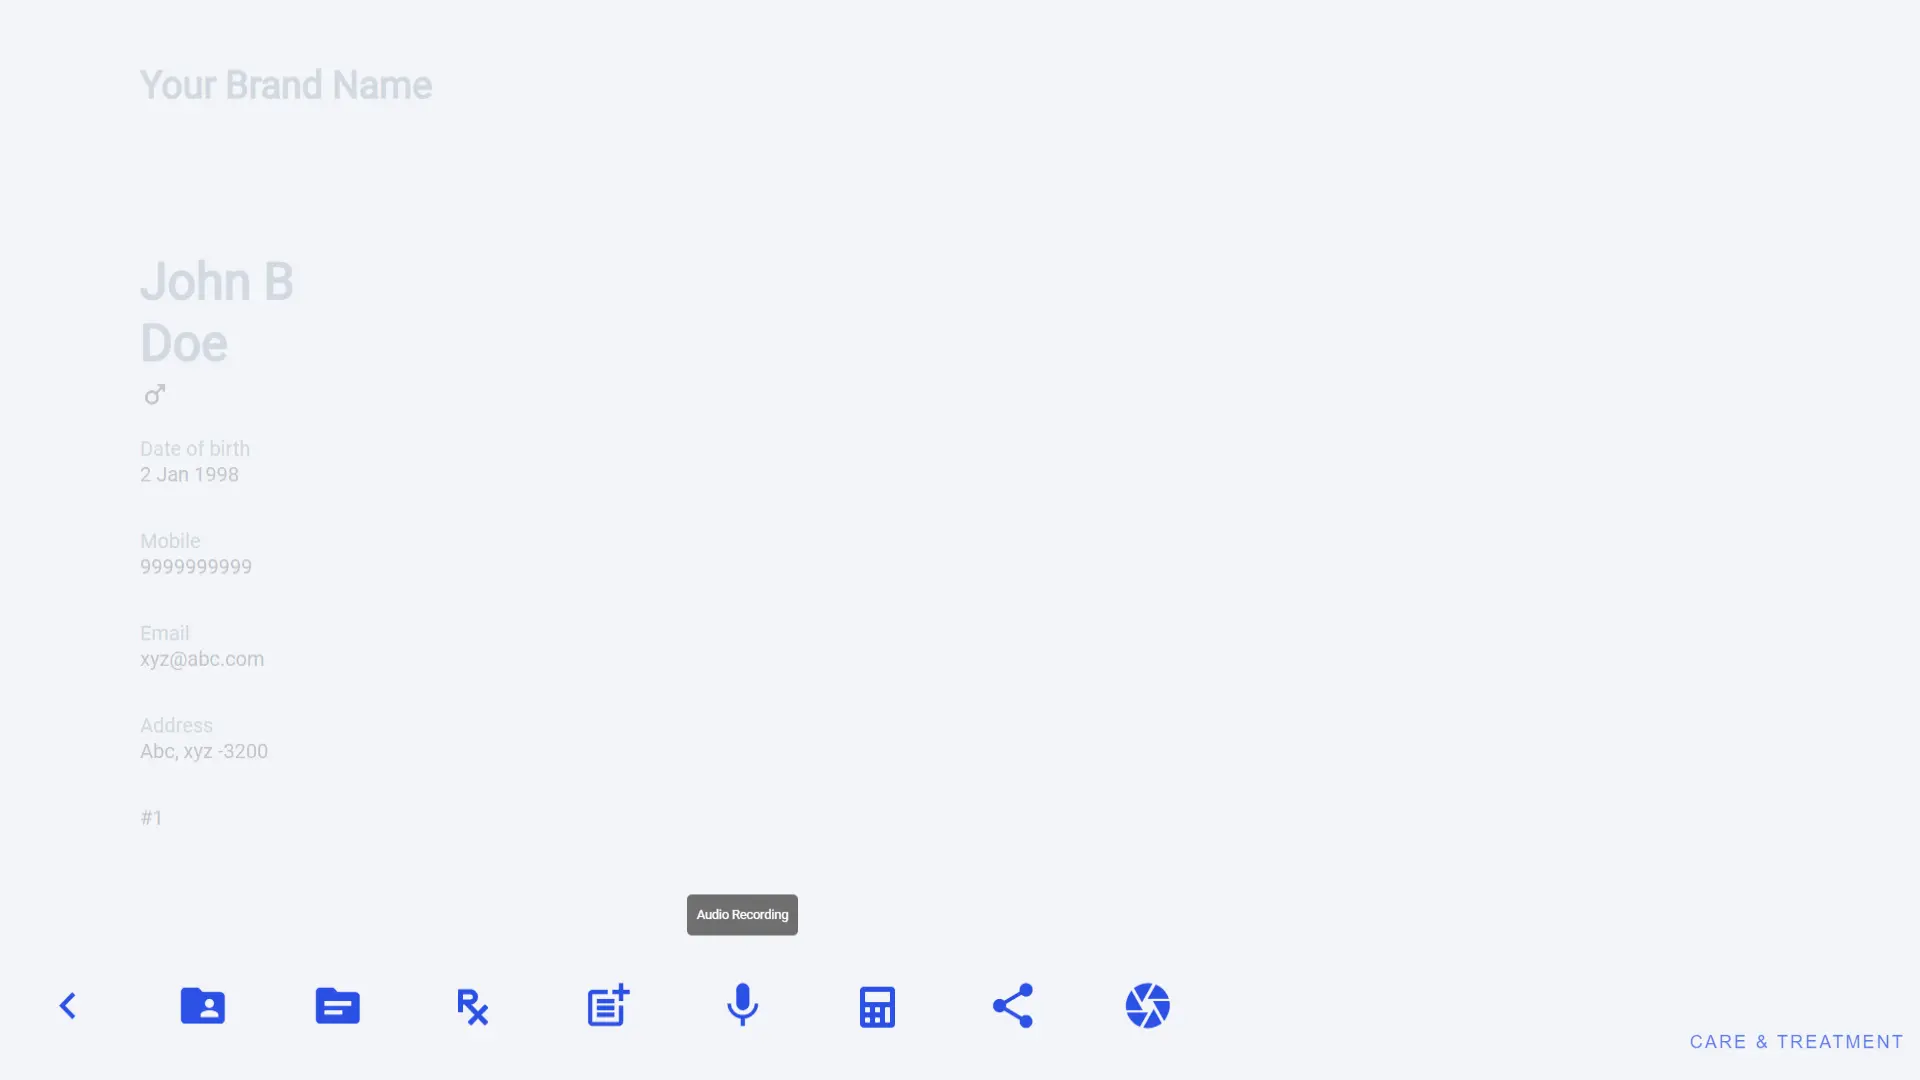
It’s so handy that only require 1 click to start and 1 click to stop. During your consultation talk you can just click on the mike to start the recording. It will convert to red and start blinking and showing seconds when the recording is running.
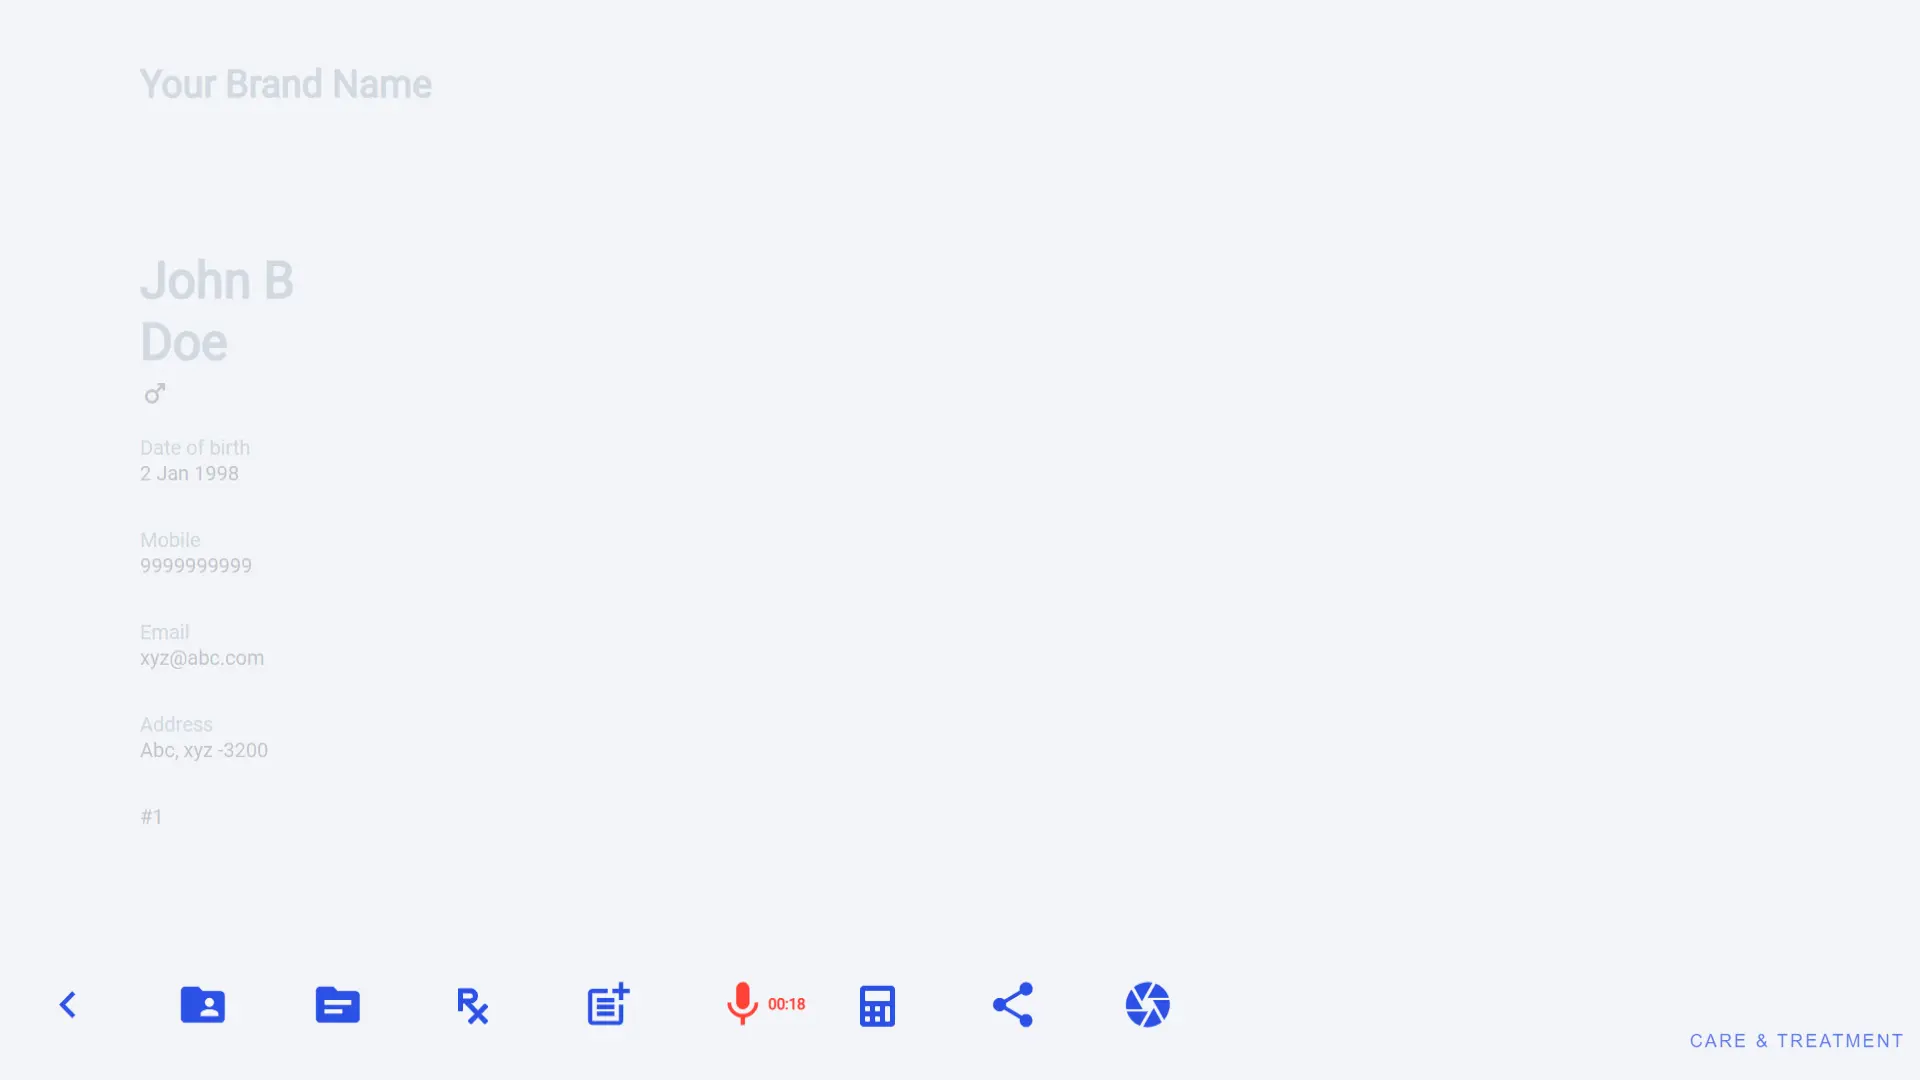
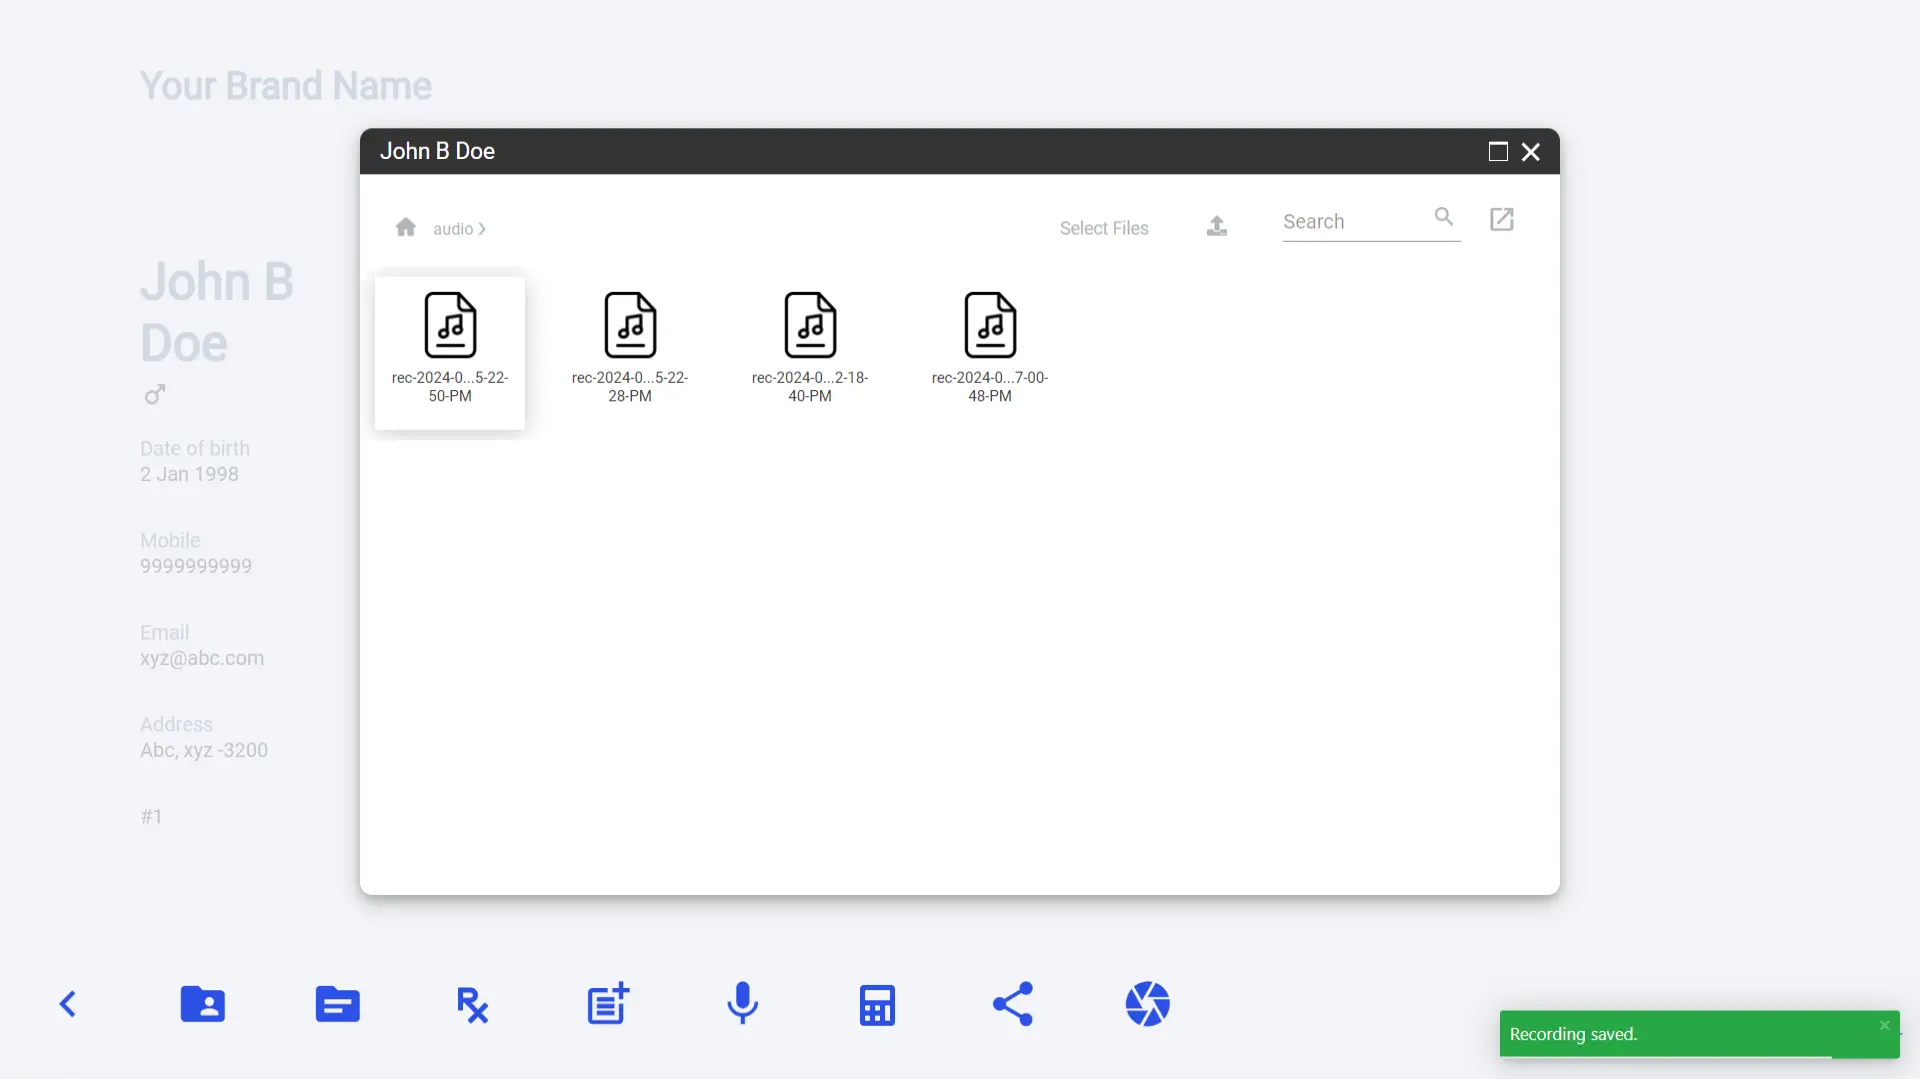
When you want to stop, just one more click on the red mike and it will automatically save the audio in the patient file. You can keep all the recording and use in the future.
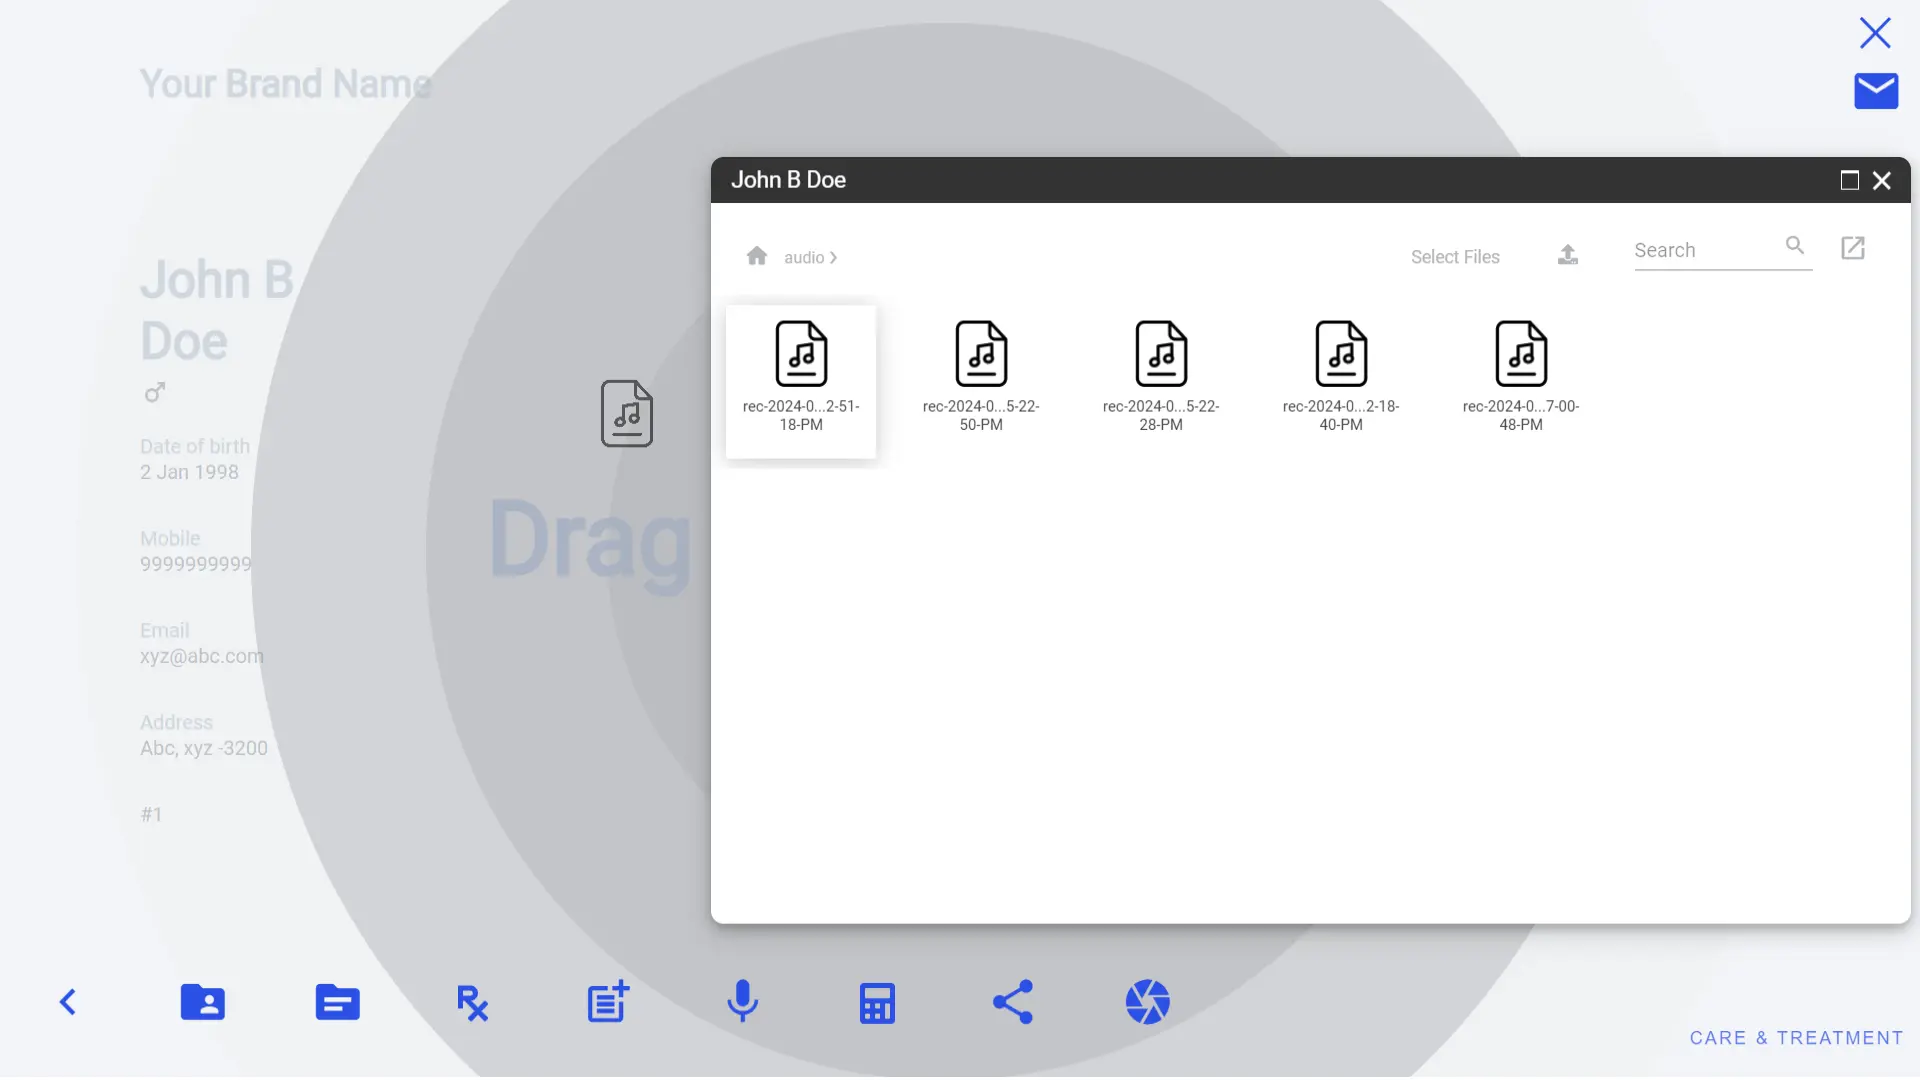
You can also share audio recording via Email only. It’s easy just drag and drop from a patient file while sharing is on.
 Calculator
On screen calculator help you to show the calculation of treatment cost. This is a very easy way to demonstrate the cost of treatment and later you can take the screenshot of the final amount in the calculator for future record.
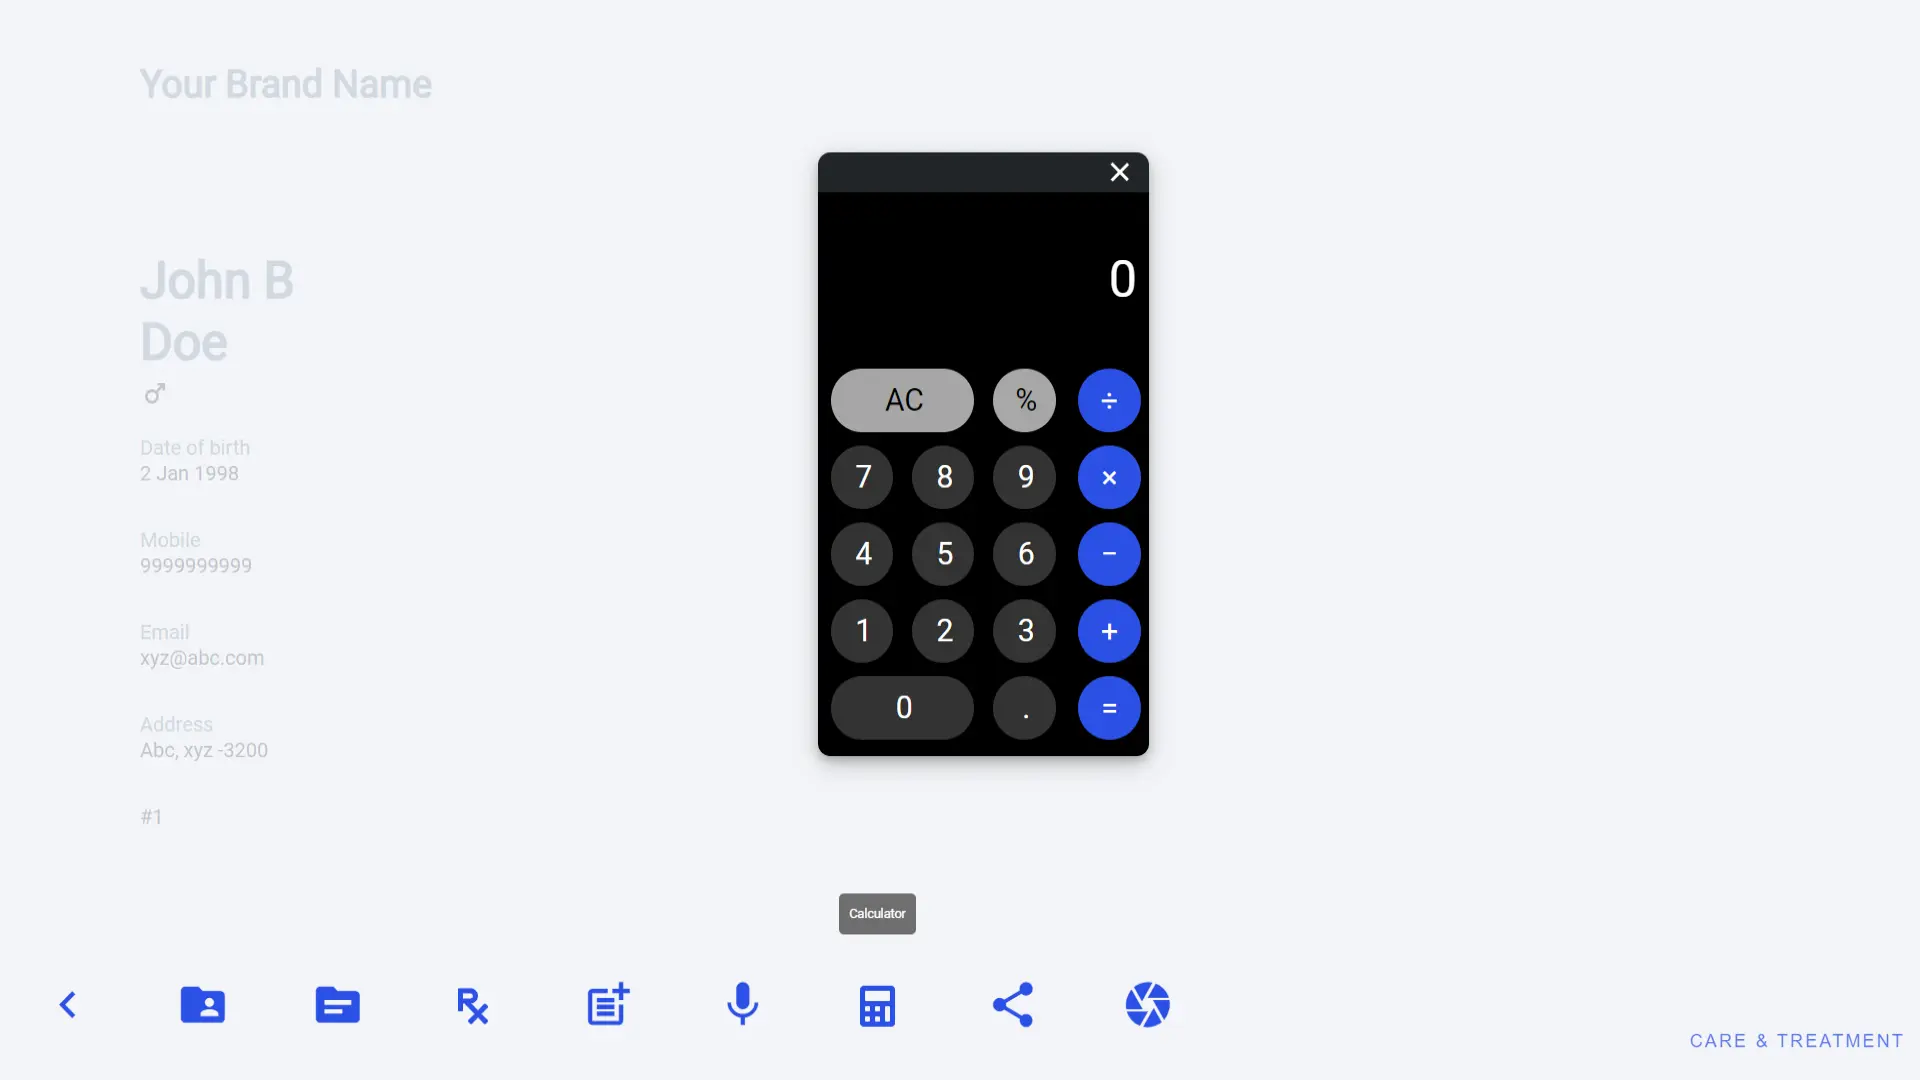
This is very helpful when treatment cost is not one time and divided during the entire treatment cycle. This makes an impact in such cases when the patient forgot the treatment cost on long run and get unsatisfied. Calculator screenshot help them to remind the original talk of treatment. This feature help improve patient relation.
This screenshot will be saved inside the patient file automatically and can be shared with the patient on their WhatsApp or Email.
 Share
Share
Sharing is one of the important feature of Care & Treatment app. This connects patient directly with doctors. This is the easy and fastest way of communication. Simple process is turn on sharing, drag and drop your selected files such as images or PDF and it will be sent to patient WhatsApp number or Email, you are done.
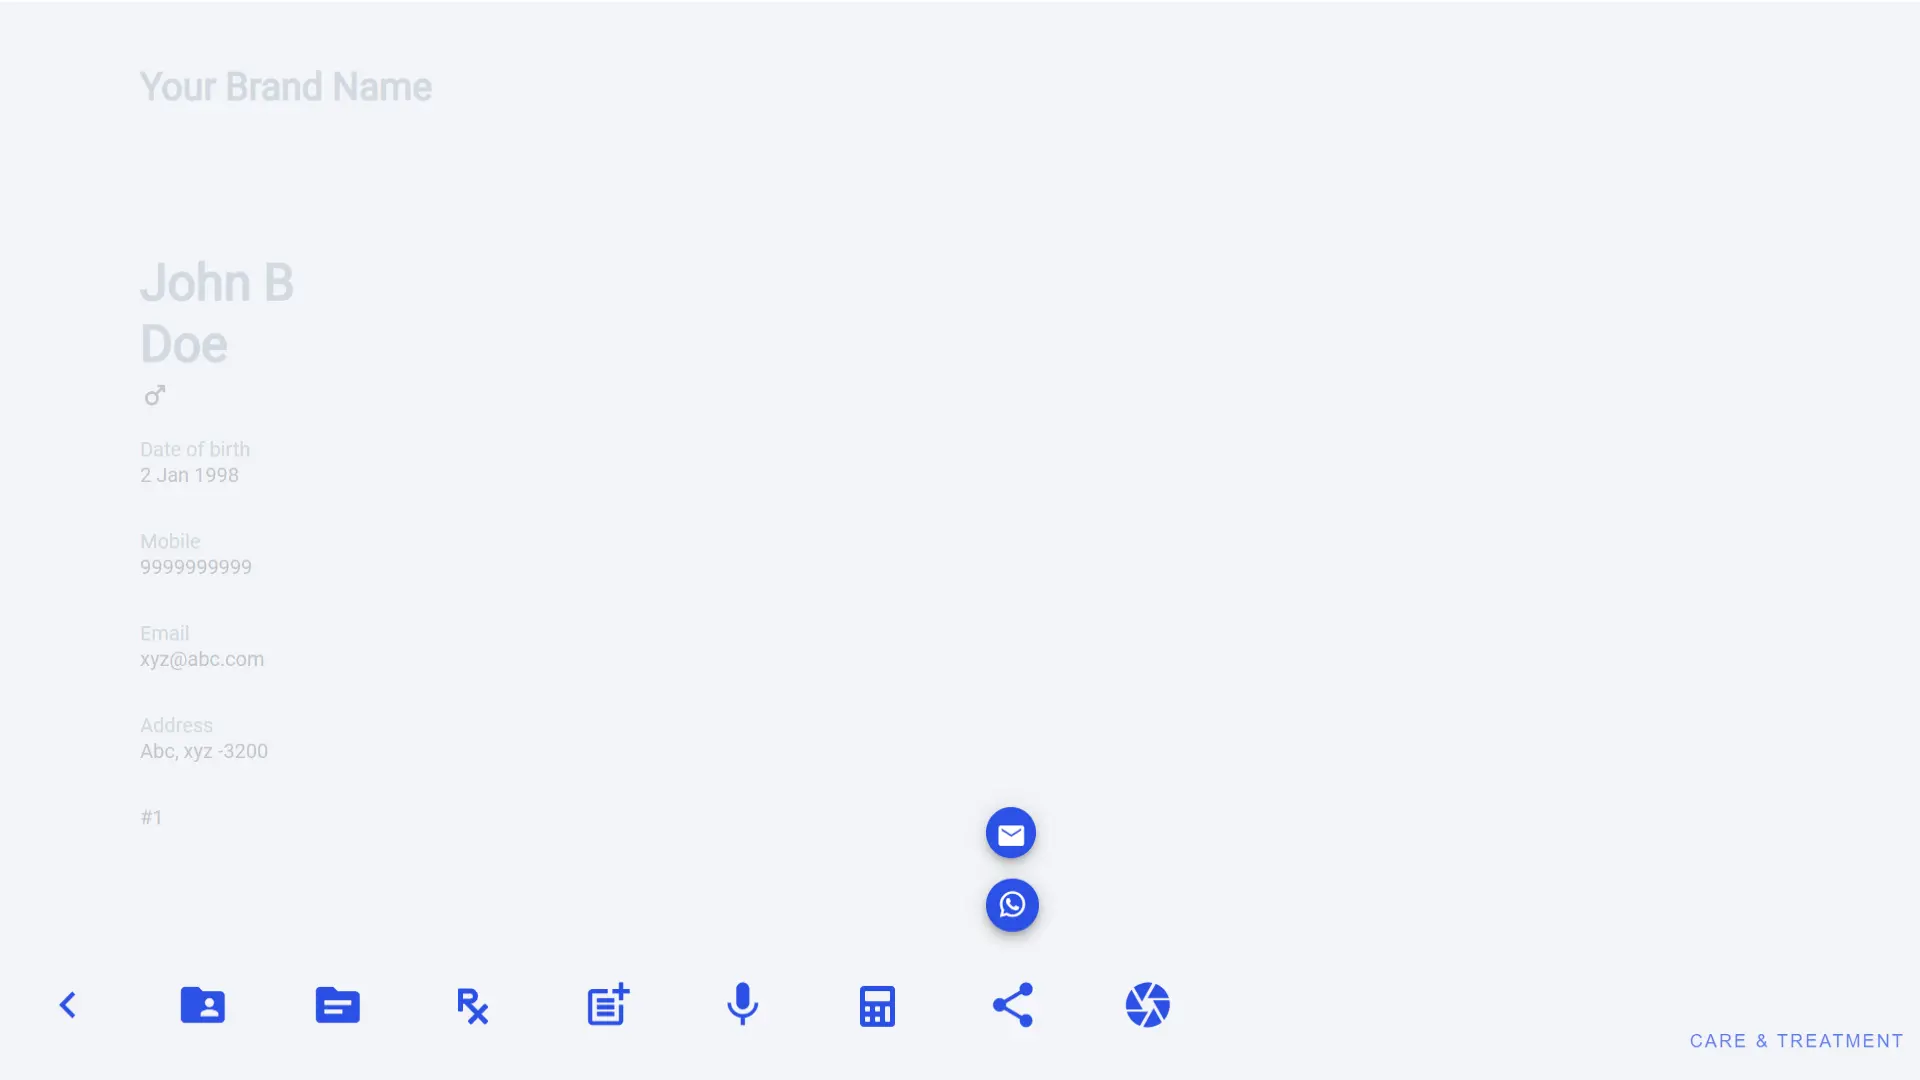
There are 2 options to share data with the patient.
1. Share via WhatsApp
2. Share via Email
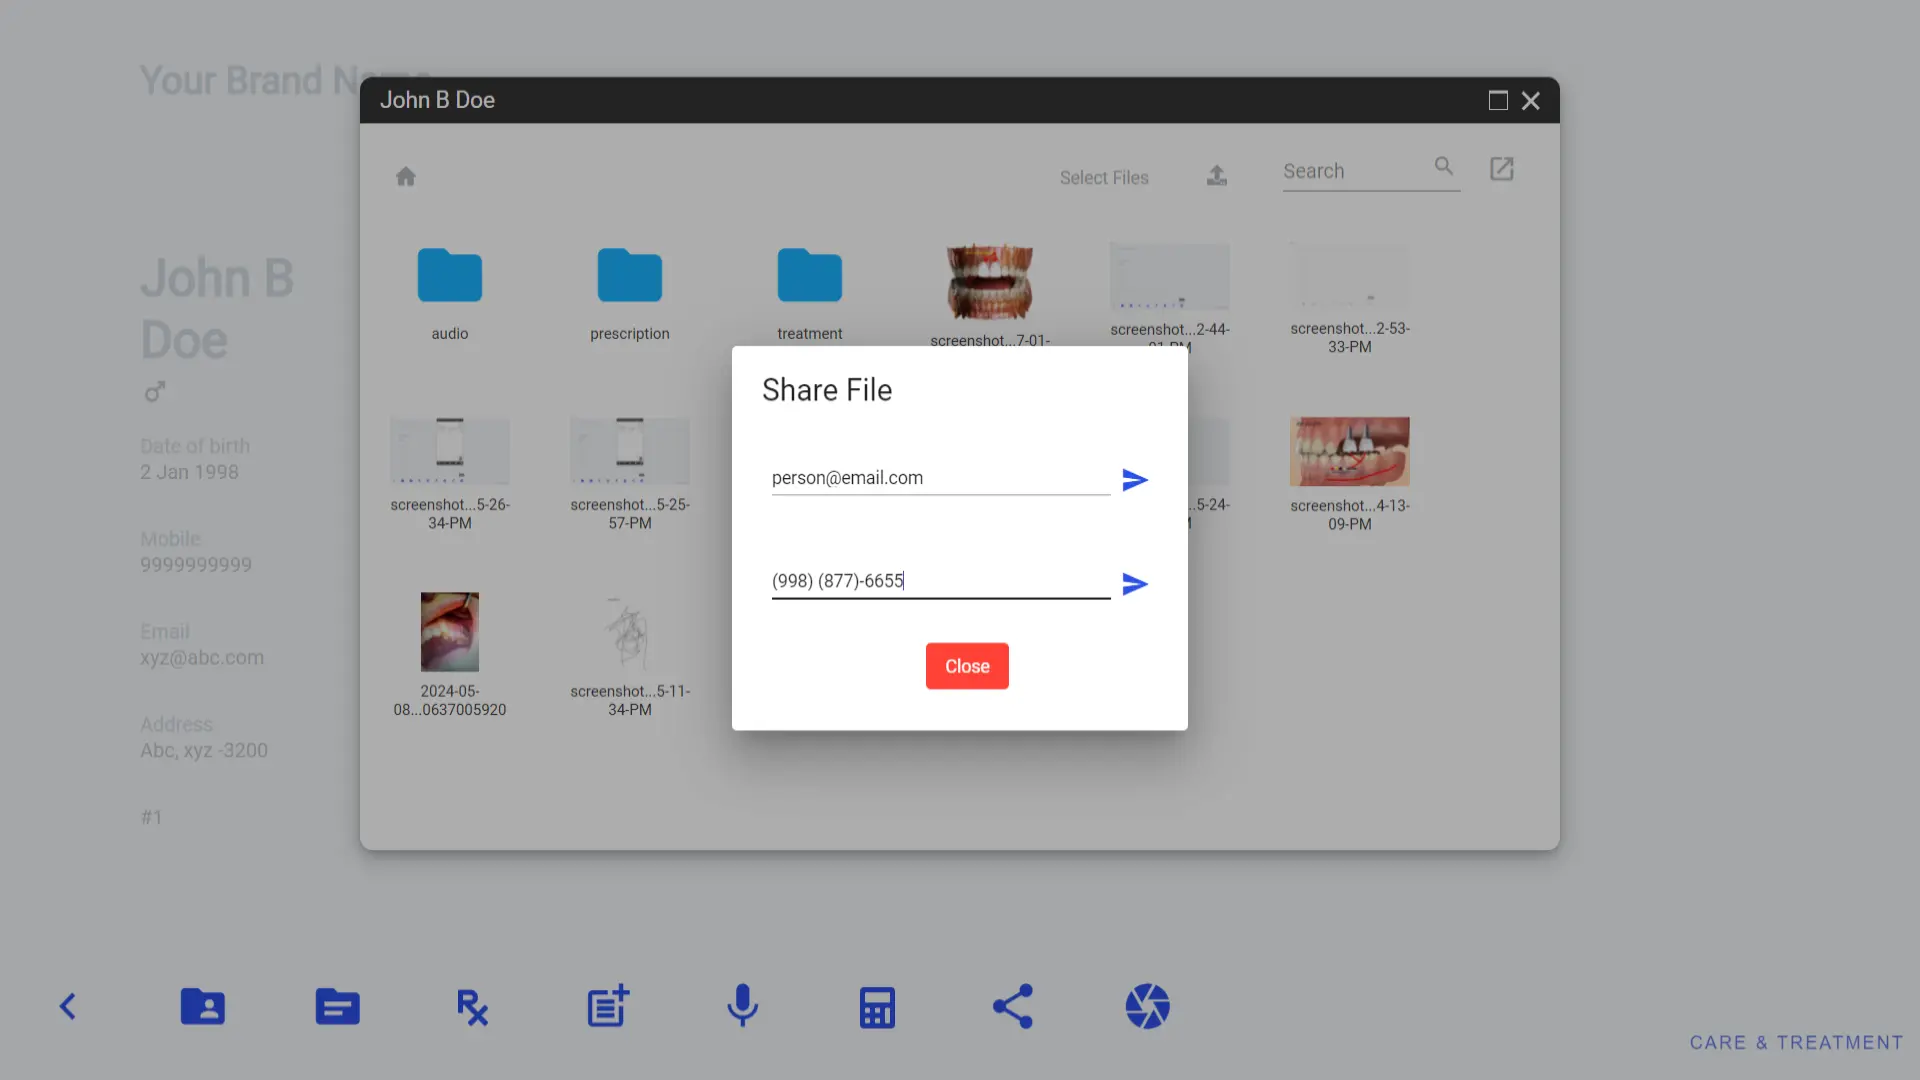
Sharing is also available inside patient file. Go to patient file, right click on file you want to share.
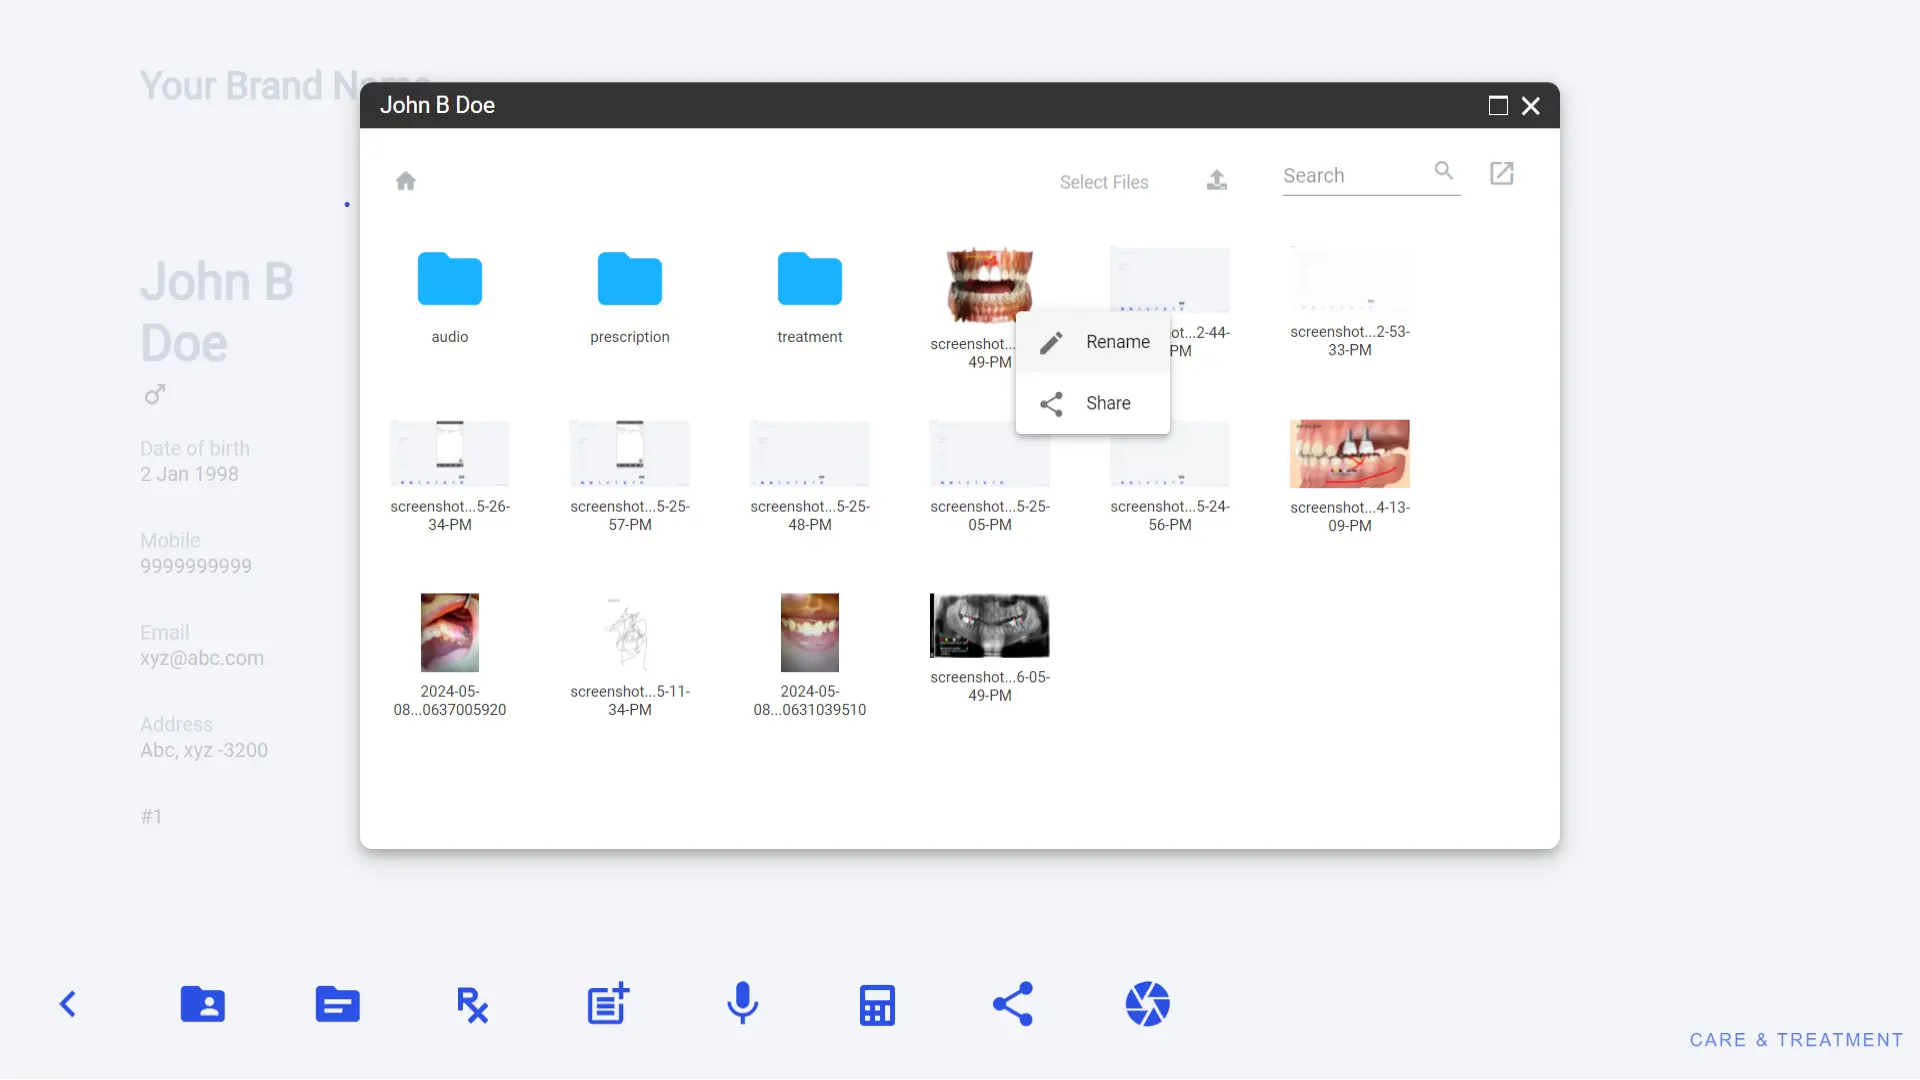
It will open context menu, where you need to click on Share. It will open a pop-up window and ask for mobile number or email to share with. Just enter and click on the send button you are done.
 Screenshot
Taking a screenshot is a good idea when it comes to keep records of something
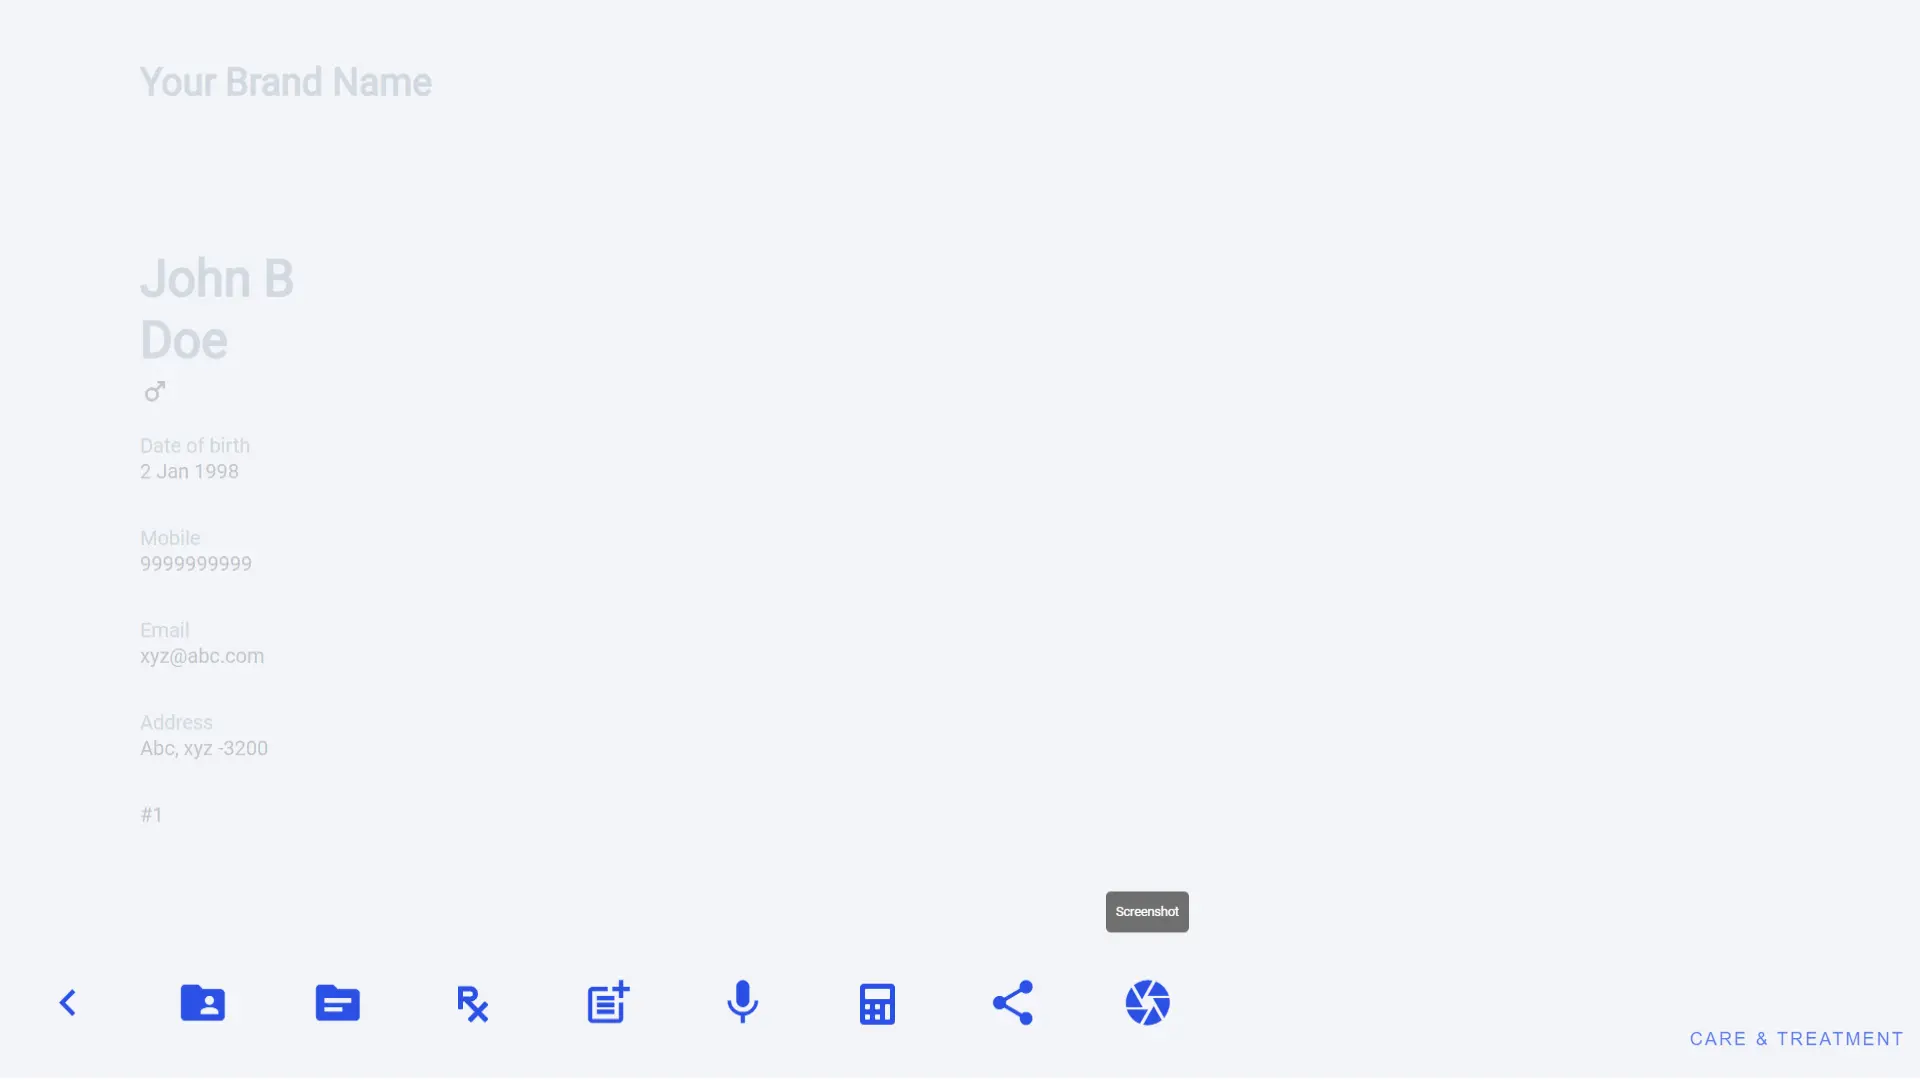
Screenshot features allow doctors to take photo of their working desk when consultation, treatment cost all other process is going on.
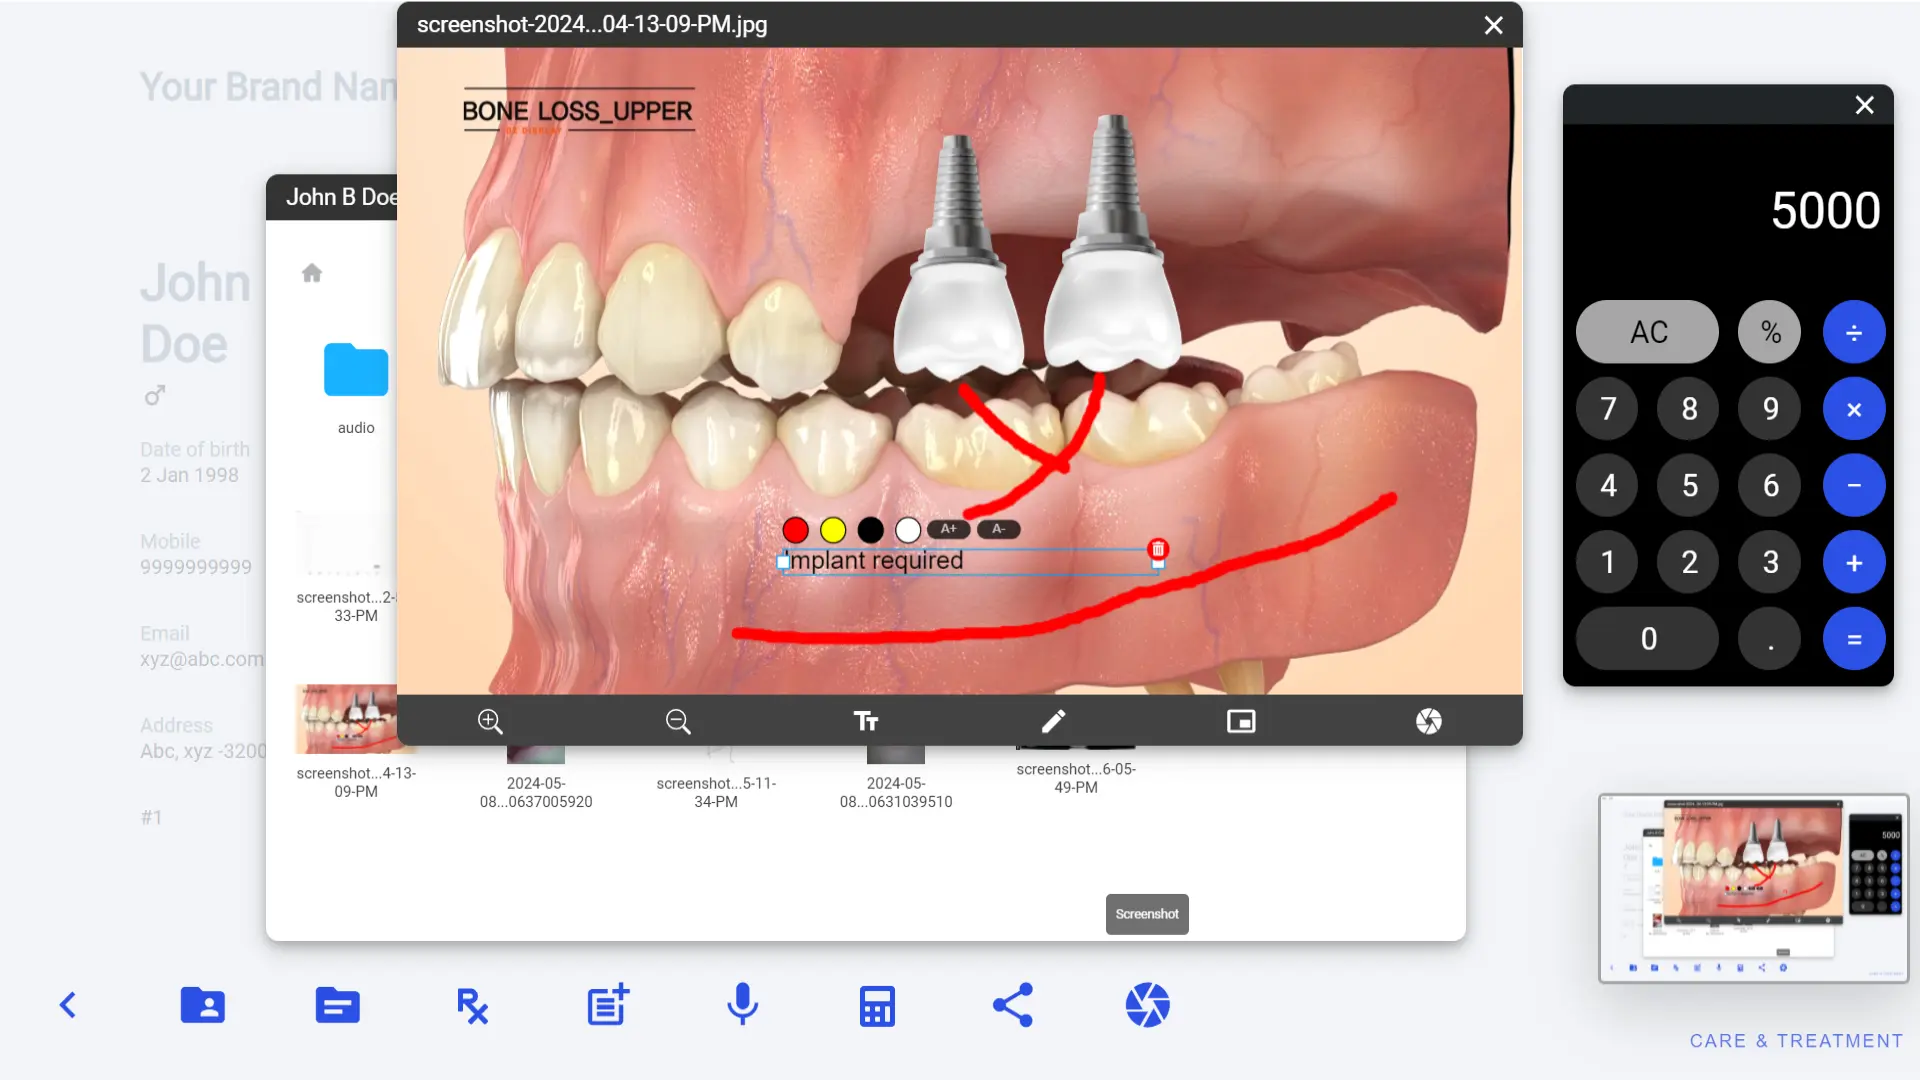
It’s so easy and quick. Just click on shutter icon and screenshot will be taken automatically and will be saved inside patient file. This screenshot can be shared with the patient via WhatsApp or Email. Just a click to save everything in 1 image.


